Operation – RIDGID R2500 User Manual
Page 11
11
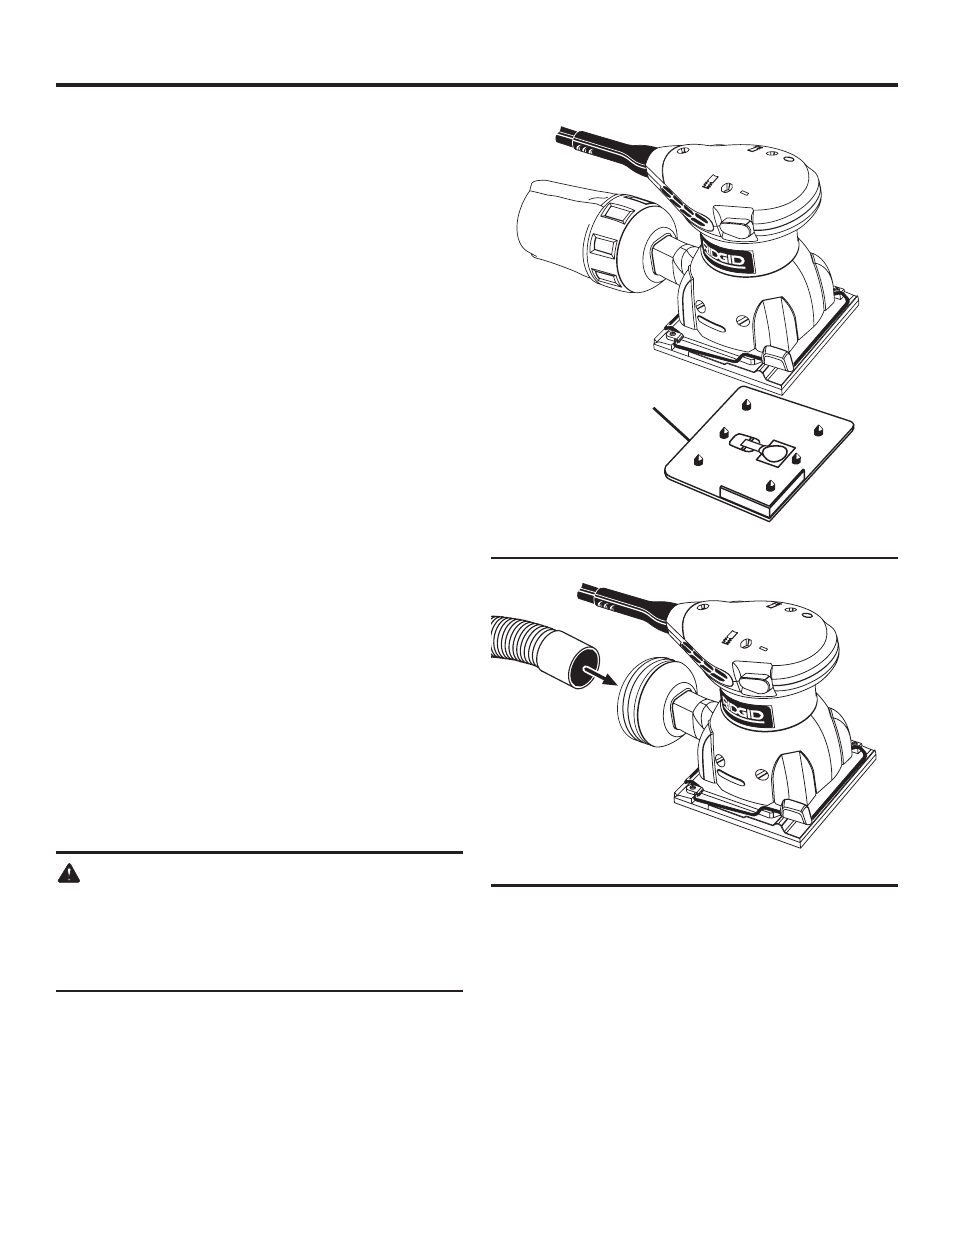
PAPER PUNCH
See Figure 3.
A paper punch template has been supplied with the sander
for aligning and punching holes in sandpaper. The punched
holes must align with the holes in the sander cushion.
n
Install sandpaper on the sander.
n
Align sander cushion over the paper punch.
n
Push down on sander.
SANDPAPER SELECTION
Selecting the correct size grit and type sandpaper is an
extremely important step in achieving a high quality sanded
finish. Aluminum oxide, silicon carbide, and other synthetic
abrasives are best for power sanding. Natural abrasives,
such as flint and garnet are too soft for economical use in
power sanding.
In general, coarse grit will remove the most material and finer
grit will produce the best finish in all sanding operations. The
condition of the surface to be sanded will determine which
grit will do the job. If the surface is rough, start with a coarse
grit and sand until the surface is uniform. Medium grit may
then be used to remove scratches left by the coarser grit and
finer grit used for finishing of the surface. Always continue
sanding with each grit until surface is uniform.
NOTE: DO NOT use sander without sandpaper. Doing so
will damage the cushion.
OPERATION
ORIENT PAPER
PUNCH AS SHOWN
PAPER PUNCH
Fig. 3
ATTACHING THE SANDER TO A VACUUM
See Figure 4.
You can easily attach the dust collection system of the
sander to a vacuum.
n
Unplug the sander.
n
Remove the dust bag from the sander.
n
Attach vacuum hose to blower exhaust.
NOTE: Vacuum hose fits inside blower exhaust.
n
Connect sander and vacuum to power supply.
WARNING:
When sander is not connected to vacuum, always
reinstall dust bag assembly back onto sander.
Failure to do so could cause sanding dust or
foreign objects to be thrown into your face or eyes
which could result in possible serious injury.
Fig. 4