Maintenance and repair instructions – Ryobi 130rEB User Manual
Page 15
MAINTENANCE AND REPAIR INSTRUCTIONS
15
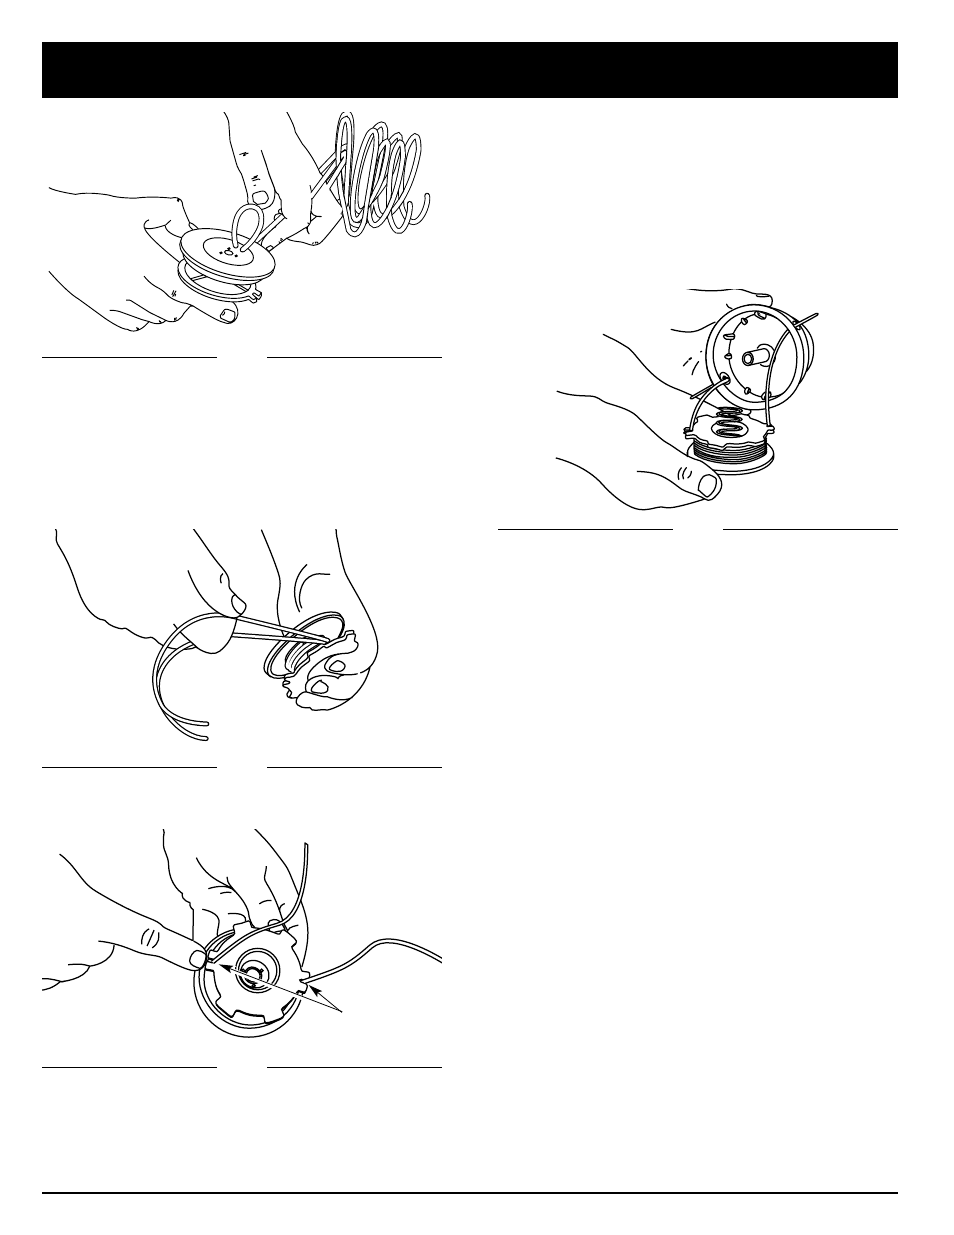
Fig. 23
Fig. 24
Fig. 22
Fig. 25
9. Place the spring in the inner reel. Insert the ends of
the line through the eyelets in the outer spool and
place inner reel inside the outer spool (Fig. 25). Push
the inner reel and outer spool together. While holding
the inner reel and outer spool, grasp the ends and
pull firmly to release the line from the holding slots in
the spool.
NOTE: The spring must be assembled on the inner reel
before reassembling the cutting attachment.
7. Wind the lines in tight even layers, onto the reel
(Fig. 23). Wind the line in the direction indicated on
the inner reel. Place your index finger between the
two lines to stop the lines from overlapping. Do not
overlap the ends of the line.
NOTE: Failure to wind the line in the direction indicated
will cause the cutting attachment to operate
incorrectly.
8. Insert the ends of the line into the two holding slots
(Fig. 24).
Holding Slots
10. Hold the inner reel in place and install the Bump
Knob by turning clockwise. Tighten securely.
INSTALLING A PREWOUND REEL
1. Hold the outer spool with one hand and unscrew the
Bump Knob counterclockwise (Fig. 18). Inspect the
bolt inside the Bump Knob to make sure it moves
freely. Replace the Bump Knob if damaged.
2. Remove the old inner reel from the outer spool
(Fig. 19).
3. Remove the spring from the old inner reel (Fig. 19).
4. Use a clean cloth to clean the spring, shaft, and
inner surface of the outer spool (Fig. 20).
5. Place the spring in the new inner reel. Insert the ends
of the line through the eyelets in the outer spool
(Fig. 25).
6. Place the new inner reel inside the outer spool. Push
the inner reel and outer spool together. While holding
the inner reel and outer spool, grasp the ends and
pull firmly to release the line from the holding slots in
the spool.
NOTE: The spring must be assembled on the inner reel
before reassembling the cutting attachment.
7. Hold the inner reel in place and install the Bump
Knob by turning clockwise. Tighten securely.