Rogue Audio TEMPEST II User Manual
Page 5
4
your speaker or your local dealer to determine the correct choice. The amplifier is
factory set to 8 ohm.
To switch impedance setting:
1) Using a ½” wrench remove the outermost nut from the positive (red) binding
post.
2) Remove the 8 ohm tap (green wire marked 8) from the binding post. Be
careful to leave the black wire with heat shrink on the post.
3) Remove the polyurethane tubing from the unused 4 ohm wire (yellow) and
lug.
4) Place the 4 ohm wire onto the binding post and replace the outer nut.
5) Place the polyurethane tubing on the 8 ohm wire and lug.
CAUTION – Do not operate the amplifier unless it is connected to a
loudspeaker.
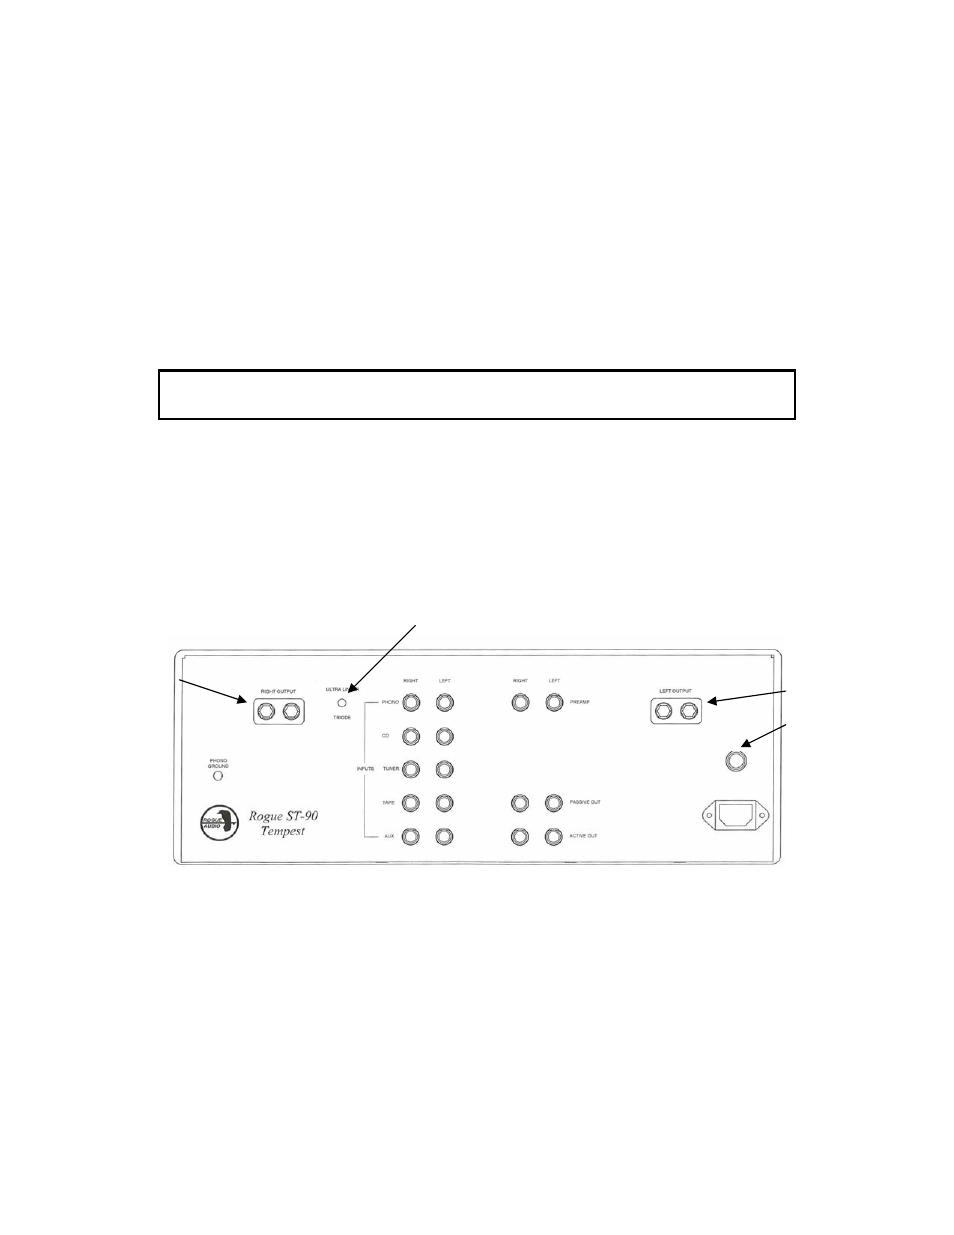
Connecting the Tempest II to the source components:
The input connections to the Tempest II are made via RCA jacks on the rear of
the amplifier. See figure 2. Be sure to use high quality interconnect cables – they
do make a difference.
Figure 2. Rear panel layout
Connecting the Tempest II to the power outlet:
Connect the IEC end of the detachable power cord (provided) to the amplifier,
and plug the opposite end into the power outlet. It is recommended that the
Tempest II and all sources (CD, tuner, etc,) are plugged into the same wall outlet
if possible (perhaps using a power outlet strip) to avoid creating a ground loop.
Right Channel
Binding Post
Leftt Channel
Binding Post
Main Fuse
Ultra Linear /
Triode Switch