Saw and work area set-up, Operating dry cut saw – RIDGID Dry Cut Saw User Manual
Page 7
Ridge Tool Company
5
Saw and Work Area Set-Up
WARNING
To prevent serious injury, proper set-up of the
saw and work area is required. The following pro-
cedures should be followed to set-up the dry cut
saw:
1. Locate a work area that has the following:
• Adequate lighting
• No flammable liquids, vapors or dust that may
ignite.
• Grounded 15 amp electrical outlet
• Clear path to the electrical outlet that does not
contain any sources of heat or oil, sharp edges or
moving parts that may damage electrical cord.
• Dry place for saw and operator. Do not use the
saw while standing in water.
• Level ground
2. Clean up the work area prior to setting up any equip-
ment. To prevent slips and falls, always wipe up any
oil that may be present.
3. Place the dry cut saw on a stable, level surface. If
workpiece extends more than four (4
′
) feet beyond the
saw, use one or more pipe supports.
Failure to properly support the workpiece
can result in the unit tipping or the workpiece falling.
4. Plug the saw into the electrical outlet making sure to
position the power cord along the clear path selected
614 Dry Cut Saw
earlier. If the power cord does not reach the outlet,
use an extension cord in good condition.
To avoid electrical shock and electrical
fires, never use an extension cord that is damaged or
does not meet the following requirements:
• The cord has a three-prong plug similar to shown
in Electrical Safety section.
• The cord is rated as “W” or “W-A” if being used
outdoors.
• The cord has sufficient wire thickness (14 AWG
below 25
′
/12 AWG 25
′
- 50
′
). If the wire thickness is
too small, the cord may overheat, melting the cord’s
insulation or causing nearby objects to ignite.
To reduce risk of electrical shock, keep
all electrical connections dry and off the ground. Do
not touch plug with wet hands. Make sure power cord is
clear of saw blade.
NOTE! Use of extension cords over 50 ft is not recom-
mended. An improper extension cord will result
in deterioration of the performance of the saw.
5. Check the unit to insure it is operating properly.
• To start the tool, firmly grasp the handle then
depress LOCK-OFF switch button. Keeping the
LOCK-OFF switch button depressed, pull the trig-
ger switch (Figure 4).
• Depress and hold the switch. Inspect the moving
parts for misalignment, binding, odd noises or
any other unusual conditions that may affect the
safe and normal operation of the saw. Make sure
saw is free from vibration. If such conditions are
present, have the saw serviced.
• Release the trigger switch.
Operating Dry Cut Saw
WARNING
Wear safety glasses and ear protection. Make
sure guards are in place and in working order.
Always clamp the workpiece with the vise. Do
not perform any operation freehand.
Keeps hands out of the path of saw blade. Never
reach around or in back of the saw blade.
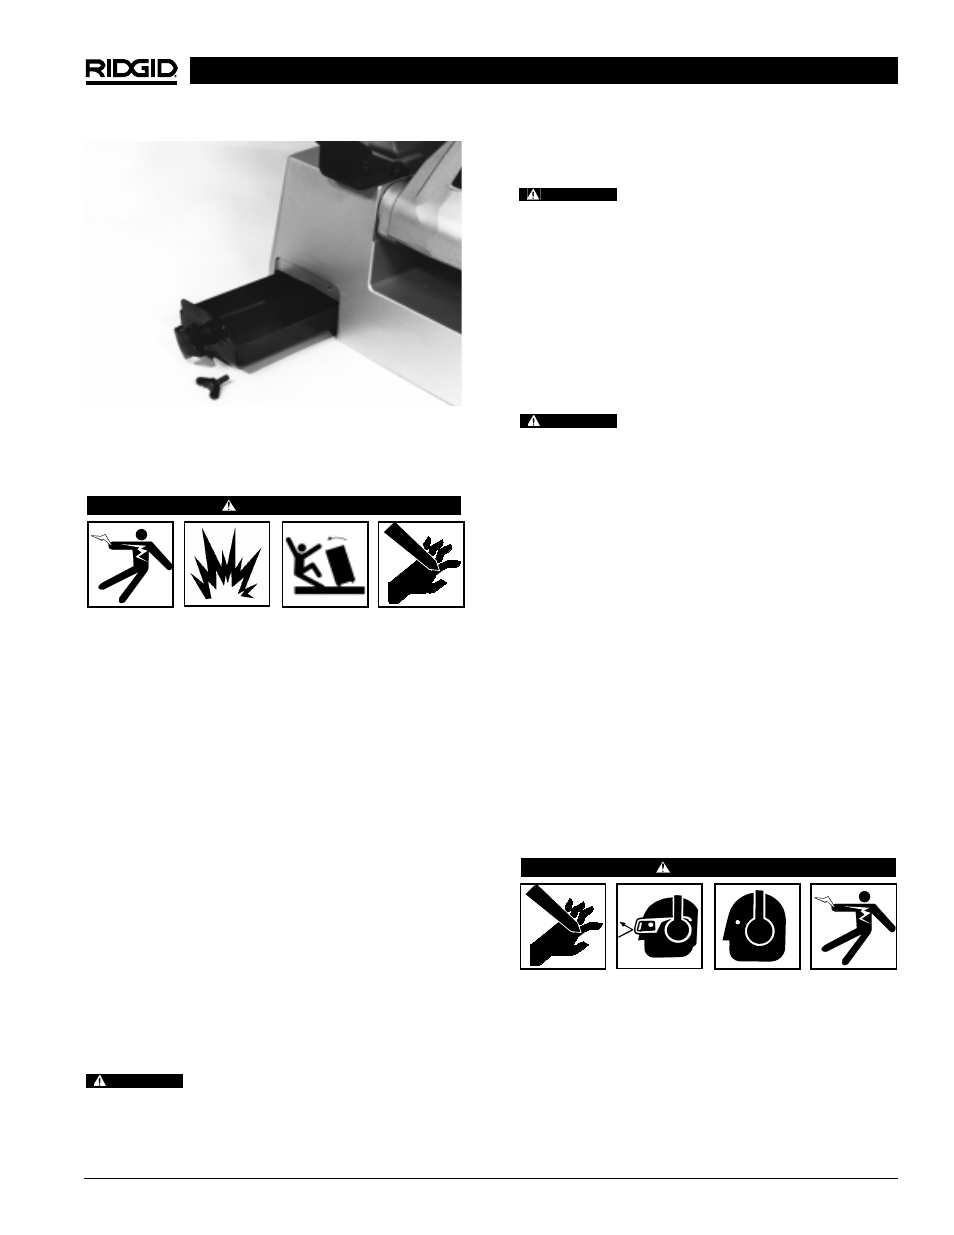
Figure 1 – Cleaning Metal Shavings From Chip Tray
WARNING
WARNING
WARNING