Warning – Ryobi AP13AK User Manual
Page 7
Page 6
ADJUSTMENT
ADJUST DEPTH OF CUT (Fig. 5)
To adjust the depth of cut, turn the cutterhead-
raising hand crank in the direction marked on top
of the planer. The depth of cut adjustment can
be read from the depth scale. The adjustment
gradation is 2mm per revolution of the hand
crank.(Fig. 5)
Always start your work by making a light planing
cut. The depth of cut on subsequent passes may
be increased by up to 3mm, but remember that a
light cut creates a finer finish than a heavier cut.
The thickness of timber running through the planer
is controlled by the distance you adjust the cutting
blade from the table.
• Do not plane timber which is less than 5mm thick.
• Do not plane timber which is thicker than 153mm (6”).
WARNING:
Never plane more than 3mm in one pass and
never attempt to plane a board under 127mm
(5”) in length. Always wear a protective face
shield.
When you have properly adjusted the depth of
cut scale, test your reading by planing a piece of
scrap timber. After planing, measure the planed
thickness and double check it against the scale
reading. The two measurements should be the
same, re-adjust your depth of cut scale to read the
planed thickness if necessary.
Cutterhead Raising
Hand Crank
Depth
Scale
Plastic Pointer
Fig. 5
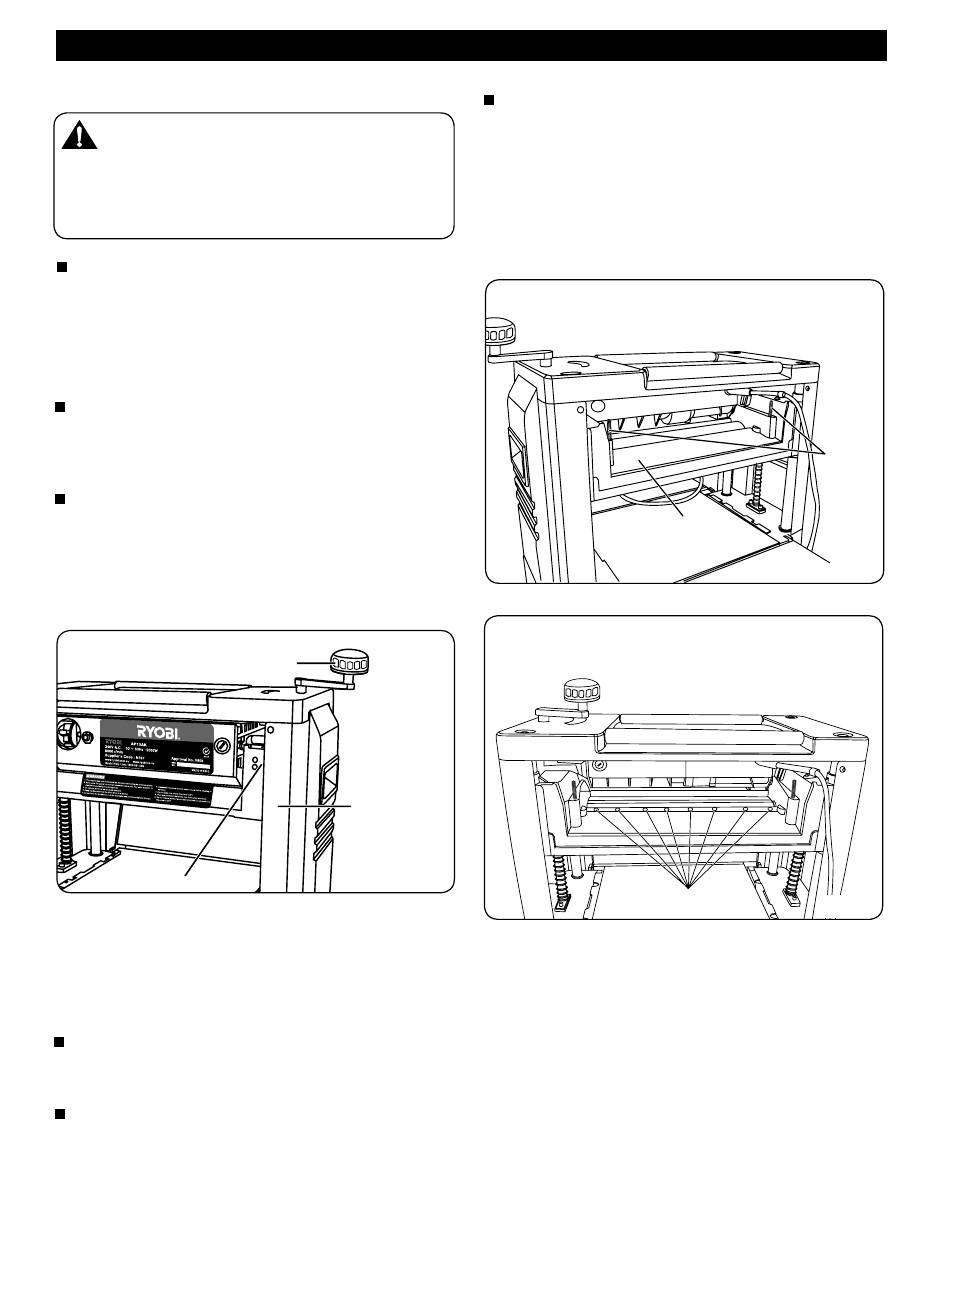
Fig. 6
Chip Deflector
Safety Guard
Screws
Screws
Fig. 7
ADJUSTING THE DEPTH OF CUT SCALE
(Fig 6&7)
For safe operation of your planer, it is very important
that the depth of cut scale is read accurately. To adjust
the depth of cut scale, follow the steps outlined below:
Try to feed a board for planing.
Compare the measured thickness of the board to
the reading on the depth of cut scale.
If the reading on the depth of cut scale is incorrect,
loosen the screw which tightens the plastic pointer
and adjust accordingly (Fig. 5)