Rockford Fosgate P600..I bd User Manual
Page 9
9
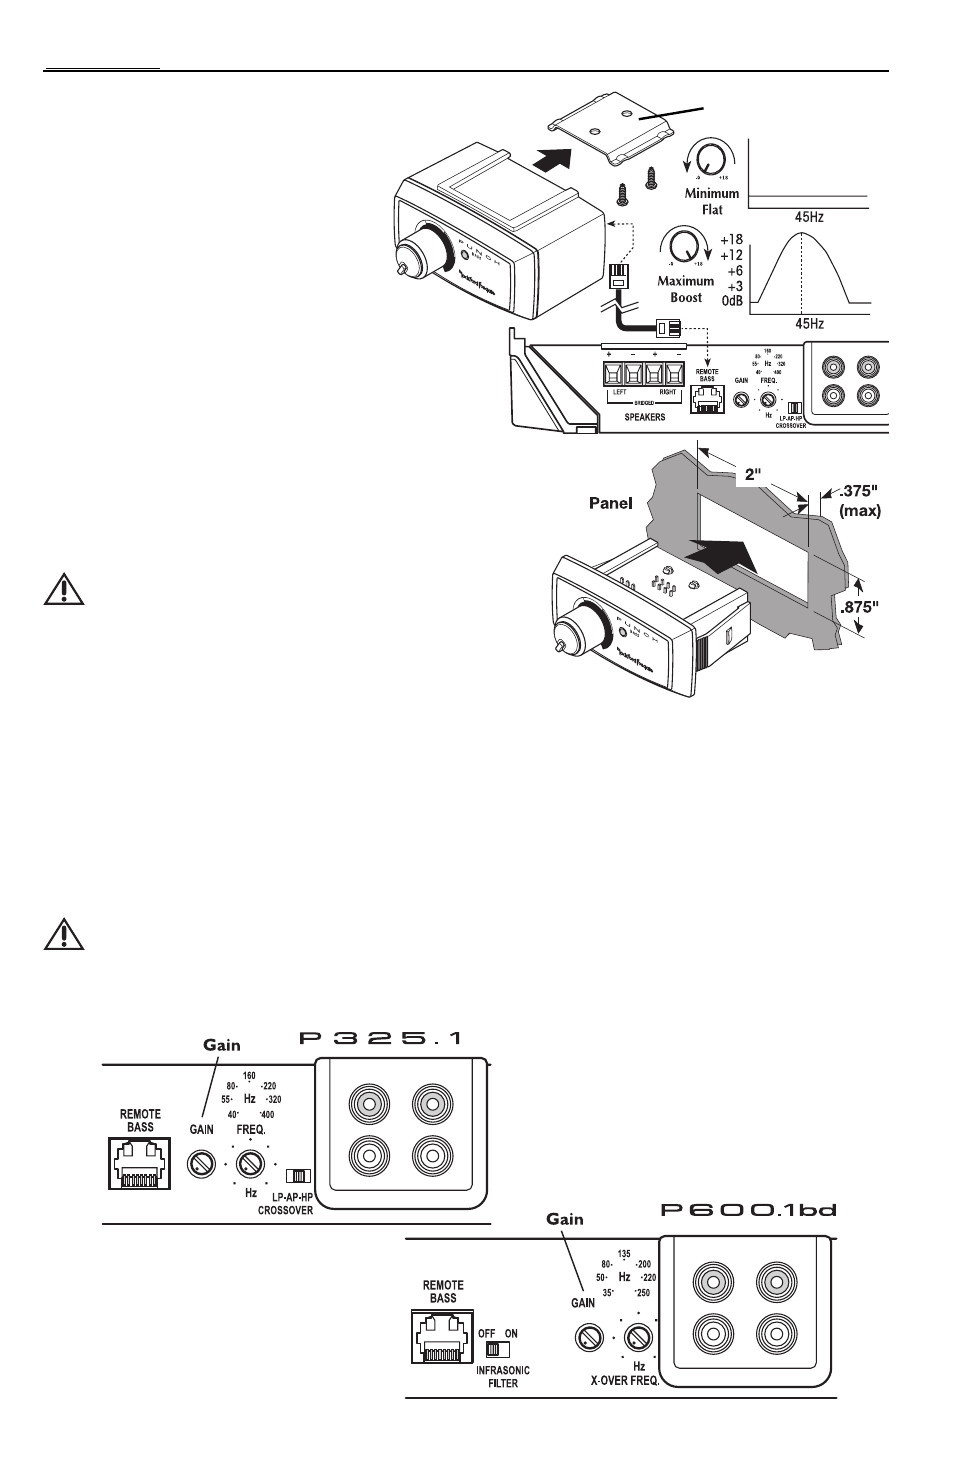
Outside Panel Install
3. Using the screws supplied, install the
mounting clip.
4. Slip the remote onto the mounting
clip until it snaps into place.
5. Connect the cable to the remote.
Panel Install
6. Cut out a 2”x 7/8” hole in the panel,
with a maximum panel thickness of
3/8”. Ensure there is enough room
within the panel area for connection.
7. Route the cable through the hole and connect to
the remote.
8. Press the remote into the panel cutout until it clicks
in place.
Operation
9. Turn clockwise to add Punch to amplifier bass
frequencies.
CAUTION:Overexcursion and subsequent
damage may occur at high levels
of boost
NOTE: An optional Para-Punch Remote Bass is available
which adds an adjustable center frequency
control with the adjustable boost control.
Mounting Clip
O
PERATION
ADJUSTING GAIN
To adjust the gain setting, turn the amplifier gains all the way down (counter-clockwise).Turn the source unit
volume up until distortion is audible and then turn it down a bit until the distortion is inaudible.This will be
about all the way up on most source units. Next, increase the amplifier gain setting until adequate volume is
achieved. Rockford Fosgate source units do not distort, so the volume can be used at maximum setting.
NOTE: Best signal to noise and dynamic range are realized with the gain at minimum. Most users find
adequate gain and volume is achieved at about halfway in the adjustment range.
CAUTION:Avoid setting the amplifier gain very high as noise and distortion will
increase significantly.
NOTE: For a more in depth setting procedure, contact Rockford Technical Support.