Operation – Radio Shack 43-3909 User Manual
Page 2
2
use screws with heads that fit into the
keyhole slots on the bottom of the base.
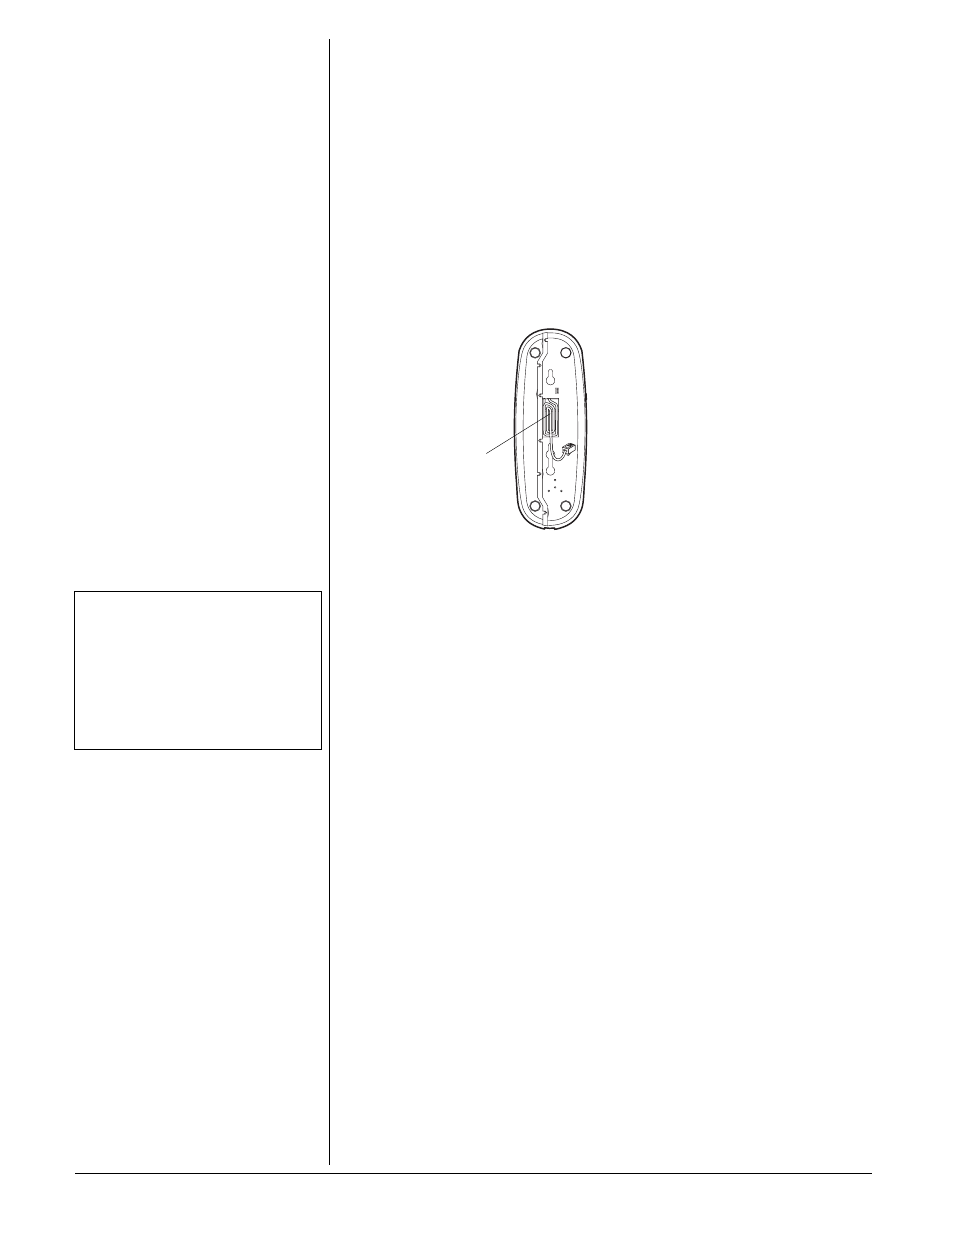
3. Plug one end of the supplied long
modular cord into the modular jack on
the back of the base.
4. Route the phone cord through the
groove on the bottom of the base,
securing the cord under the tabs.
5. Fit the heads of the screw into the
keyhole slots, then slide the base down
until it is secure.
6. Plug the other end of the cord into a
modular phone jack.
On a Desktop
1. Plug one end of the
supplied long modular
cord into the modular
jack on the bottom of
the base.
2. Route the phone cord
through the groove on
the base’s bottom.
Secure the cord under
the tabs along the
groove.
3. Plug the other end of
the cord into a modular
phone jack.
C
ONNECTING
THE
H
ANDSET
Plug one end of the supplied coiled cord into
the handset’s modular jack, then connect
the other end to the jack on the bottom of
the telephone base.
Ô
S
ET
U
P
THE
P
HONE
1. Hold down both
d
REVIEW
e
for about
four seconds until
ENTER LANGUAGE
, then
ENG
(flashing)
ESP FRA
appear.
2. Press
d
or
e
to select the desired
language, then press
DELETE
to
confirm.
LCD CONTRAST
and
1 2 3 4 5
appear on the display, and
3
flashes.
3. Press
d
or
e
to select the contrast level
(from 1-5), then press
DELETE
to
confirm.
ENTER AREA CODE
appears, _ _ _
appears and the first _ flashes.
4. Press
d
or
e
to select the first number
of the area code. Press
DELETE
to
confirm the selection.
5. Repeat step 4 to select the second and
the third digit.
6.
ENTER TIME DATE
appears and the hour
digit flashes.
7. Press
d
or
e
to select the desired hour,
then press
DELETE
to confirm.
AM
appears for an AM hour,
PM
appears for
a PM hour.
8. Repeat step 7 to set the minutes,
month, and day.
Ô
S
ETTING
THE
R
INGER
If you do not want to hear the phone ring,
slide
RINGER
to
OFF
. You can still make
calls with the ringer off, and you can answer
calls if you hear another phone on the same
phone line ring.
NEW
flashes when the
phone rings, even when the ringer is off.
S
ETTING
THE
D
IALING
M
ODE
Slide
TONE/PULSE
to the appropriate setting
for your type of service. If you are not sure
which service you have, do this simple test.
1. Slide
TONE/PULSE
to
TONE
. Lift the
handset and listen for a dial tone.
2. Press any number except
0
. If your
phone requires that you dial an access
code before you dial an outside number
(9, for example), do not press the
access code number.
• If the dial tone stops, you have touch-
tone service. Slide
TONE/PULSE
to
TONE
.
• If the dial tone continues, you have
pulse service. Slide
TONE/PULSE
to
PULSE
.
U
SING
S
PECIAL
T
ONE
S
ERVICES
Some computer services, such as alternate
long distance, require tone signals for
communications. If you have pulse service,
you can still use special tone service by
following these steps.
1. Connect to the special service with
TONE/PULSE
set to
PULSE
.
2. When the special service answers,
change
TONE/PULSE
to
TONE
, or press
* to temporarily switch to tone dialing.
3. When you complete the call, hang up
and return the setting to
PULSE
.
OPERATION
M
AKING
A
C
ALL
1. Pick up the handset and wait for a dial
tone.
2. Use the keypad to enter the number
you wish to dial. The dialed number
appears on the display. If you dial a
number over 15 digits, only the last 14
digits appear on the display.
3. When you complete your call, hang up.
A few seconds later, the number
disappears, and the display returns to
normal.
Ô
NOTE
Ô
Connecting the Handset
Your local RadioShack store sells a variety of
longer coiled handset cords, which are
especially useful when you mount the phone
on a wall.
Set Up the Phone
Do not lift the handset from the base until the
Caller ID setup has been completed.