Maintenance – Ryobi JM82 User Manual
Page 23
22
23
n
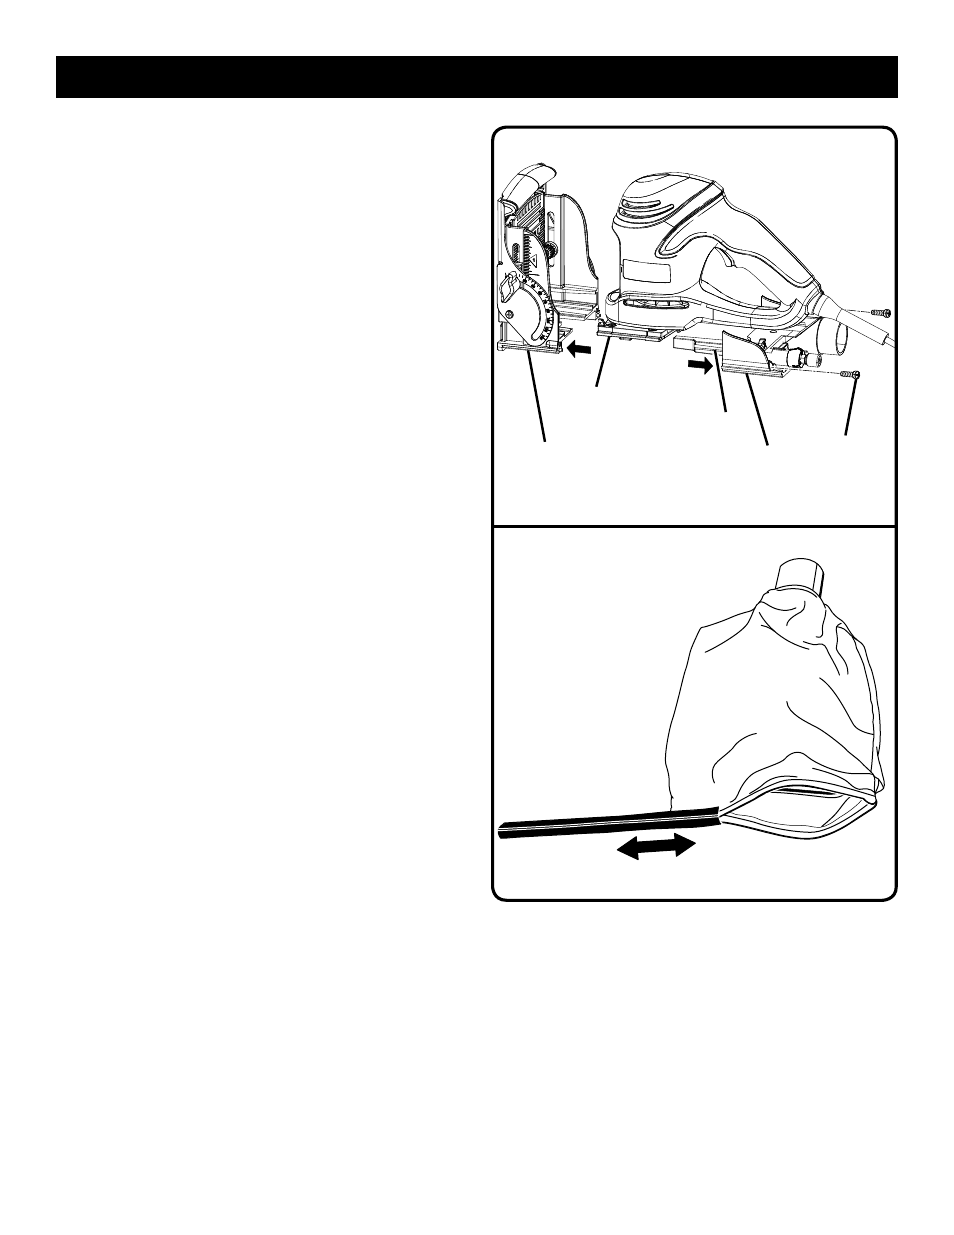
Using a screwdriver, remove the two screws that connect
the front and rear base assemblies.
n
Carefully separate the front base assembly from the rear
base assembly. Remove the front base assembly.
NOTE: These pieces are tightly joined. It may be helpful to
use a mallet to lightly tap the area where the assemblies
meet.
n
Remove the rear base assembly.
n
With the assemblies separated, clean wood particles and
resin from the blade area, dust bag port, front and rear
assemblies and all surrounding areas.
n
Apply a thin coat of general purpose grease in slots or
tracks on the bearing plate where the base slides.
n
Replace the rear base assembly.
n
Replace the front base assembly. Replace and tighten
the screws that connect the front and rear base assem-
blies.
n
Replace the springs.
n
Reinstall or replace the blade.
n
Secure the shoe with the washers and screws.
n
Replace the dust bag.
CLEANING THE DUST BAG
See Figure 28.
n
Unplug the biscuit joiner.
n
Remove the dust bag.
n
Slide the clip off the end of the dust bag.
n
Thoroughly clean the dust bag by shaking out all
debris.
n
Replace the clip.
n
Replace the dust bag.
MAINTENANCE
Fig. 27
SCREWS
REAR BASE
ASSEMBLY
FRONT BASE
ASSEMBLY
TRACK(S)
SLOT(S)
Fig. 28