Assembly – RIDGID AC99402 User Manual
Page 8
8
ASSEMBLY
MOUNTING MITER SAW
See Figures 6 - 7.
WARNING:
Failure to unplug the tool could result in accidental
starting causing possible serious personal injury.
Before You Start
RIDGID miter saws bolt directly onto this workstand.
When you are finished attaching your saw to the workstand
reread the Operation and Rules for Safe Operation sections
of this manual. Make sure that you understand how to
set-up and fold the workstand safely. Saw and workstand
combination must be stable in order to operate safely.
WARNING:
To avoid serious personal injury, always assure
saw is fully supported and securely attached to a
level work surface. If not, relocate to a more stable
location.
WARNING:
To reduce the risk of injury from the miter saw
moving or falling off stand, always check that all
mounting bolts and nuts are securely tightened
before moving stand or using tool.
MOUNTING RIDGID 10 in. AND 12 in.
COMPOUND MITER SAW
NOTE: Mounting holes are provided for 10 in. and 12 in.
RIDGID miter saws.
Other brands of miter saws will require additional 5/16 in.
mounting holes to be drilled. See instructions:
n
Locate the following parts:
Hex Bolts, M6 x 40mm (4)
Flat Washers, M6 (4)
Fender Washers, M6 (4)
Lock Nuts, M6 (4)
n
Determine the correct mounting holes for your RIDGID
miter saw.
n
Position the RIDGID miter saw over the mounting
holes. Always mount the miter saw so the workpiece is
positioned inline with the roller assemblies.
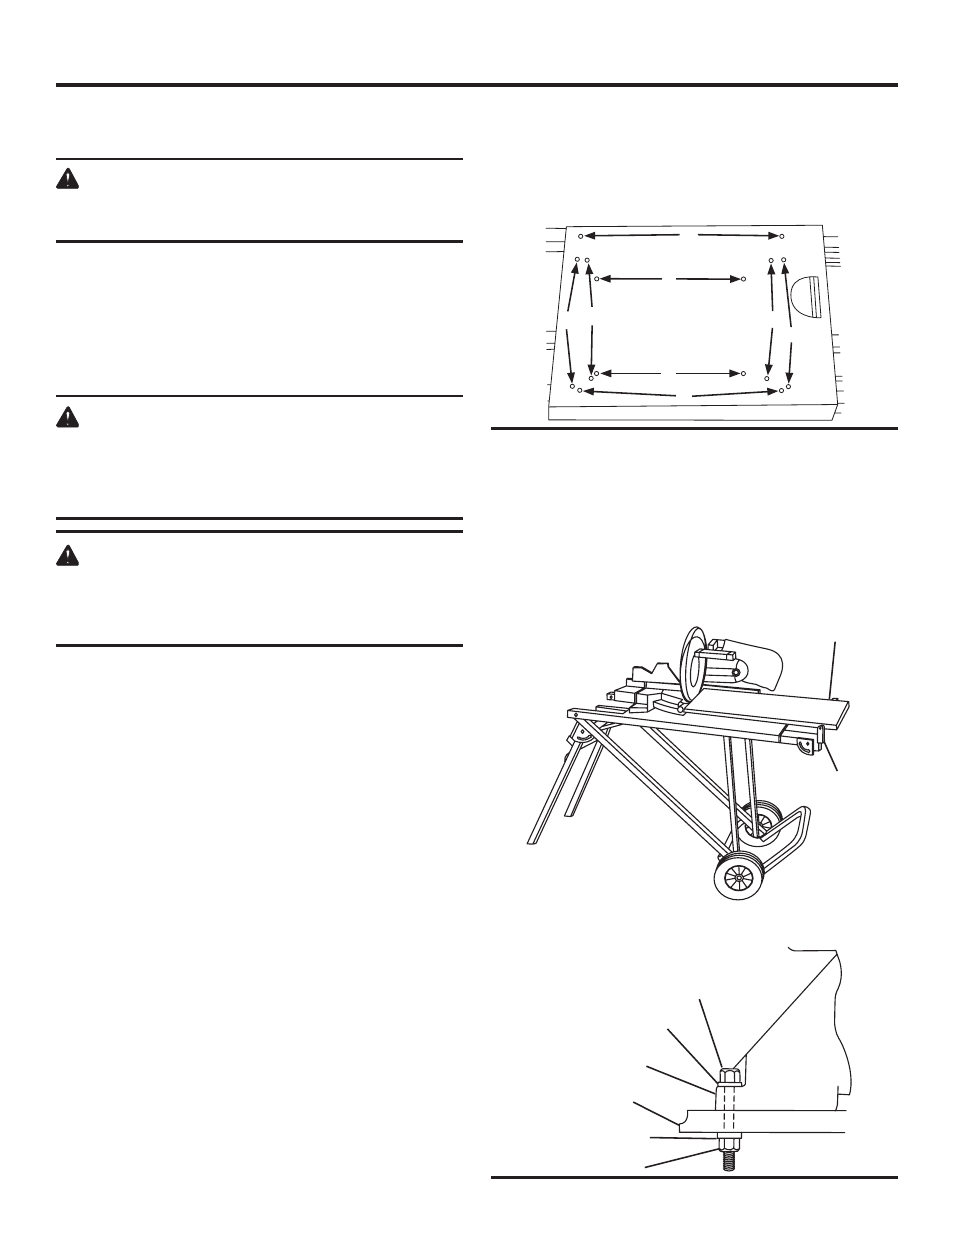
RIDGID MOUNTING HOLES
See Figure 6.
A - 10 in. miter saw (MS10500, MS10501, MS10502, MS1060)
B - 12 in. miter saw (remove miter saw left side table
extension for easier access to workstand knobs).
C - 12 in. slide miter saw (on rear holes of miter saw,
place hex bolts through the bottom side of the
table).
D - 10 in. miter saw (MS1065)
n
On some miter saws using mounting position “C”, it is
necessary to mount the hex bolt and flat washer from
the bottom side of the table on the rear of the miter saw
to allow clearance with the frame when folding the stand
in the upright storage position.
n
Slide flat washer on the hex bolt and “finger tighten”
using lock nut.
n
Repeat steps for the other three mounting holes.
n
Tighten all lock nuts.
ROLLER
ASSEMBLY
WORKPIECE IN LINE WITH
ROLLER ASSEMBLIES
HEX HEAD BOLT
FLAT WASHER
MITER SAW
WORKSTAND
FENDER WASHER
LOCK NUT
B
B
C
C
D
D
A
A
Fig. 6
Fig. 7
n
Slide flat washer on hex bolt and place through miter
saw base and workstand. The larger fender type flat
washer can be placed on the bottom or top of the
miter saw. Certain mountings will require this washer
to be placed on top of the miter saw in order to provide
clearance with the frame.