Remington 493 User Manual
Page 20
20
103500
REMOVING FIRING PIN
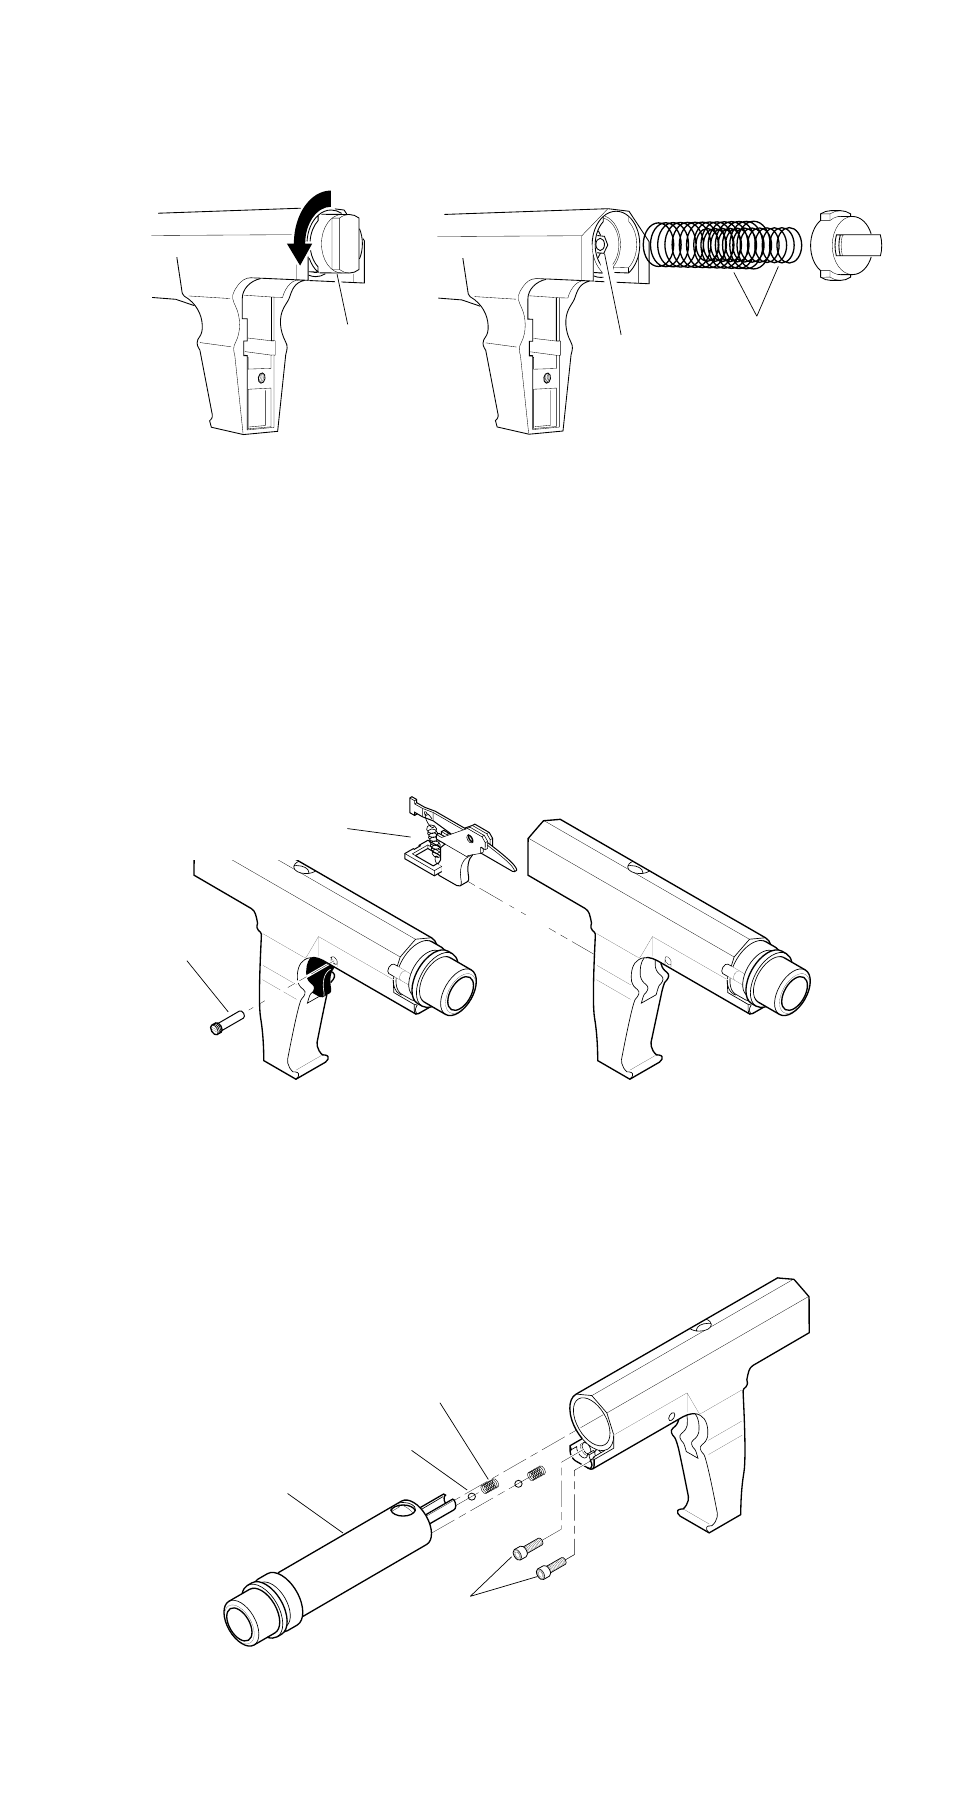
1. Remove plug from end of tool. Do this by pressing plug in and turning it 90°. This
will release the plug from the tool body.
2. Remove the two springs within the cylinder at rear of tool body.
3. Use needle-nosed pliers to grasp nut at rear of firing pin assembly. Pull firing pin
assembly and sear assembly from tool body.
4. Remove push pin from inside tool body. Do this by tilting rear of tool down. Push
pin will fall out.
5. Remove firing pin assembly from sear assembly.
REMOVING TRIGGER ASSEMBLY
1. Remove trigger pin from tool body (see Figure 8).
Note:
End of trigger pin is
threaded. Unscrew threaded portion of pin, then pull pin from tool body.
2. Remove trigger assembly from rear of tool body.
Plug
Firing Pin
and Sear
Assembly
Springs
Figure 7 - Removing Plug and Springs to Access Firing Pin
REMOVING LINER FROM TOOL BODY
Note:
You must remove trigger assembly before removing liner.
1. Remove two screws just under liner at front of tool body.
2. Grasp liner and hold tool vertically with liner pointing down.
3. Remove liner from tool body.
4. Remove two springs and two ball bearings at rear of liner.
Figure 9 - Removing Liner From Tool Body
Screws
Trigger Pin
Trigger Assembly
Figure 8 - Removing Trigger Pin and Trigger Assembly
Ball Bearing
Liner
Spring