Operation – Ryobi TR45K User Manual
Page 15
Page 14
Page 15
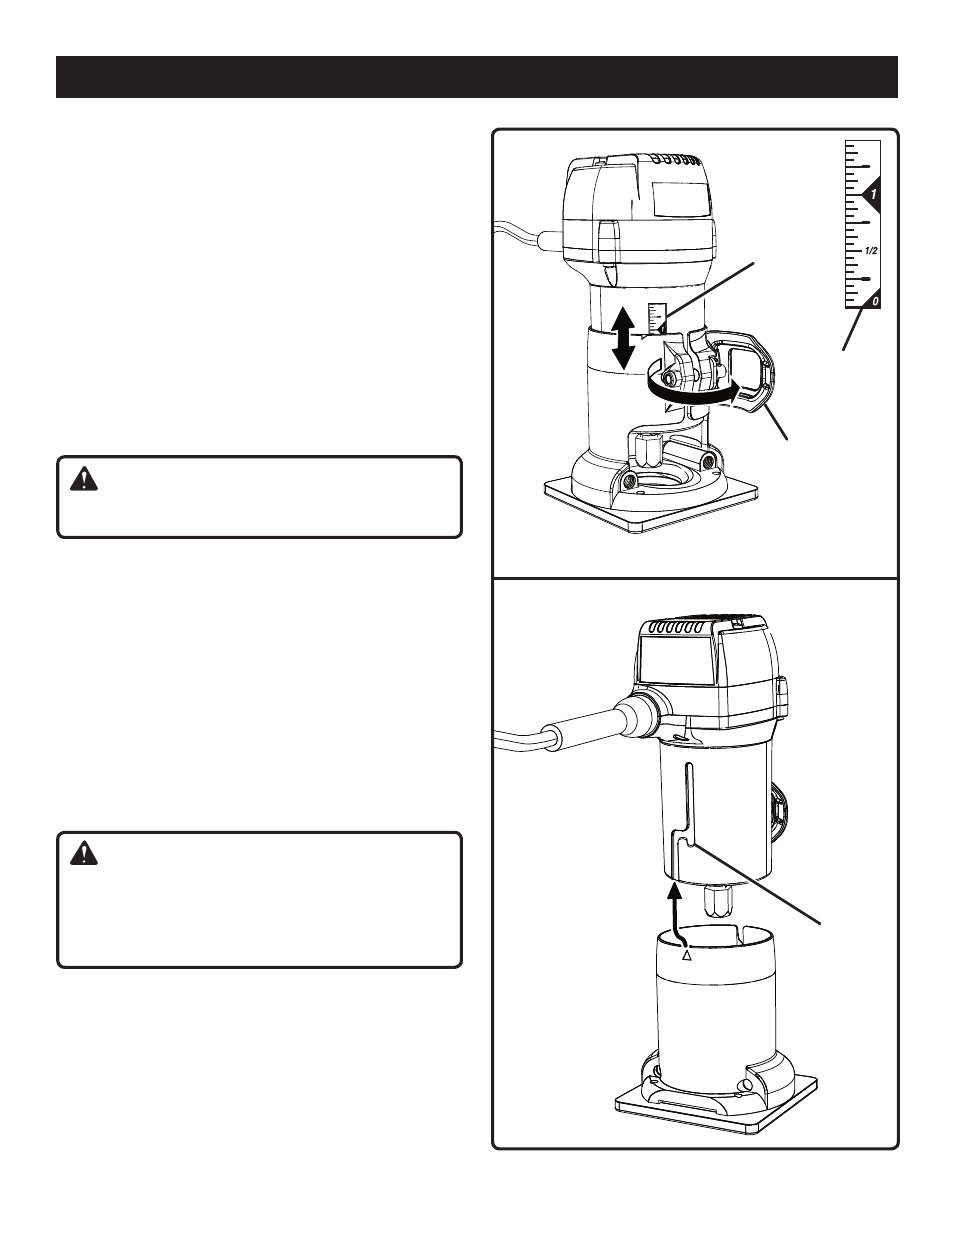
TO SET DEPTH OF CUT
See Figure 10.
n
Unplug the trimmer.
n
Open the depth adjustment latch as indicated by the ar-
row in figure 10.
n
Slide the motor housing section of the trimmer upward
until the tip of the cutter reaches the work surface. The
depth of cut is zero at this point.
n
Adjust the position of the trimmer to obtain the desired
depth of cut by moving the motor housing section up or
down, as shown by the up/down arrow in figure 10. The
distance the cutter moves can be read on the depth of
cut scale. Each mark on the scale indicates a 1/16 in. (1.6
mm) change in depth setting. Indicator points are located
on the base.
n
Completely close the depth adjustment latch.
WARNING:
Avoid open area of trimmer base. Serious personal injury
will result from contact with a rotating cutter.
NOTE: When adjusting the base, note the groove that serves
as a stop to prevent the motor housing from sliding directly
off and separating from the base.
REMOVING THE BASE
See Figure 11.
n
Unplug the trimmer.
n
Open the depth adjustment latch.
n
Holding the trimmer by the motor housing, slide the base
downward and over. Continue to slide the base downward
to remove it.
NOTE: Replace the base before using the trimmer. Do
not attempt to operate the trimmer without the base in-
stalled.
WARNING:
Always use the laminate sub-base for laminate trimming.
Always use the woodworking sub-base for trim routing
operations. Use of the trimmer without a sub-base or
using the incorrect base can result in serious personal
injury.
OPERATION
Fig. 10
Fig. 11
DEPTH OF
CUT SCALE
STOP
GROOVE
INDICATOR
POINT(S)
DEPTH
ADJUSTMENT
LATCH