Maintenance and repair instructions – Ryobi 150r User Manual
Page 12
MAINTENANCE AND REPAIR INSTRUCTIONS
12
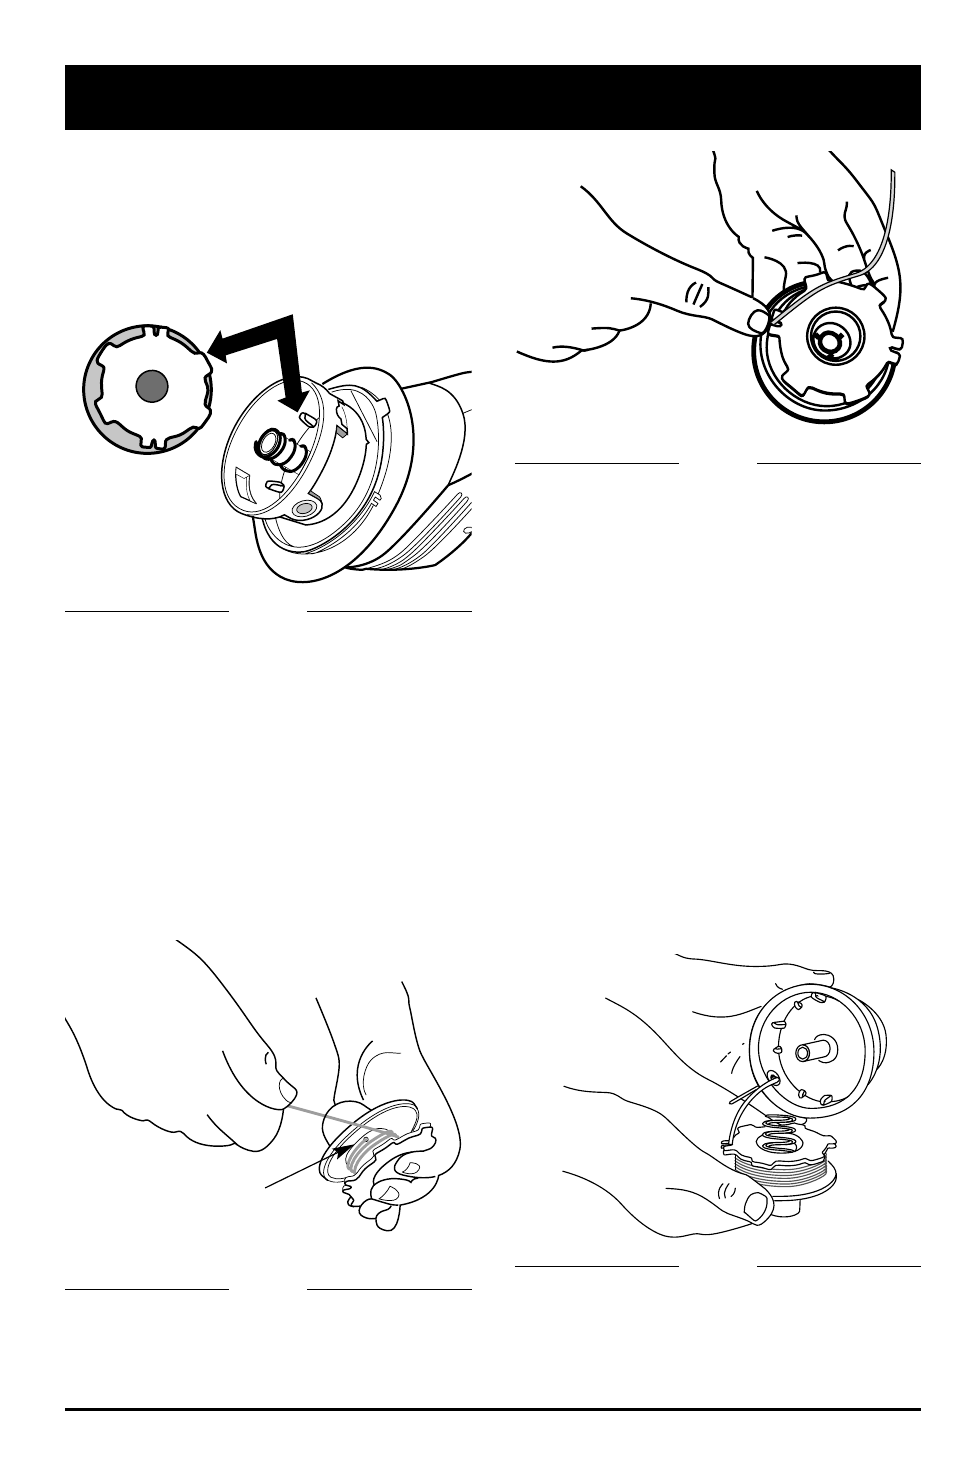
Reinstalling the Reel and Spring
1. Insert the end of the line through the eyelet in
the outer spool (Fig. 16)
2. Place inner reel and spring inside the
outer spool.
NOTE: The spring must be assembled on
the inner reel before reassembling
the bump head.
3. Hold the inner reel in place, grasp the line
end and pull firmly to release the line from
the holding slot in the inner reel (Fig. 17).
4. Install the bump head cover over the inner
reel. Align the tabs on the cover with the
slots in the outer spool and press the cover
evenly down until it snaps into place .
NOTE: Make sure the bump head cover tabs
snap into place or the inner reel will
come out during operation.
4. Check the indexing teeth on the inner
reel and outer spool for wear (Fig. 13).
If necessary, remove burrs or replace
the reel and spool.
Winding the Existing Reel
1. Take approximately 12 feet (3.6 m) of new
trimming line, insert one end of the line into
the hole in the inner reel (Fig. 14).
2. Wind the line, in even and tight layers,
onto the reel (Fig. 14). Wind the line in the
direction indicated on the inner reel.
NOTE: Failure to wind the line in the direction
indicated will cause the bump head to
operate incorrectly.
3. Insert the end of the line into one of the two
holding slots (Fig. 15).
Fig. 13
Fig. 14
Fig. 15
Fig. 16
Indexing Teeth
Inner Reel Hole