Operation – Ryobi BE318-2 User Manual
Page 13
13
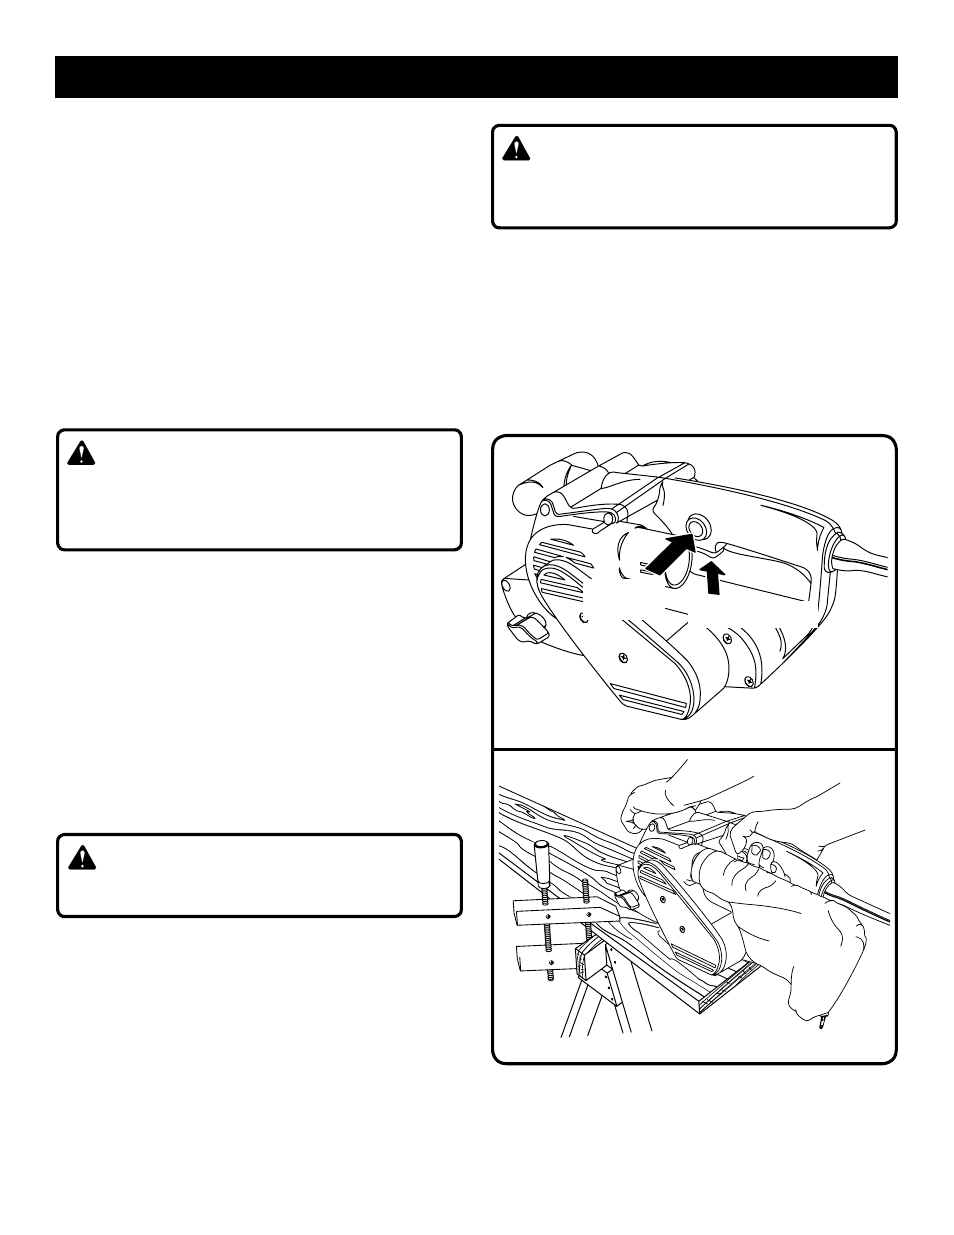
TURNING ON/OFF THE SANDER
See Figure 8.
n
To turn on the sander: Depress the switch trigger.
n
To turn off the sander: Release the switch trigger.
LOCKING ON THE SANDER
See Figure 8.
The lock-on feature allows you to lock the switch trigger in
the
ON position. Locking the switch trigger on allows you to
operate the sander for extended periods of time.
If you have the lock-on feature engaged during use and the
sander is accidentally disconnected from the power sup-
ply, disengage the lock-on feature immediately. Also, do
not lock the switch trigger if you might need to suddenly
stop the sander.
WARNING:
Before connecting the sander to a power supply, make
sure it is not in the locked-on position. Failure to do so
could result in accidental starting of the tool resulting in
serious injury.
To lock- on the sander:
n
Depress the switch trigger.
n
Push in the lock-on button.
n
Release the switch trigger.
n
Release the lock-on button.
NOTE: To release the lock, depress and release the switch
trigger.
OPERATING THE SANDER
See Figure 9.
To operate the sander:
n
Secure the work to prevent it from moving under the
sander.
WARNING:
Unsecured work could be thrown towards the operator
causing injury.
n
Turn the sander on and let the motor reach its maximum
speed before placing the sander on the work surface.
n
Lower the sander to the work surface with a slight forward
motion.
n
Move the sander slowly over the work surface, using the
rear handle to control the sander and the front handle to
guide the sander.
NOTE: Allowing the sander to remain in one place will
result in an uneven surface.
SWITCH TRIGGER
LOCK-ON
BUTTON
OPERATION
Fig. 8
Fig. 9
WARNING:
Keep a firm grip on the sander with both hands at all
times. Failure to do so could result in loss of control lead-
ing to possible serious injury.
We designed the sander to provide the proper weight on
the sanding belt. Excessive pressure will result in the fol-
lowing:
n
Uneven work
n
Clogged sanding belts
n
Premature sanding belt wear
n
Possible motor burnout
n
Irregular sanding belt tracking