Connecting program sources, Connecting the antennas – RCA STA-3850 User Manual
Page 6
6
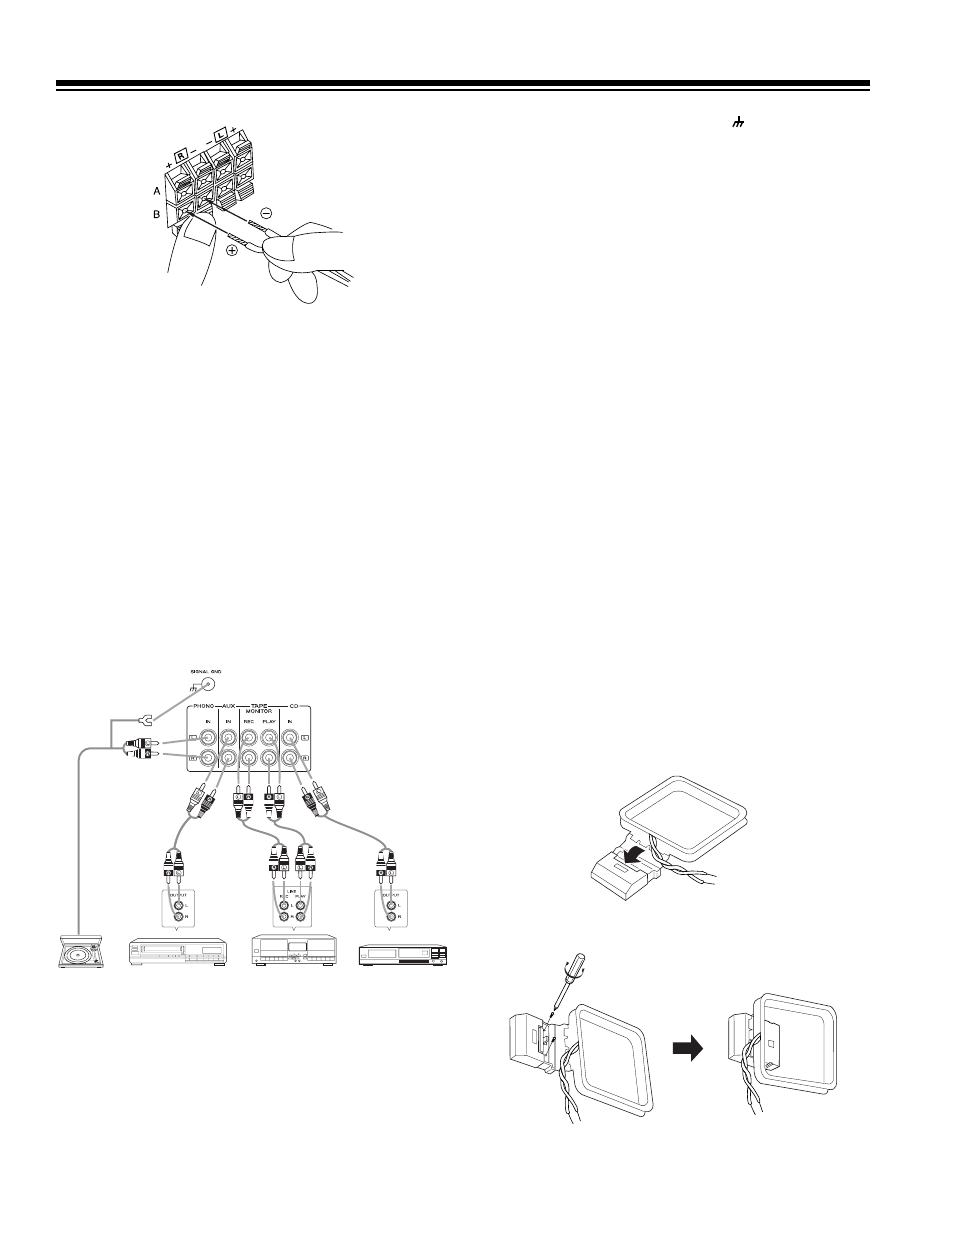
2. Press open the receiver’s negative (
–
) black lever for the
same speaker and insert the other conductor’s end into the
small hole. Release the lever to secure the conductor.
3. Connect the ridged or color-coded conductor’s loose end
to the speaker’s positive (+) terminal.
4. Connect the remaining loose conductor to the speaker’s
negative (–) terminal.
CONNECTING
PROGRAM SOURCES
Note: Use shielded audio cables with phono connectors for all
audio connections.
You can connect up to four external program sources to your
receiver.
Connecting a Turntable
Connect a turntable with a magnetic cartridge only. Some older
turntables use a ceramic-type cartridge that does not work with
this system.
Connect the turntable’s left and right cables to the receiver’s
L
(left) and
R
(right)
PHONO IN
jacks. Then connect the
turntable’s ground wire to the receiver’s
GND
screw
terminal.
Connecting a CD Player
To connect a CD player to the receiver, connect the CD
player’s left and right output jacks to the receiver’s
L
and
R CD
IN
jacks.
Connecting a Cassette Deck
You can connect a cassette deck to the
TAPE MONITOR
jacks.
Connect the cassette deck’s output jacks to the
PLAY
jacks, and
connect the cassette deck’s input jacks to the
REC
jacks.
Connecting Another Audio Source
Connect the audio outputs of another audio source, such as the
audio from a laser disc player, TV, or VCR to the
AUX
jacks.
CONNECTING THE ANTENNAS
In many areas, the supplied indoor AM loop and FM antennas
provide satisfactory reception.
AM Antennas
Assemble the supplied AM antenna’s base by swinging the
base in the direction of the arrow and inserting the antenna’s
bottom tabs into the base’s slot. If the receiver is in a rack or on
a shelf and there is no room for the AM loop antenna, use two
screws (not supplied) to mount the base on the wall or another
location as shown.