Choose your connections set up your tv, Operate your tv, Start guide – RCA 27F524T User Manual
Page 2: Viewing devices connected to your tv, Using the menu system, Quality connects to... cables needed, Jacks, Component video audio
START
GUIDE
Choose Your Connections
Set Up Your TV
VIDEO
Quality
Connects to...
Cables needed
(not included)
Audio
Video
Devices with Video (composite)
outputs, such as DVD Players,
VCRs, Satellite Receivers,
Cable Boxes, Camcorders, and
Digital Cameras.
C R T T E L E V I S I O N
Devices with Y Pb Pr
(component) outputs, such as,
HD Receivers, Satellite
Receivers, Cable Boxes, DVRs,
and DVD Players
(Progressive
Scan players- refer to the User’s Guide
for more information).
COMPONENT
(CVID) INPUT
P
r
P
b
Y
Component
Video
Audio
Jacks
COMPOSITE
(VID) INPUT
Viewing Devices Connected to Your TV
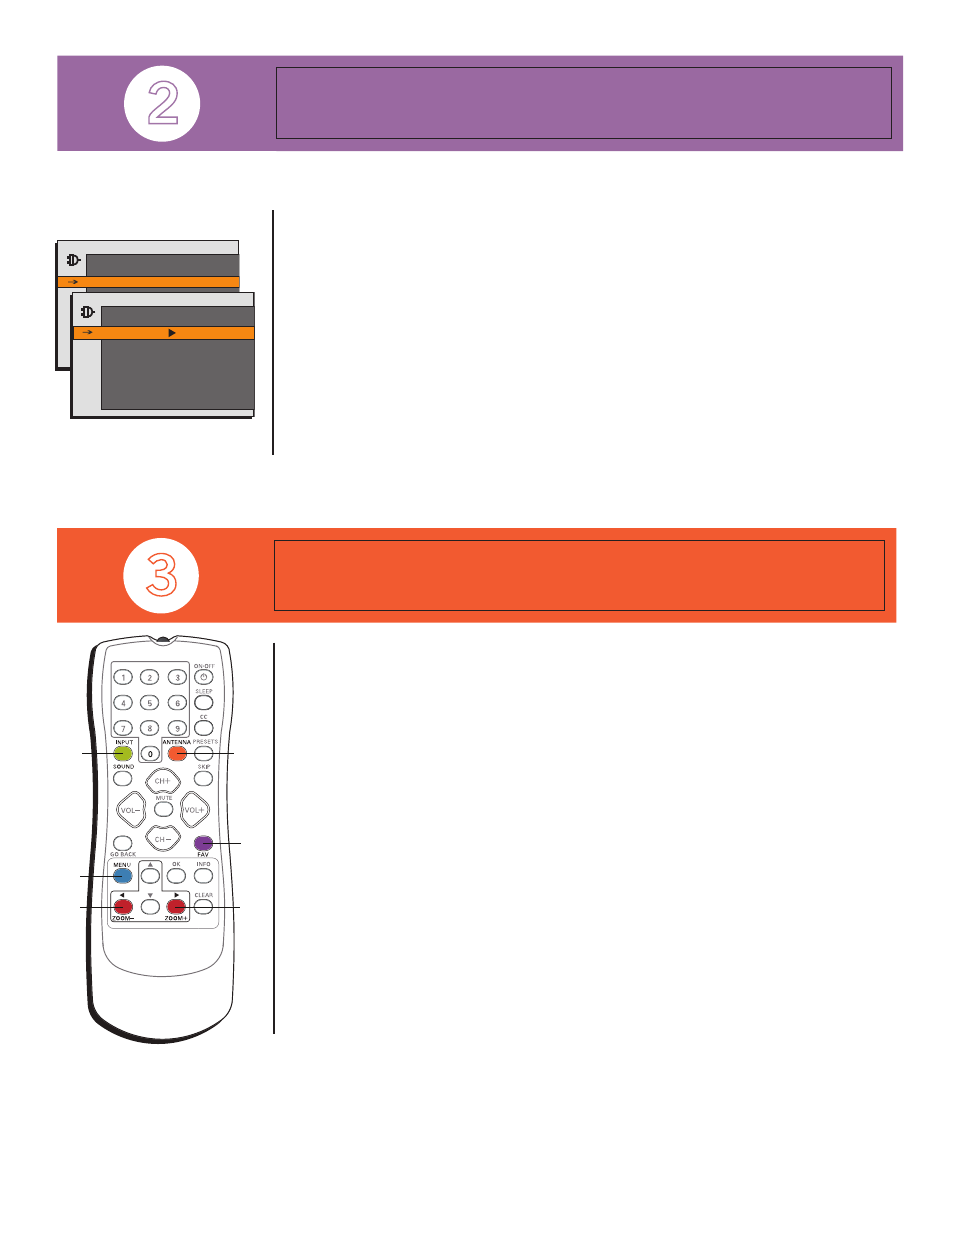
To view devices connected to your TV, use the
INPUT
button until the input name appears that
matches the input of the device you connected. Your choices are VID (composite input), CVID
(component input) and FRNT (front input). Some models have SVID (S-Video input).
Using the Menu System
To access the menu system, press the
MENU
button. Use the arrow buttons to navigate and the
OK button to change selections. Here are some features you might want to use:
• Deleting Channels. After running the channel search there might be channels you don’t want in
the channel list. To delete a channel, press MENU, highlight Setup and press OK. Highlight List &
Labels and press OK. Make sure Channel is highlighted, then press the right arrow button to select
the channel. Highlight In List and press the right or left arrow button to uncheck the box. Repeat
to delete other unwanted channels. Press CLEAR to exit.
• Changing the Screen Format.
Your remote has buttons you can use to change the format of
your picture. Press the
left arrow/ZOOM-
and
right arrow/ZOOM+
buttons to choose different
screen formats (4:3, 16:9 or Stretch). The User’s Guide has more information.
• Saving a Favorite Channel.
To store a favorite channel, press MENU, highlight Setup, and press
OK. Highlight Favorite CH and press OK. Press the left or right arrow button to select the signal
type (Analog or Digital). Press the down arrow to highlight Fav 1. Use the right and left arrow
buttons to scroll to your favorite channel. Continue to use this method to add favorite channels.
To quickly access a favorite channel while watching TV, press the
FAV
button.
• Locking the Front Panel.
Locking the front panel is convenient to keep children from using the
front panel buttons. Press MENU, highlight Parental Control and press OK. Choose lock
(R)
and
create your password so that your choice is activated. Highlight Settings and go to Lock Fr. Panel.
Press the right or left arrow button to choose lock
(R)
. For more information on features, refer to
the User’s Guide that can be found in the support section on www.rca.com/television.
TOCOM 16743670
First,
make sure you have connected your TV to any devices, connected a signal source, plugged
in the TV, and put batteries in the remote.
• Now, turn on the TV and begin the setup.
• Set the Menu Language. The default menu language is set to English. To choose another language,
press the MENU button, highlight Setup, then press OK. Go to Language and press the right arrow
button to choose another language. Press MENU to return to the previous menu or CLEAR to exit.
• Set the Signal. From the Setup menu, highlight Auto Channel Search and press the right arrow
button. Signal Type is highlighted. Press the right arrow button to select Cable or Antenna. Press
the down arrow button to highlight Start.
Search Channels.
Press the right arrow or OK button to start the channel search. (This might
take 10-15 minutes). Once the search is complete, the List and Labels menu is displayed. Go to
the next step to set the time, or go Step 3 Operate Your TV for more information.
• Set the Time. From the Main Menu, press the down arrow button to highlight Time and press
OK. Use the number buttons to set the time manually. If it’s 7:25, for example, press 0 and then
7. To change the minutes, press 2 and then 5 to complete the minutes. You can also use the right
arrow button to start the time at 12:00 am. Then, each additional right arrow press adds a minute.
Press the left arrow button to subtract minutes. The OK button selects AM or PM. Press CLEAR
to exit.
Thank you for your purchase. Before making a trip back to the retailer, please visit www.rca.com/television for more information or contact us at
1-800-336-1900 so that we may assist you in operating the unit, replacing missing parts, and ensuring your satisfaction with the product.
DIG•ANA
GUIDE
+•?
CH LIST
ABC
DEF
GHI
JKL
MNO
PQRS
TUV
WXYZ
INPUT
MENU
FAV
ZOOM+
ZOOM–
DIG•ANA
Operate Your TV
Remember:
The
DIG•ANA
button switches between analog or
digital stations. Analog channels
are sent in 4:3 (Standard) format.
Most digital channels are sent in
16:9 (Widescreen) format.
SETUP
Go Back
Auto Ch. Search
tu
...
List & Labels
...
Closed Caption
...
Favorite CH
...
Language
English...
Format
4:3
Go Back
Signal Type
Antenna...
Start
Running...
Analog Channel
0
Search Percent
0
Digital Channel
0
AUTO CHANNEL SEARCH