Nintendo dsi camera, Using game cards, Getting started – Nintendo DSi User Manual
Page 14: Screen explanation, Starting a game, Exiting a game, How many photos can i save
Press
Hold
Press and release
25
Applic
ations & S
ettings
26
Applic
ations & S
ettings
Nintendo DSi Camera
With Nintendo DSi Camera, you can take photos with
eleven different lenses, watch slide shows of your photos,
and exchange photos with other Nintendo DSi systems.
IMPORTANT: To avoid damage to the Nintendo DSi
Camera, do not point it at the sun or other very
intense sources of light.
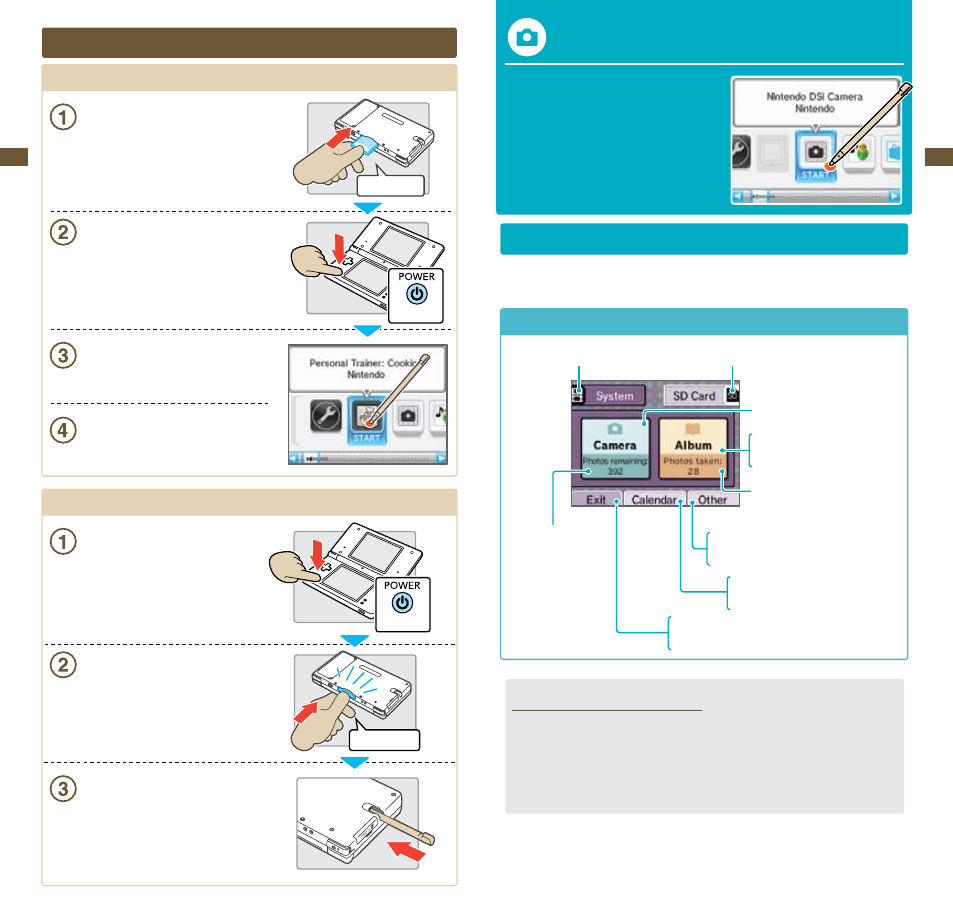
Getting Started
When you start Nintendo DSi Camera, you will have several options available. Tap the Touch Screen to
make a selection.
Screen Explanation
Take pictures using eleven
different lenses
View photos you’ve taken
View a slide show of your photos
Number of photos saved
Save your photos to the Nintendo DSi system memory. Save your photos to an SD Card (*)
Number of
photos remaining
Exchange, copy, or delete photos
View Nintendo DSi Camera instructions
View photos by date taken
Post memos on the calendar
Exit Nintendo DSi Camera and return to the
Nintendo DSi Menu
Using Game Cards
Starting a Game
Insert a Game Card in the DS Card slot.
If you have trouble inserting the Game Card, eject it
and confirm that it is facing the right direction.
Note: The label should face towards the bottom of the
Nintendo DSi.
IMPORTANT: Do not insert or remove Game Cards
or accessories when the power is on.
Press POWER.
Tap the Game Card icon.
Refer to the game’s instruction booklet for
game play information.
Exiting a Game
Press and hold POWER.
Press in and then pull out the Game Card.
Store the stylus.
Check direction
How Many Photos Can I Save?
• Check the Photos Remaining display to see how many photos you can save in your selected
location. Because photo-data size can vary, this number is only a rough indicator—it does not
reflect a precise number of photos.
• Depending on the size of your SD Card, you can save up to 3,000 photos maximum.