Installation fundamentals – Niles Audio PERFORMANCE PR6 User Manual
Page 7
11
Identify where all of your electrical, phone,
and TV wiring is likely to be and plan to
route around it all. You can accidentally
induce 60 Hz hum on your speakers if
you run your speaker wire right beside
electrical wire for more than a few feet.
Try to keep speaker wire running parallel
to power cables at least 3 feet away. To
find exactly where an electrical cable is
routed, try inspecting the inside of the wall
by turning off the breaker for a particular
power outlet or switch, removing the cover
plate and switch or receptacle, and shin-
ing a penlight into the wall.
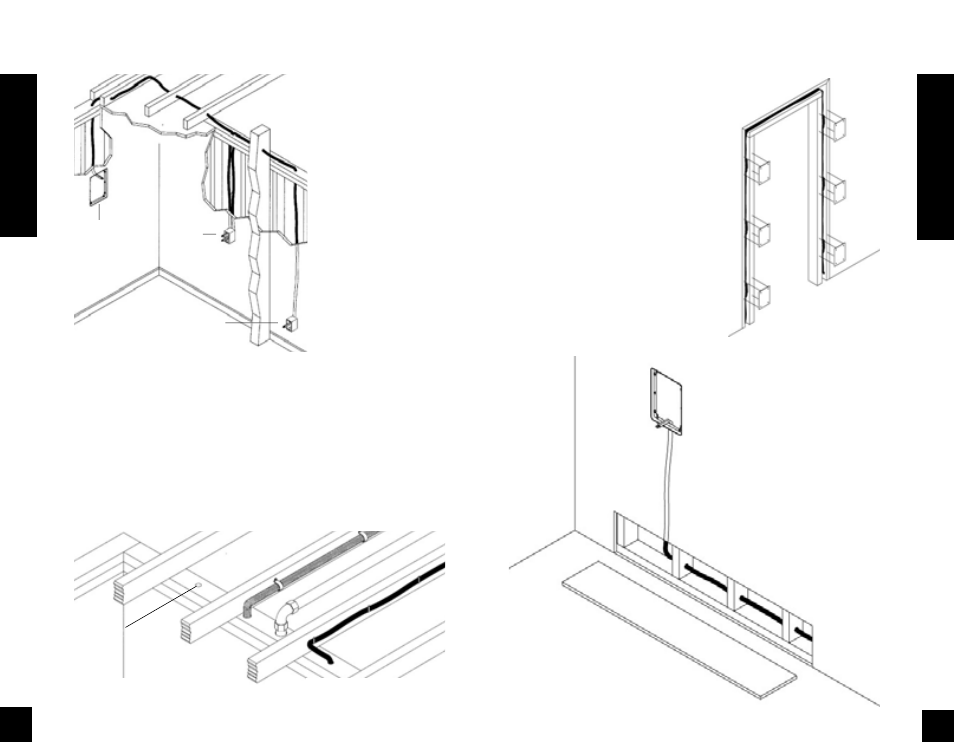
If you have access to an attic
or basement space you can
quickly see which part of the
wall space is free of obstruc-
tions (See Figure 5).
When you don’t have access
above or below the wall, try
to estimate the existing wire
and pipe locations from the
positions of electrical outlets
and plumbed fixtures on both
sides of the wall. Take a look
at the outside of your house
too, sometimes conduit, vents
or drain pipe will be visible
that give useful information.
Choose the route with the few-
est potential obstacles.
If your house is built on a slab
or you are wiring between two
finished floors, look for baseboards which
could be removed and replaced with the
wire behind them. Doorjambs can be
removed and often have enough space for
speaker wire all the way around the door
(See Figure 6)
.
Sometimes, an under-the-carpet run is
possible (there are special flat speaker
wires made for under-the-rug wire runs).
As a last resort, heating and air condition-
ing vents can be used as wire raceways
for plenum rated wire (check your local
Installation Fundamentals
Figure 4
Figure 5
Unobstructed space
for speaker wiring
Speaker
Location
Volume
Control
Location
Stereo
Location
building codes, some municipalities
require conduit).
In traditional wood stud/drywall construc-
tion you can cut the hole for the speaker
and utilize the large hole to auger holes
across, up or down the wall for as far as
your drill bit will take you. If you have
matching paint and take reasonable care
in patching you can cut a hatch in the dry-
wall at each stud, run your wire, and patch
and touch-up the wall (See Figure 7).
When you are dealing with the unknown
because of the structure of your home,
or with difficult to patch wall materials
like plaster, lath and plaster, faux finishes,
wallpaper etc., be patient. A careful study
of the potential problems before you start
the job will pay off.
12
Installation Fundamentals
Figure 6
Figure 7