Before operation (continued), Clock set, Tv aspect – NEC NDRV-60 User Manual
Page 21: Vcr play system, Progressive scan, Hookup
Before Operation (Continued)
Clock Set
11
Press SETUP.
The Setup menu appears.
2
2
Use v / V to select the GENERAL menu.
3
3
While the GENERAL option is selected, press B
to move to the second level.
4
4
Use v / V to select the Clock Set option.
5
5
Press B to move to the third level.
6
6
Enter the necessary information for date and
time.
b / B (left/right): Moves the cursor to the previous
or next column.
v / V (up/down): Changes the setting at the current
cursor position.
77
Press ENTER to confirm your setting, then
press SETUP to exit the Setup menu.
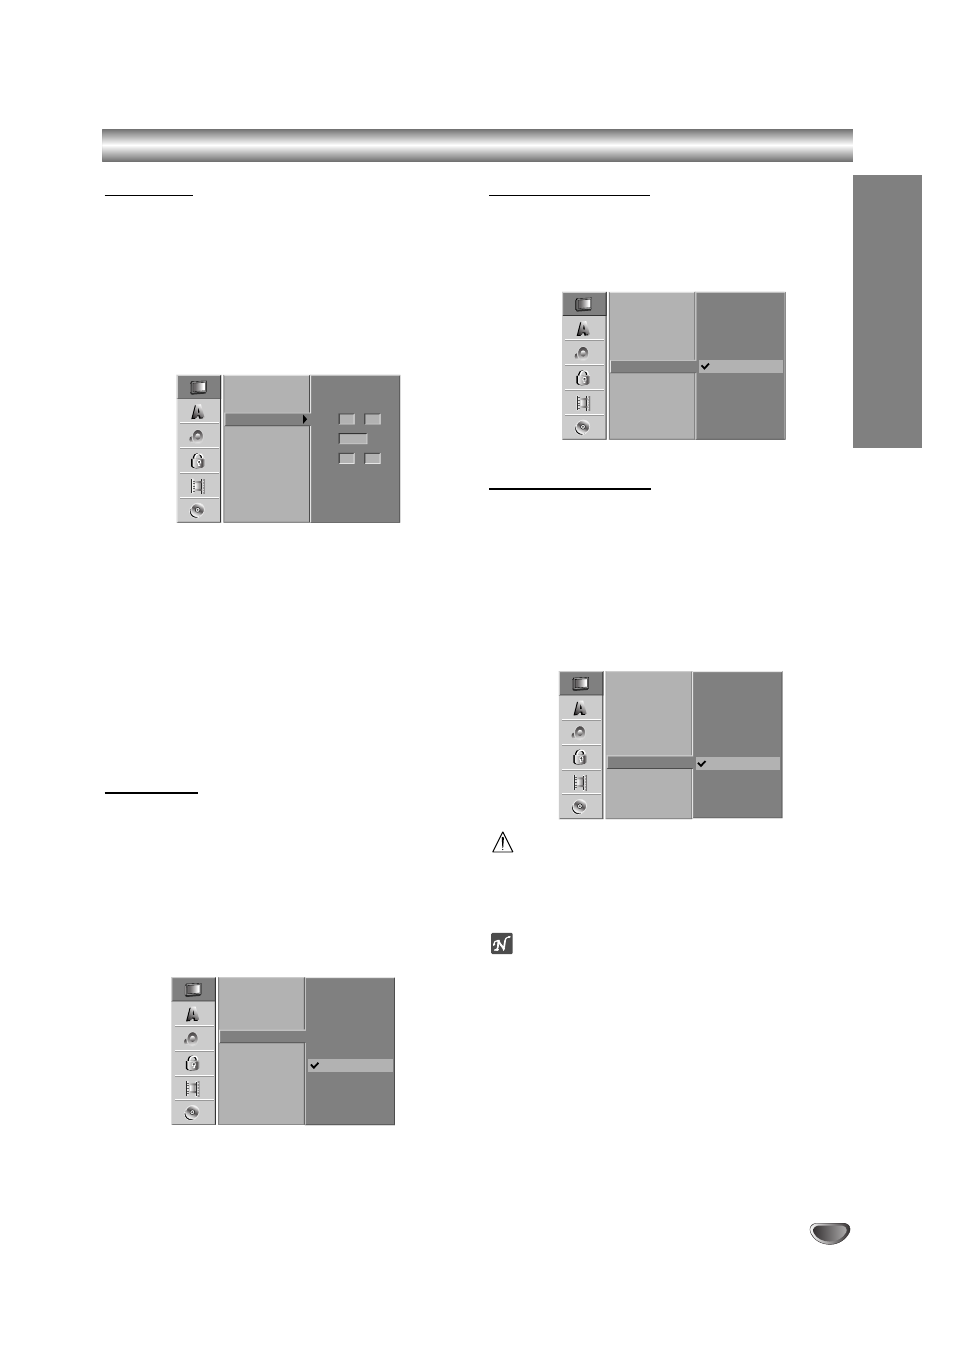
TV Aspect
You can choose:
4:3 Letter Box: Select when a standard 4:3 TV is con-
nected. Displays theatrical images with masking bars
above and below the picture.
4:3 Pan Scan: Select when a standard 4:3 TV is con-
nected. The video material formatted in the Pan & Scan
style is played back in that style (Both sides of the pic-
ture are cut off).
16:9 Wide: Select when a 16:9 wide TV is connected.
VCR Play System
Your video recorder uses dual colour standards, PAL
and MESECAM. During play your video recorder should
select the colour system automatically, however if you
experience problems you may need to do it manually.
Progressive Scan
Progressive Scan Video provides the highest quality
pictures with less flickering.
If you are using the COMPONENT/PROGRESSIVE
SCAN VIDEO OUT jacks, but are connecting the
recorder to a standard (analog) television, set
Progressive Scan to OFF.
If you are using the component video jacks for connec-
tion to a TV or monitor that is compatible with a pro-
gressive scan signal, set Progressive Scan to ON.
Caution
Once the setting for progressive scan output is entered,
an image will only be visible on a progressive scan
compatible TV or monitor. If you set Progressive Scan
to On in error, you must reset the unit.
ote
You can reset the unit only in DVD mode.
1) Remove any disc from the unit and close the disc
tray.
2) Press STOP and hold it for five seconds before
releasing it. The video output will be restored to the
standard setting and a picture will once again be
visible on a conventional analog TV or monitor.
21
Auto Programming
Program Edit
Clock Set
TV Aspect
VCR Play System
Progressive Scan
- - - -
Year
Time
- -
- -
Date
/
- -
- -
:
Factory Set
Auto Programming
Program Edit
Clock Set
TV Aspect
VCR Play System
Progressive Scan
16:9 Wide
4:3 Letter Box
4:3 Pan Scan
Factory Set
Auto Programming
Program Edit
Clock Set
TV Aspect
VCR Play System
Progressive Scan
PAL
Auto
MESECAM
Factory Set
Auto Programming
Program Edit
Clock Set
TV Aspect
VCR Play System
Progressive Scan
Factory Set
OFF
ON
HOOKUP