Caution, Weatherhood clearances, Weatherhood installation – Lifebreath RNC120F User Manual
Page 8
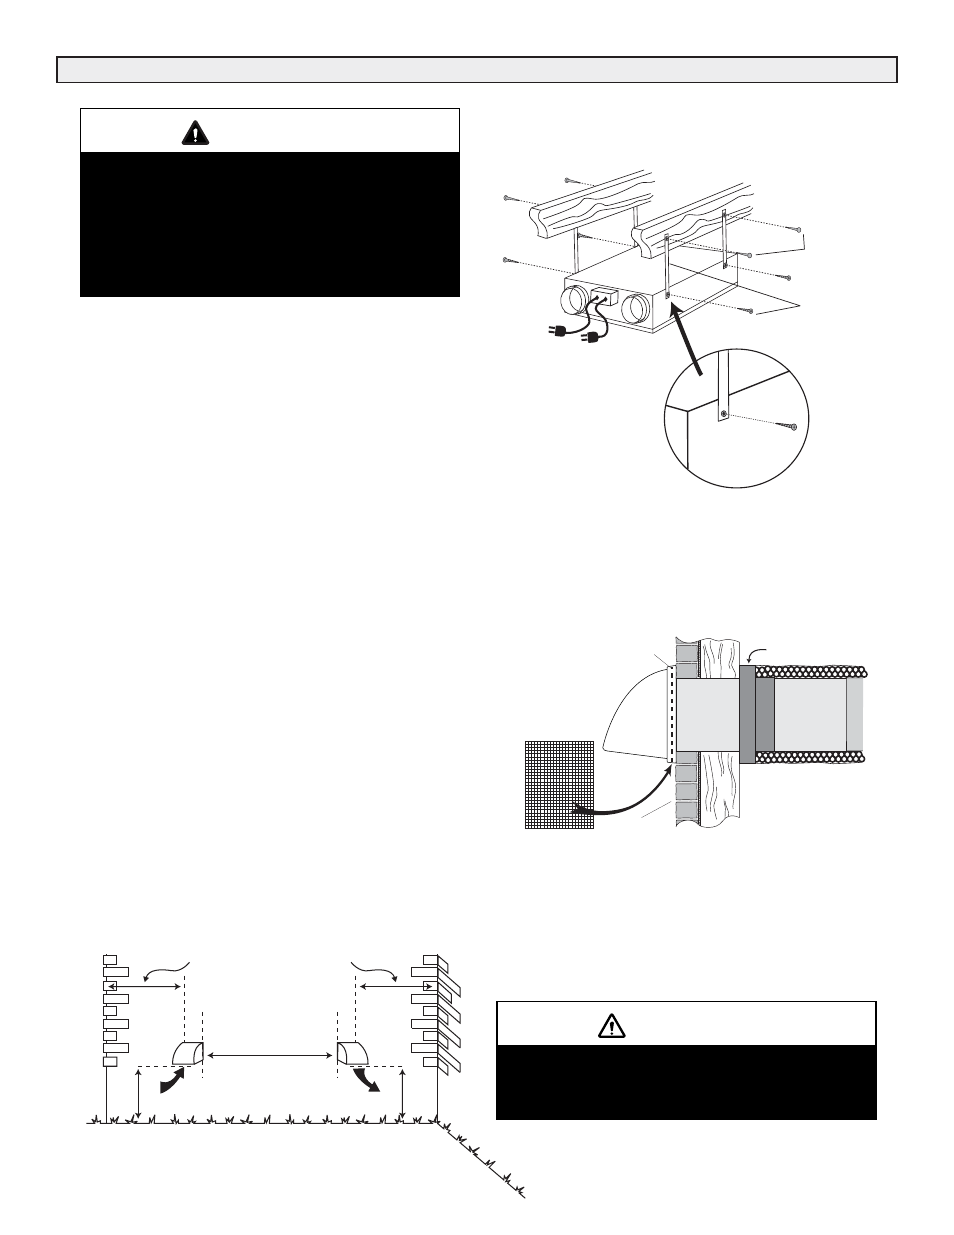
36" (1m)
recommended min.
36" (1m)
recommended min.
6' (2m)
recommended min.
18" (460mm) min.
18" (460mm) min.
OUTSIDE CORNER
INTAKE
EXHAUST
INSIDE CORNER
8
When installing the weather hood, its outside perimeter
must be sealed with exterior caulking.
* Local code may require greater distances.
Intake Weatherhood Requirements
• Should be located upstream (if there are prevailing
winds) from the exhaust outlet
• At least 6' (2 m) from the exhaust weather hood *
• At least 6' (2 m) away from dryer vents and air handler
exhaust (medium or high efficiency furnaces)*
• A minimum of at least 6' (2 m) from driveways, oil fill
pipes, gas meters, or garbage containers, swimming
pools*
• At least 18" (460mm) above the ground, or above the
depth of expected snow accumulation*
• At least 3' (1 m) from the inside/outside corner of the
building*
• Do not locate in a garage, attic or crawl space
* Local code may require greater distances.
Weather hood arrangement - requires a minimum
of 6’ (2m) separation and a minimum of 18" (460mm)
clearance above grade or anticipated snow level.
CAUTION
Weatherhood Clearances
STRAPS
AND
SCREWS
(supplied)
FASTENERS
(not supplied)
DETAIL
Unit is designed for
horizontal installation
only as shown.
Using full length hanger
straps is recommended
for vibration control, but
can be shorter if required.
Note: Illustration depicts unit suspended from wood floor joists. If
a different ceiling system is used, securing straps to floor will be
different.
Suspending the Unit using the
Provided Hanging Straps
Unit must be installed level to ensure proper
condensate drainage. Due to the broad range of
installation and operational conditions,
consideration must be given for the possibility
of condensation forming on the unit or
connecting ducting. Objects below the
installation may be exposed to condensate.
CAUTION
1. Thermal Collar slides over galvanized
sleeve of Weatherhood.
2. Fasten Thermal Collar to Belt.
3. Slide the Insulated Flexible Ducting over
the Weatherhood's galvanized sleeve and
fasten it to the Thermal Collar.
4. Hood is hinged to allow for easy access
for cleaning of bird screen.
1/4" (6 mm) SCREEN
(front view)
EXTERIOR
WALL
SCREEN
(side view)
COLLAR IS SUPPLIED TO
ENSURE VAPOUR BARRIER
IS 100% SEALED TO
WALL PLATE
12" galvanized
pipe supplied
Weatherhood Installation
Installation