Caution, Warning – Pentair Light and Return Water Flow Quasar User Manual
Page 4
P/N 98748000
4
REV. F
1-6-05
NOTE
For narrow, interlocking, extruded aluminum wall panels, center flange between the ridges while viewed from
the inside of the pool. Add the spacer and additional gasket to the flange before inserting the flange through
the wall panel. This is necessary to accommodate a fountain attachment.
11. With the inlet port of the fitting body in the 3 O’clock position, place the fitting body against the
threads of the flange and keeping the inlet port in the 3 O’clock position; see Figure 6. Hand tighten
the flange as tight as possible. Rotate the flange, not the body.
CAUTION
Do not over tighten the flange.
12. To complete the tightening process, hold the flange in place and
rotate the fitting body until the inlet port is in the 6 o’clock
position; see Figure 6.
13. Take a hose clamp and place it over the return hose cuff.
14. Slip the return hose from the equipment, over the inlet port, and
tighten the hose clamp securely; see Figure 7.
15. Take the bulb assembly and insert it through the flow director.
Note the aligning keyway on the bulb assembly as shown in
Figure 8. The keyway must point in the same direction as the top
key on the fitting body.
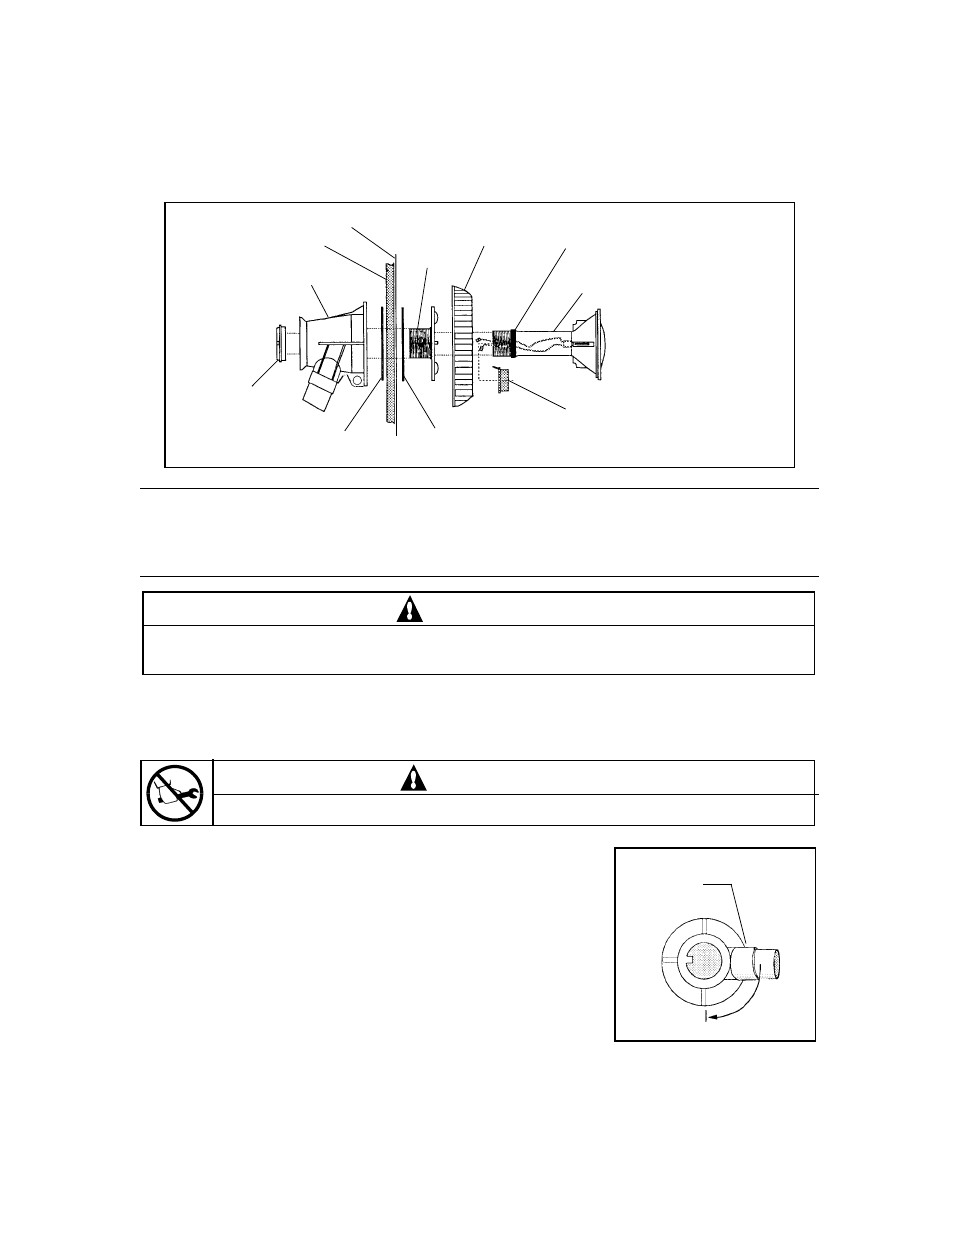
O-Ring—Use silicone
lubricant only. Do not use
any petroleum lubricants.
Bulb Assy.
Flow Director
Flange
Liner
Pool Wall
Body
Nut
(Bulb Assy.)
GASKET
GASKET
Red Cap/Plug.
Remove after bulb is in
place in the Fitting Body.
Figure 5.
Inlet Port
3 O’clock
position
6 O’clock
Figure 6.
WARNING
The light fixture must be mounted so that the word "top" is at the top of the fixture when
installed. Incorrect orientation and a low water condition can damage the light fixture.