Scan to the internal hard disk drive, Chapter 2 scan/email operations – Panasonic C263 User Manual
Page 14
14
Chapter 2 Scan/Email Operations
Scan to the Internal Hard Disk Drive
The scanned image can be saved to the Internal Hard Disk Drive, and then the saved data can be
retrieved using a computer via a network.
z
The hard disk is provided with 12 image boxes. For instructions on how to change the image box name, refer to
Editing Image Box Name (see page 56).
z
All data saved on the Hard Disk Drive can be deleted with a scanner function. For more details, refer to Chapter
5 “Scanner Settings” in the Operating Instructions (for Function Parameters).
z
When the image data is stored in the Hard Disk Drive, Scan/Email memory indication does not go below 1 %.
z
The Hard Disk Drive is included with DP-C354/C264, and it is available as an option for DP-C323/C263/C213.
1
Place the original(s).
z
For instructions on how to place originals,
refer to Basic Operation Procedure (see
page 6). For more details, refer to Placing
Originals (Copy) in the Operating
Instructions (for Basic Operations).
2
Press the Scan/Email key.
3
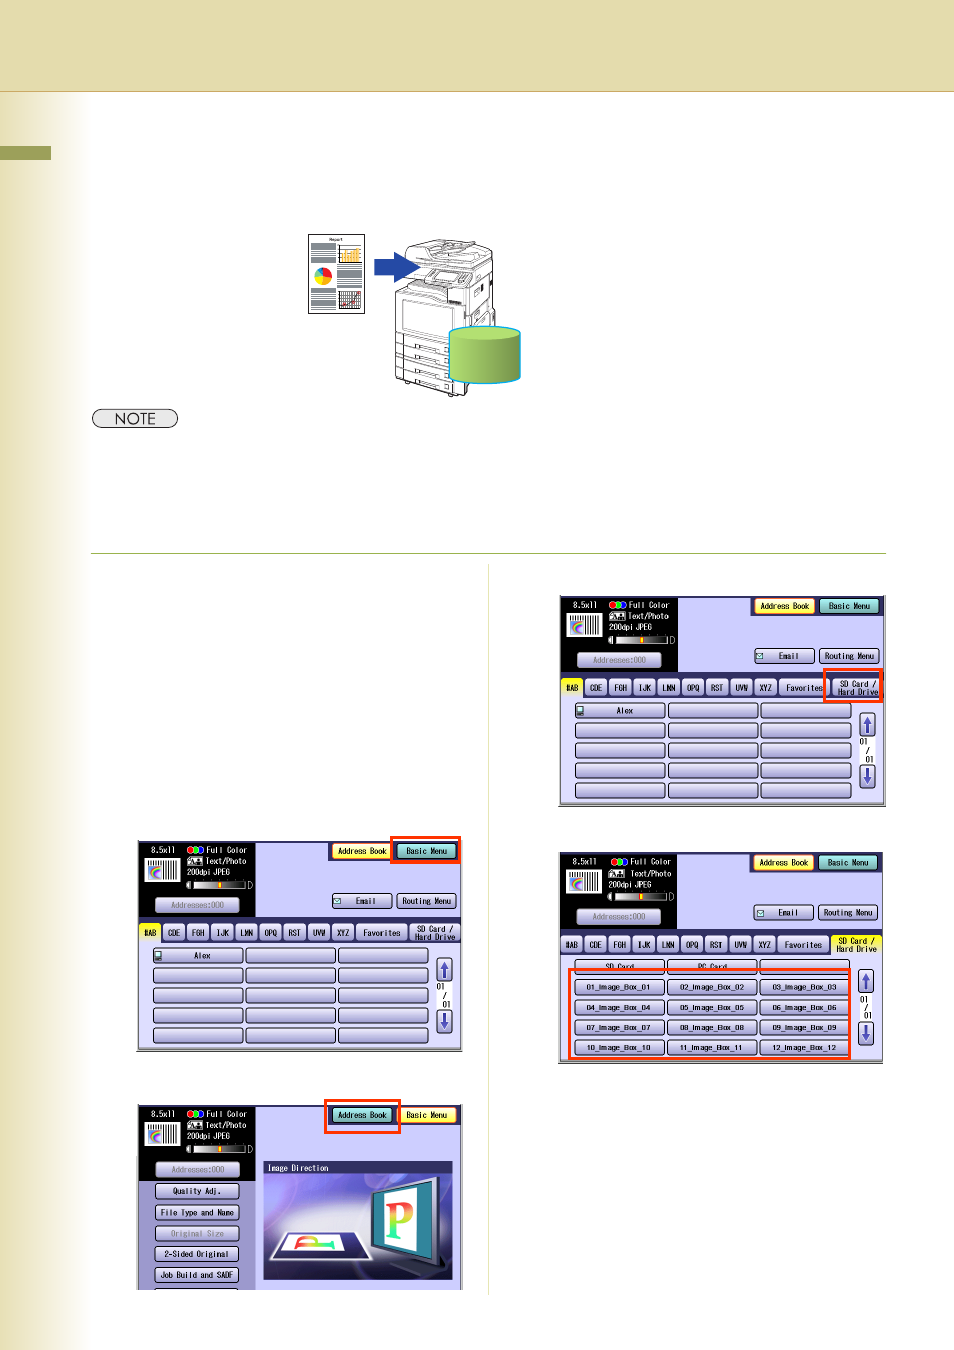
Select “Basic Menu” to configure the
required settings, and then select “OK”.
Refer to Scanner Settings (see
pages 38-50).
4
Select “Address Book”.
5
Select “SD Card/Hard Drive”.
6
Select an Image Box in the Hard Disk Drive.
z
Only one Image Box can be selected at a time.
z
When the Hard Disk Drive is selected to be
the storage destination, the scanned image
cannot be saved to the SD Memory Card, or
PCMCIA/PC Card at the same time.
7
Press the Start key.
When the document scanning completes, the
scanned data is saved on the Hard Disk Drive.
z
For instructions on how to download the saved
data, refer to Retrieve Scanned Image from
Hard Disk Drive (see page 15).
Hard Disk Drive