Primera Technology 090709-510963-(01) User Manual
Page 30
26
Creating Discs on a PC
Center The Print Image
NOTE:
Your printer comes from the factory pre-calibrated to print
the image in the center of the CD. You can use this adjustment if you
need to fine-tune this location.
If you ever wish to verify your factory-calibrated Vertical
and Horizontal calibration settings, you can run a simple
calibration procedure to assure that your images will be
centered when printed on a CD. To do this, refer to the
following steps:
1.
Verify that a disc and a color ink cartridge are installed
in the Publisher. It is important to use the same disc you
normally use for your publishing because different brands
of discs may vary slightly in size. Also, verify that the
Publisher is powered ON and that it is connected to your
computer.
2.
Click on the Center the Print Image and then the
Properties
button. The printer will begin printing the
calibration test print.
3.
When the print is complete, rotate disc 180º
and put the disc back in the input bin and
repeat step 2 using the same disc.
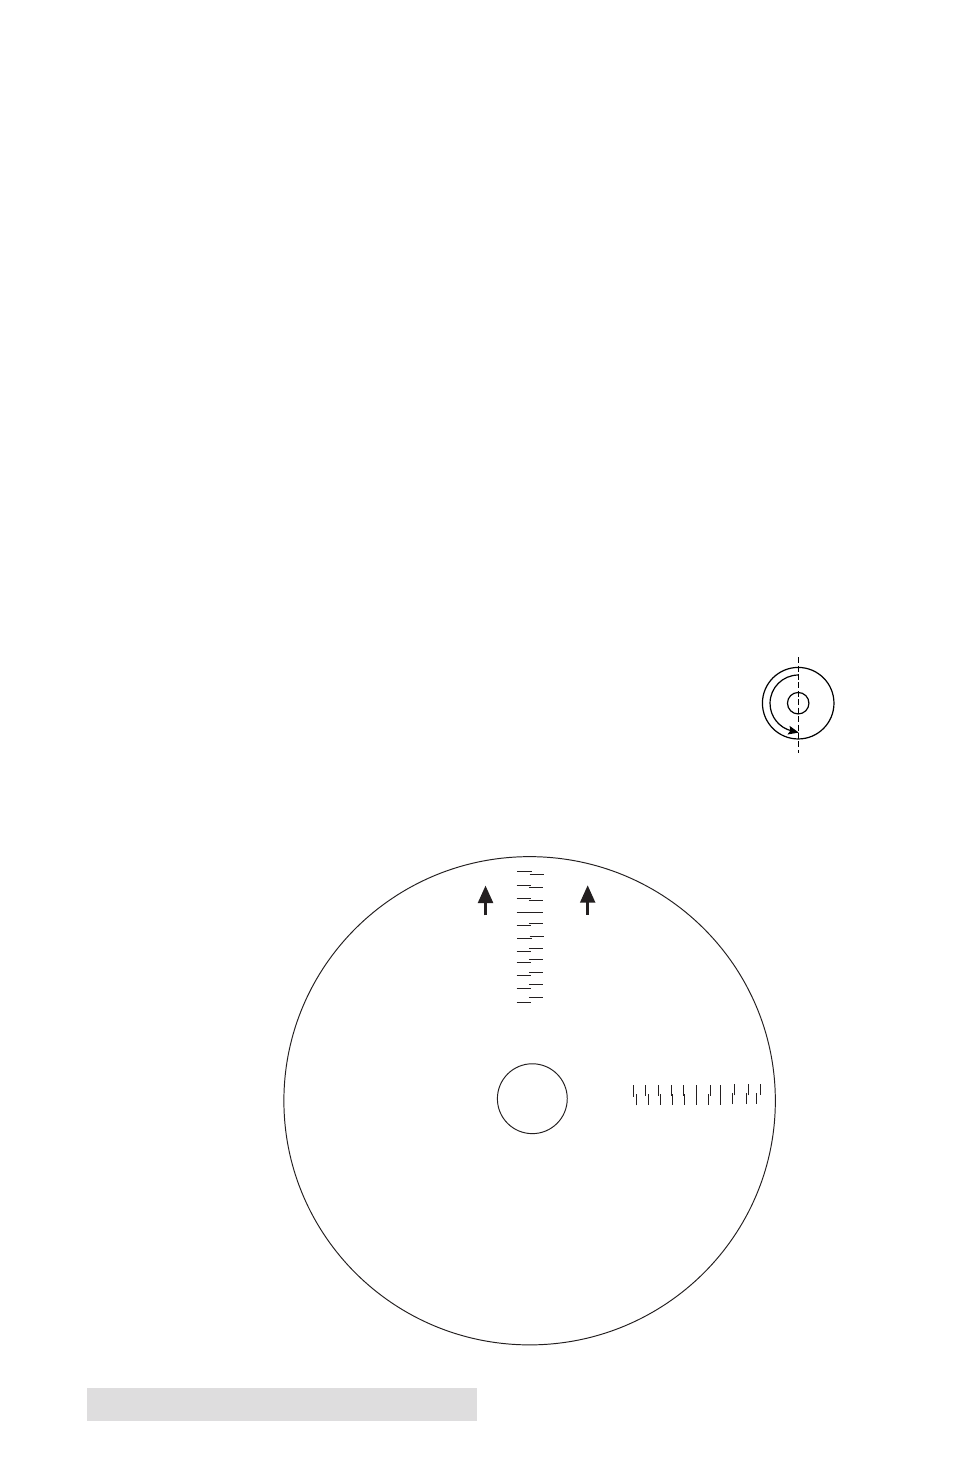
4.
When the second run of the print is complete, you should
have a test print that looks similar to the following:
-5 -4 -3 -2 -1 0 1 2 3 4 5
5 4 3 2 1 0 -1 -2 -3 4 -5
Horiz
ontal Calibra
tion
Find and enter the number
whose lines tough
(must be the SAME n
umber)
Ver
tical Calibra
tion
Find and enter the number
whose lines tough
(must be the SAME n
umber)
NOTE:
After printing this image
once, rotate this CD
so the ARROWS point
to the BACK of the printer
and print again.
-5
-4
-3
-2
-1
0
1
2
3
4
5
5
4
3
2
1
0
-1
-2
-3
-4
-5
BACK
BACK