Paradise RA 5785 User Manual
Page 21
Operations Manual, HPA3, Mini Compact Outdoor SSPA
208143 REV -
21
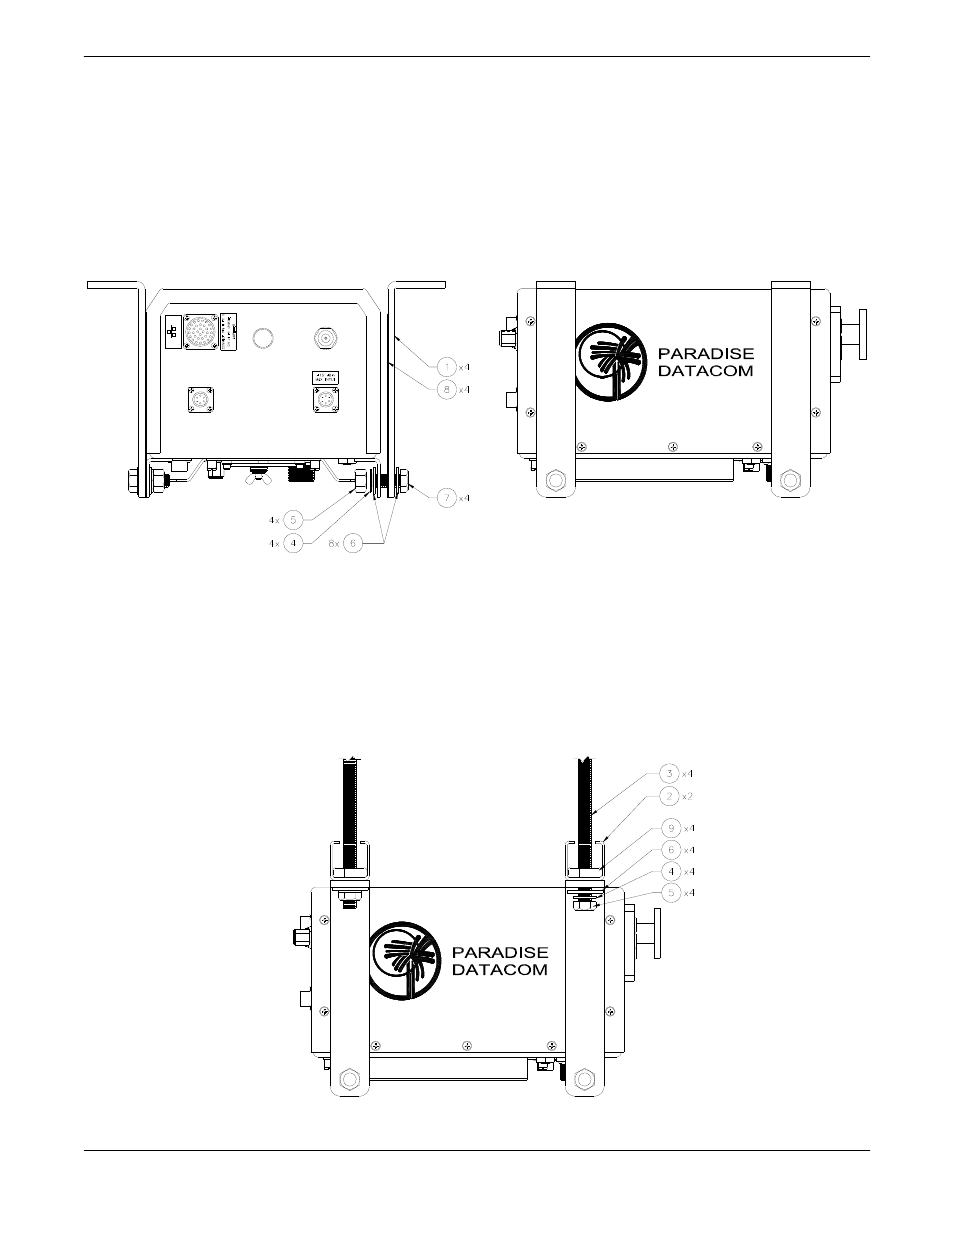
2.4.3 Installation
1. Cut gasket (Item 8) into four (4) 1.5” x 7” pieces. Attach gasket to each support bracket
(Item 1) as shown in Figure 2-3. Trim gasket around bottom corners and slot in bracket.
2. Locate the mounting studs on the bottom of the Mini Compact Outdoor SSPA unit. Using a
1/2” bolt (Item 7), two flat washers (Item 6), and a 1/2” nut (Item 5), firmly bolt one mount-
ing bracket to each mounting stud, as shown in Figure 2-3. Be sure the gasket installed in
Step 1 is between the bracket and the unit, that each bracket is vertical, and the top flange
of the mounting bracket points away from the unit.
3. Place one piece of Uni-Strut (Item 2), with the open channel up, at each end of the unit,
across the flanges of the mounting brackets, lining up the holes. Run on a self-holding nut
(Item 9) about 1” from the end of each All-Thread stud (Item 3). Slip the self-holding nut
into the channel and through the Uni-Strut and mounting flange. Secure firmly in place
with a flat washer (Item 6), lock washer (Item 4) and nut (Item 5). The unit should now look
as shown in Figure 2-4.
M & C
J4
SWITCH
J6
J1
RF IN
STATUS
SSPA
LINK
J5
E
T
HE
RNE
T
RE
A
D
Y
Figure 2-3: Attach Mounting Supports to Unit
Figure 2-4: Install All-Thread stud