Additional additional safety rules safety rules, Assembly assembly, Attaching or removing bit – Panasonic EY6450 User Manual
Page 4
- 4 -
Read “the Safety Instructions” booklet
and the following before using.
. ADDITIONAL
ADDITIONAL
SAFETY RULES
SAFETY RULES
1) Be aware that this tool is always in
an operating condition, since it does
not have to be plugged into an elec-
trical outlet.
2) When drilling or driving into walls,
floors, etc., “live” electrical wires may
be encountered. DO NOT TOUCH
THE CHUCK OR ANY FRONT
METAL PARTS OF THE TOOL! Hold
the tool only by the plastic handle to
prevent electric shock in case you
drill or drive into a “live” wire.
3) If the bit becomes jammed, im-
mediately turn the main switch off
to prevent an overload, which can
damage the battery pack or motor.
Use reverse motion to loosen
jammed bits.
4)
Do NOT operate the Forward/Reverse
lever when the main switch is on.
The battery will discharge rapidly
and damage to the unit may occur.
5) During charging, the charger may
become slightly warm. This is nor-
mal. Do NOT charge the battery for
a long period.
6) Use only a dry, soft cloth to wipe
the unit. Do NOT use a damp cloth,
thinner, benzine, or other volatile
solvents for cleaning.
7) When storing or carrying the tool,
set the Forward/Reverse lever to
the center position (switch lock).
8) Do not strain the tool by holding
the speed control trigger halfway
(speed control mode) so that the
motor stops.
9) Do not operate the speed selector
switch (LOW-HIGH) while pulling on
the speed con trol trigger. This can
cause the rechargeable battery to
wear quickly or damage the inter nal
mechanism of the motor.
10) Young children should be supervised
to ensure that they do not play with
appliance.
. ASSEMBLY
ASSEMBLY
Attaching or removing bit
Attaching or removing bit
NOTE:
When attaching or removing a bit,
discon nect battery pack from tool
or place the switch in the center
position (switch lock).
This tool is equipped with a keyless
drill chuck.
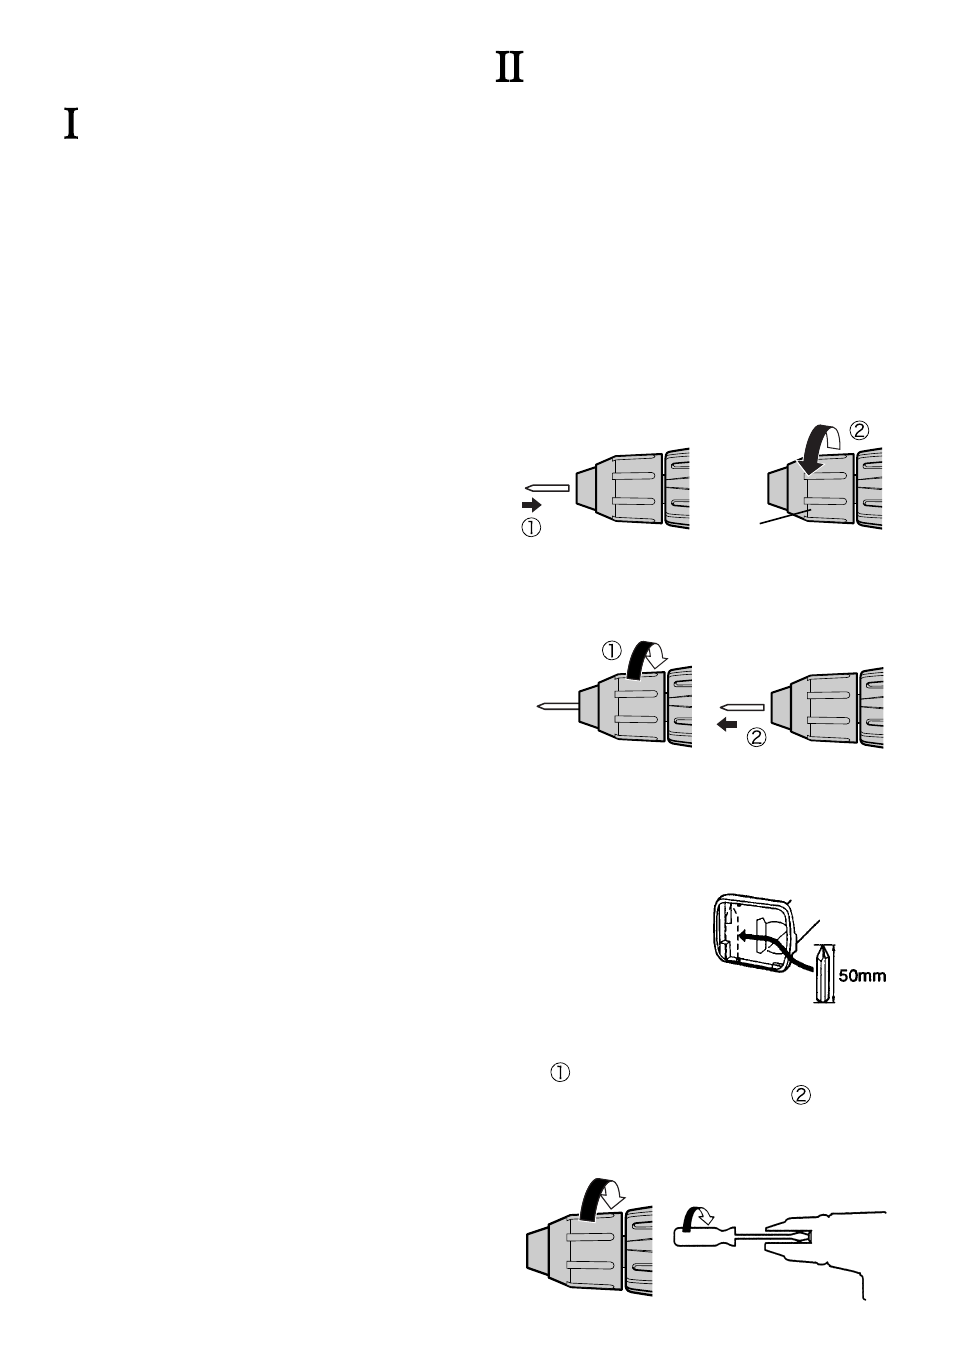
1.
Attachment
Insert the bit and turn the lock col-
lar clock wise (looking from the
front) to tighten firmly until it stops
clicking.
Lock collar
2.
Removal
Turn the lock collar counterclockwise
(looking from the front), then remove
the bit.
3.
Storage
Keep the bit in bit holder when not in
use.
R e m o v e t h e b a t t e r y p a c k t o
expose the bit storage compart-
ment inside the handle housing.
Bits up to 50
mm (1-31/32
inch) long can
be stored here.
NOTE:
If excessive play occurs in the
chuck, secure the drill in place and
open the chuck jaws by turn-
ing the lock collar and tighten
the screw (left-handed screw) with
a screwdriver by turning it counter-
clockwise (viewed from the front).