Philips BDP5506/F7 User Manual
Page 46
EN - 46
D Note for “IP Address”, “Subnet Mask”,
“Default Gateway”, “Primary DNS” and
“Secondary DNS”
•
The range of input numbers is between 0 and 255.
•
If you enter a number larger than 255, the number will
automatically be reset to 255.
•
When you enter a wrong number, select “Clear” to
clear. (The number will be reset back to “0”.)
•
If you want to enter a 1 or 2-digit number in one cell,
press [B] to move on to the next cell.
D Note for “Proxy Address” and “Proxy Port”
•
The range of input numbers for the port number is
between 0 and 65535. (If you enter a number larger
than 65535, it will be regarded as 65535.)
•
For proxy port, certain ports might be closed, blocked
or unusable depending on your network environment.
•
Choose a connection speed in accordance with your
network environment.
•
When the settings are changed, the network
connection may be disabled depending on the device.
Ⅲ Wireless
If you connect this unit to the network wirelessly, select
“Wireless” and set up necessary settings.
Please make a note of your Wi-Fi network name (SSID) and
its WEP / WPA key before proceeding with the setup.
Auto Scan
Search for Wi-Fi networks automatically and select the Wi-
Fi network name (SSID) from the list.
1. Follow steps 1 to 2 in “Auto Setup” on page 44.
2. Use [K / L] to select “Wireless”, then press [OK].
3. Use [K / L] to select “Auto Scan”, then press [OK].
• This unit will start searching for Wi-Fi networks
automatically.
4. The result of Wi-Fi network searching will be displayed.
Use [K / L] to select the appropriate Wi-Fi network
name (SSID), then press [OK].
• If you select an SSID without “ ”, please go to step
6.
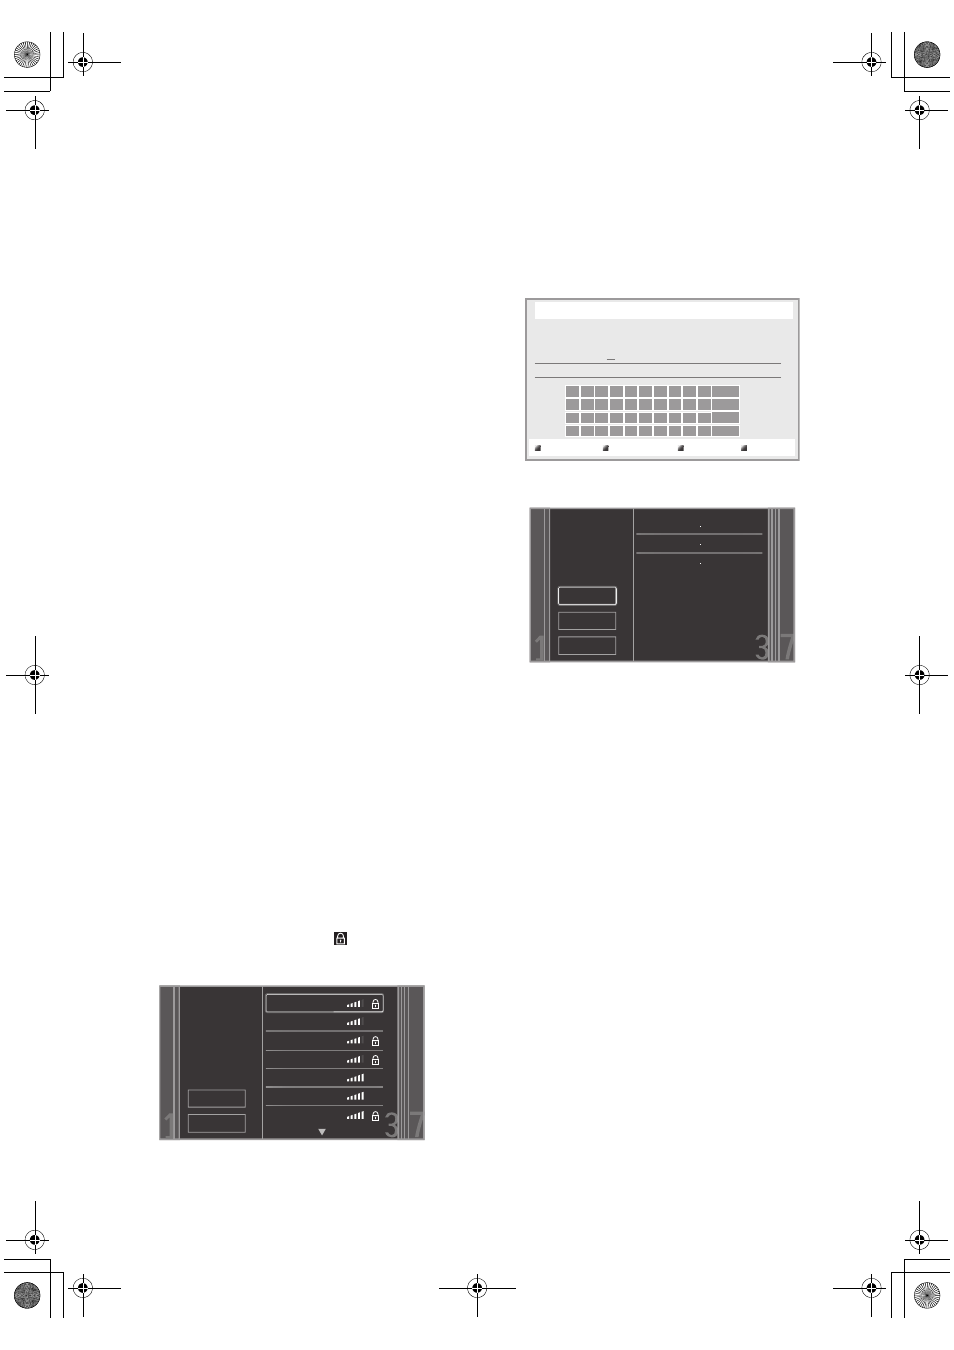
5. “Access Point Setting (Auto Scan)” screen will appear.
Enter the WEP / WPA key of the selected Wi-Fi
network using cursor buttons, number buttons and
color key, then press [Red].
• If you do not know the WEP / WPA key for your
Wi-Fi network, ask your ISP or the person who set
up your Wi-Fi Network.
6. Use [K / L] to select “Continue”, then press [OK].
7. Use [K / L] to select “Auto Setup” or “Manual Setup”,
then press [OK].
• If you select “Auto Setup”, follow step 5 in “Auto
• If you select “Manual Setup”, follow steps 3 to 12 and
14 to 16 in “Manual Setup” on page 44.
D Note
•
The internal wireless LAN supports following
specifications
Please select the
access point.
Rescan
Cancel
Access 1
Access 2
Access 3
Access 4
Access 5
Access 6
Access 7
- Wi-Fi standards
: IEEE 802.11 b/g/n
- Frequency spectrum : 2.4 GHz
- Security protocol
: WEP / WPA / WPA2
XXXXXXXXXX
a/A/@
Access Point Setting (Auto Scan)
Please input the WEP/WPA key with keypad or software keyboard.
Done
Cancel
Clear
Please confirm the
setting.
Rescan
Continue
Cancel
SSID
Access 1
Security
WPA-PSK(AES)
WEP/WPA Key
XXXXXXXXXX
E5WA0UD_EN_v3.book Page 46 Thursday, March 24, 2011 1:43 PM