Step 3: installing ink cartridges, Step 4: connecting the usb cable, Index – Primera Technology Primera Bravo Automated Opitcal Disc Duplication & Printing System II User Manual
Page 15
Hardware and Software Set-Up 11
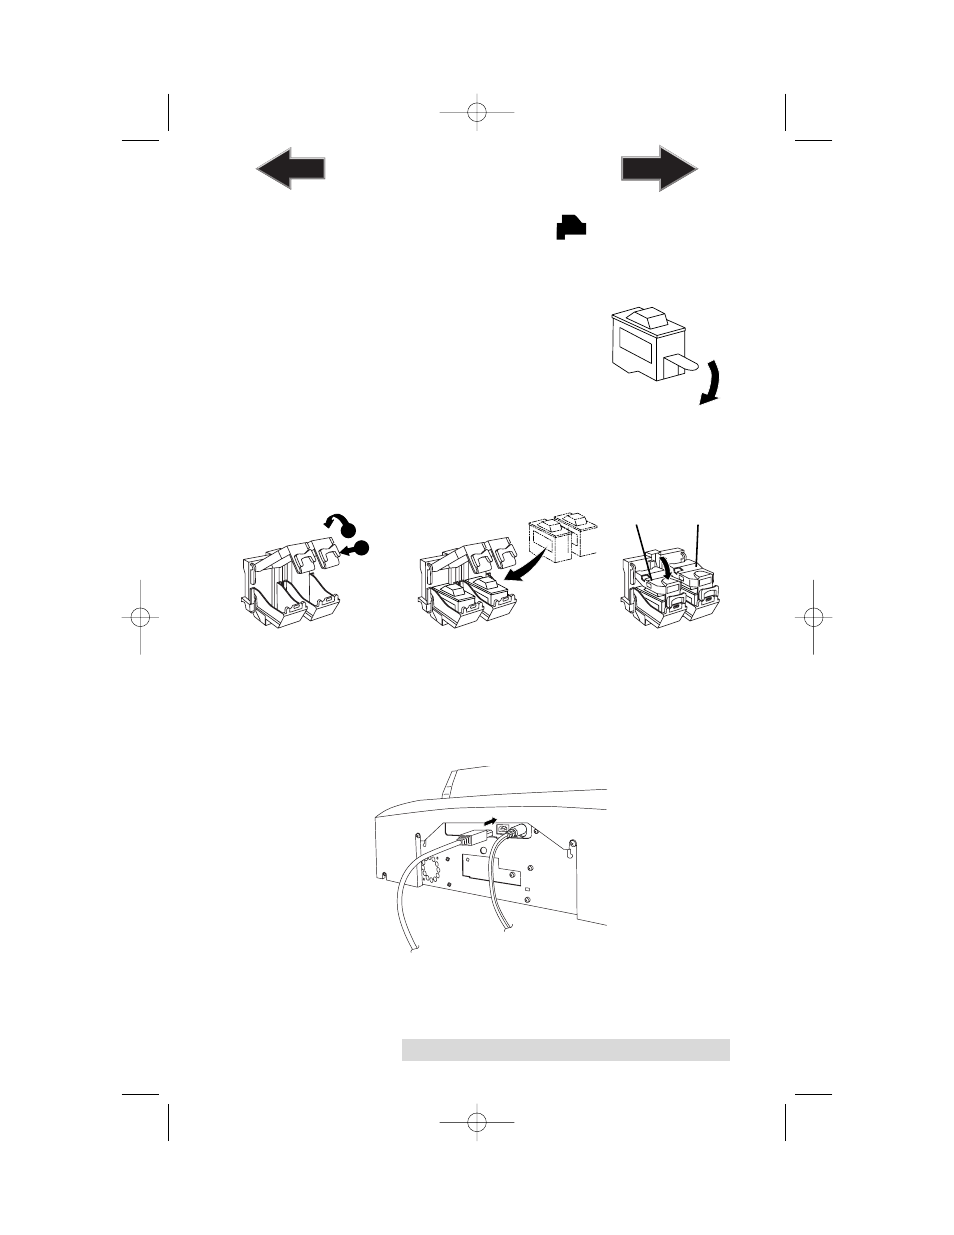
Step 3: Installing Ink Cartridges
• Press the Ink Cartridge Button to move the Ink
Cartridge Carrier to the load position and open the ink
cartridge covers
• Remove each ink cartridge from its packaging
• Slowly remove the tape covering
the cartridge's print head, being
careful to avoid damaging the
barcode label on the underside of
the cartridge.
DO NOT TOUCH THE COPPER AREA!
• Insert the ink cartridges into the carrier, copper end first
and snap the cartridge cover in place. Insert the color
in the left holder, monochrome black in the right
cartridge holder.
• Close the Publisher’s front cover.
Step 4: Connecting the USB 2.0 Cable
Connect the Publisher to your computer with the beige
USB 2.0 Cable.
1
2
1. Push in
2. Lift Up
Color
Black
510873PM.qxd 4/3/2006 4:56 PM Page 11
TOC
INDEX