Line-of-cut indicator – Porter-Cable 447 User Manual
Page 11
11
TO ADJUST 90° POSITIVE STOP
1.
DISCONNECT TOOL FROM POWER SOURCE.
2.
Set bevel stop sleeve to normal position (see Fig. 6).
3.
Loosen bevel adjustment knob (A) Fig. 5, and position base for 90° cut
being sure that the bevel stop sleeve is against the 90° stop screw.
4.
Turn saw upside down, retract telescoping guard and check squareness
of blade as shown in Fig. 7.
5. If adjustment is necessary loosen bevel adjustment knob, keeping bevel
stop sleeve in contact with stop screw, turn stop screw until squareness is
obtained.
TO ADJUST 45° BEVEL POSITIVE STOP
1.
DISCONNECT TOOL FROM POWER SOURCE.
2.
Set bevel stop sleeve to normal position (see Fig. 6).
3.
Loosen bevel adjustment knob (A) Fig. 5, and position base for 45° cut
being sure that the bevel stop sleeve is against the 45° stop screw.
4.
Turn saw upside down, retract telescoping guard and check 45° angle
as shown in Fig. 8.
5.
If adjustment is necessary loosen bevel adjustment knob and turn stop
screw until angle is correct.
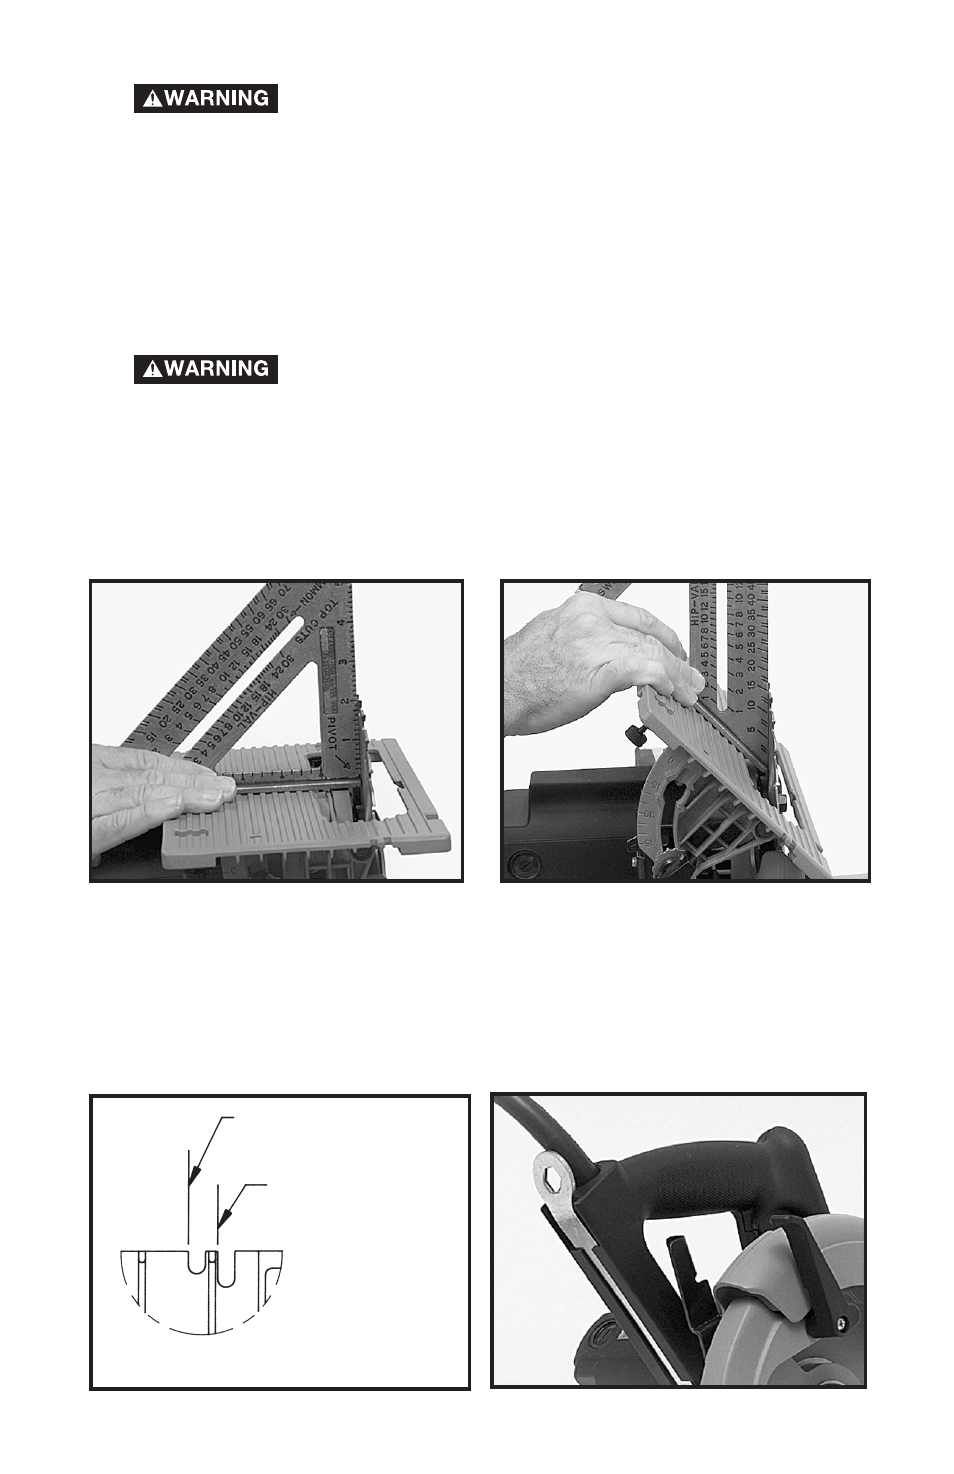
LINE-OF-CUT INDICATOR
Line-of-cut indicator slots (Fig. 9), are provided at the front of the saw base.
The right slot is used to follow a line when making a 90° cut. The left slot is
used to follow a line when making a 45° cut.
Fig. 7
Fig. 8
Fig. 10
SIGHT THIS EDGE
FOR 45° CUTS
Fig. 9
SIGHT THIS EDGE
FOR 90° CUTS
VIEW FROM
OPERATOR’S POSITION