3 mounting the hard drives, 4 configuring master/slave, Motherboard overview – Philips DVAA Series User Manual
Page 10
9
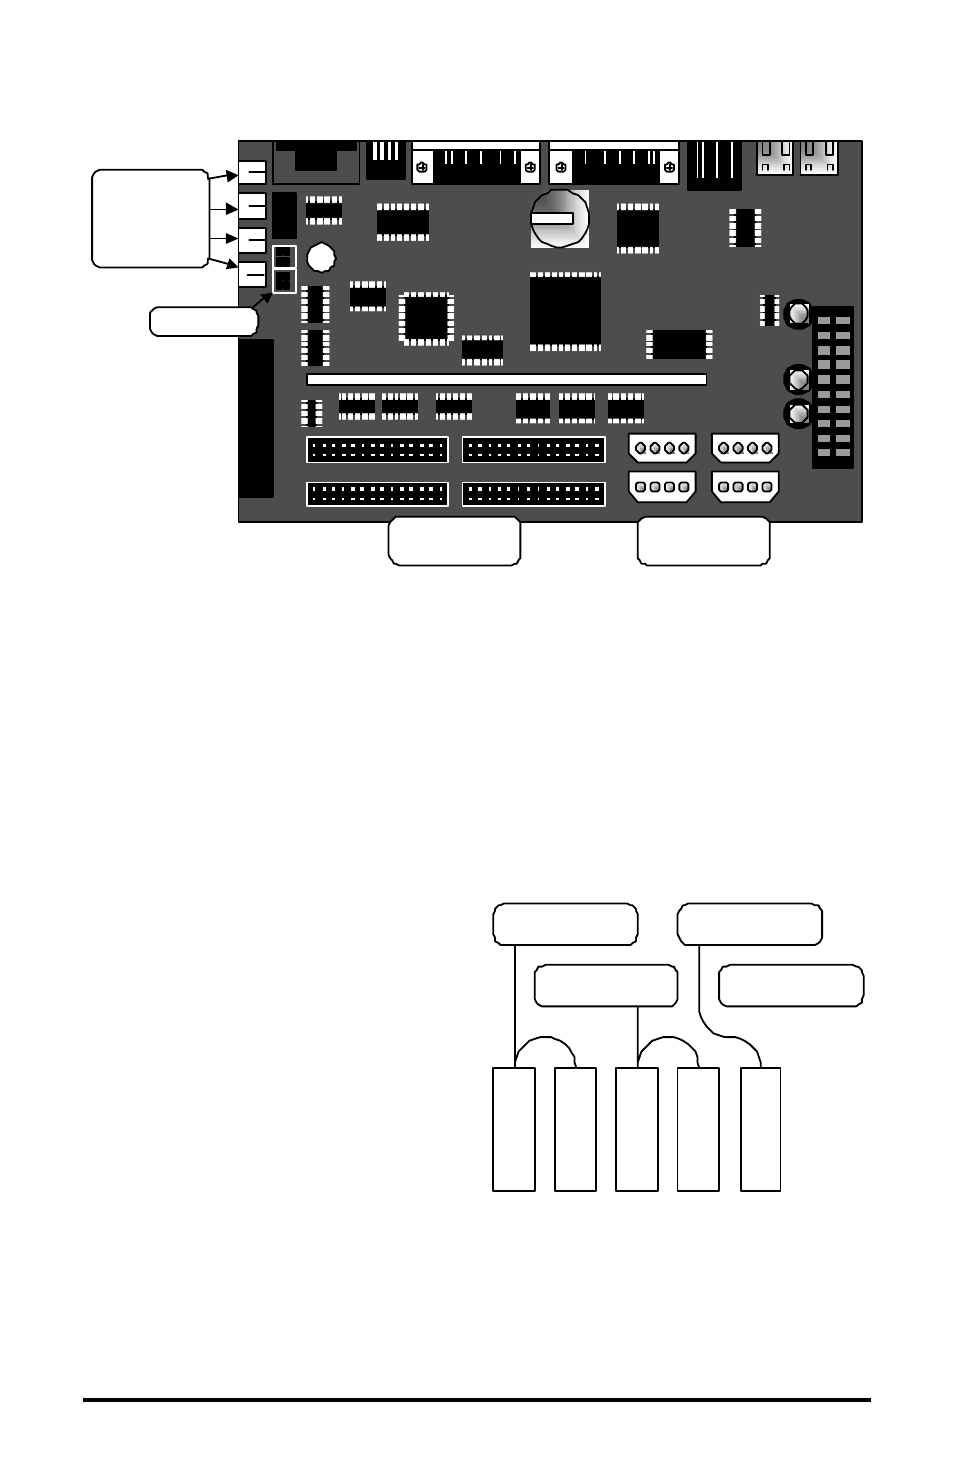
Motherboard Overview
IDE Power
Connectors
IDE
Connectors
Power
Supply
Load
Resistors
Jumpers
3.3 Mounting The Hard Drives
First remove the hard drive support bracket. Orient the hard drive so that the IDE
Power Connector is near the bottom of the chassis and facing the motherboard.
Populate the drive array in order, starting from the left.
Fasten the drive in place using the supplied screws. Fasten each drive using two
screws through the bottom of the chassis. Attach the Hard Drive Support
Bracket then fasten the hard drives to the bracket using the screws.
3.4 Configuring Master/Slave
Hard drives are connected in pairs to
each of the four IDE connectors. Each
pair of hard drives must have a Master
and a Slave. Configure the
Master/Slave setting on each hard
drive individually using the jumpers
provided with the drive. Use the
diagram located on the hard drive to
determine the proper jumper
configuration.
If a single drive is connected to an IDE
connector, it must be configured as a
Master.
IDE Connector #1
IDE Connector #2
IDE Connector #3
IDE Connector #4
Disk 1 Master
Disk 2 Slave
Disk 3 Master
Disk 4 Slave
Disk 5 Master
When configuring the jumpers on the hard drive, select 16 Heads, Master or
Slave.