Iv. assembly – Pride Mobility JET 3 User Manual
Page 23
Jet 3 Ultra
www.pridemobility.com
23
I V . A S S E M B L Y
To install the seat:
1. Set the trapeze bars to the desired height. To
change the trapeze bar height, see V. “Comfort
Adjustments.”
2. Tilt the seat back and slide the rear extrusion onto
the rear trapeze bar. See figure 10.
3. Lower the front extrusion onto the front trapeze
bar until the seat locks into place.
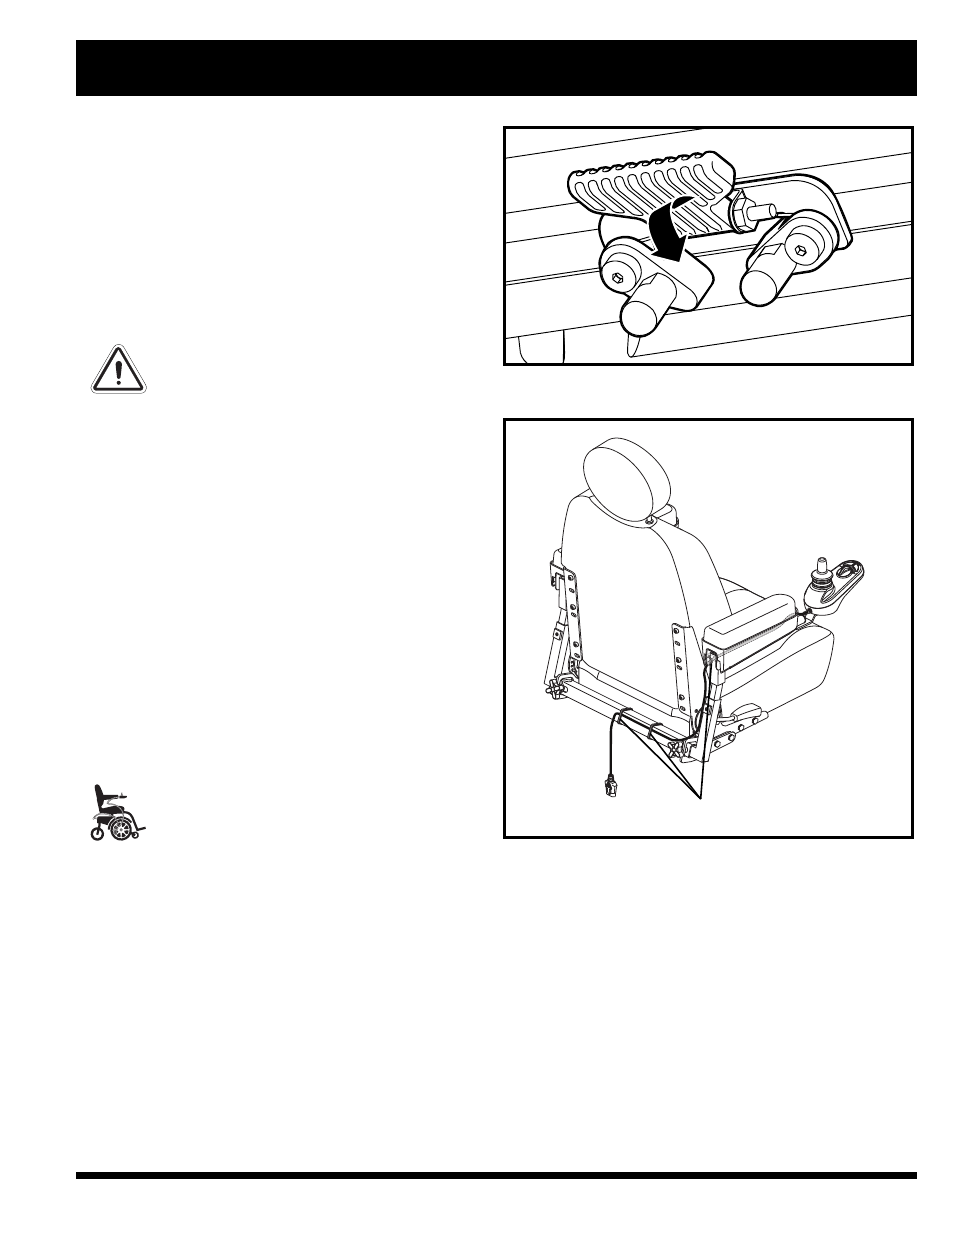
4. Flip the seat latch safety down. See figure 11.
WARNING! Make sure the seat latch
safety is flipped down before using
your power chair.
5. Install the controller into one of the armrests. See
V. “Comfort Adjustments.”
6. Turn the rear shroud fasteners one-quarter turn in
any direction. See figure 6.
7. Remove the rear shroud.
8. Plug the motor connectors, the charger inhibit
connector, and the battery connector into the
power module. See figure 7.
9. Reinstall the rear shroud. Turn the rear shroud
fasteners one-quarter turn in any direction.
10. Route the controller harness so that it cannot be
pinched in the seat hinge.
MANDATORY! Prevent controller
harness damage! Use correct tie-
down points for controller harness.
Avoid routing the controller harness
on the outside of the armrest pad.
Route the harness under the armrest
or toward the inside of the armrest
pad. Use correct tie-down points for
the controller harness to prevent the
harness from getting caught in the
drive tires, pinched in the seat frame,
or damaged when passing through
doorways.
11. Secure the controller harness to the armrest
receiver with wire ties. See figure 12.
Figure 11. Seat Latch Safety - Latched
WIRE TIES
Figure 12. Controller Harness Routing