Pentair Slide Backwash Valve User Manual
Page 7
Page 7
Figure 10. Slide Valve Performance Curve -
(Slide Valve with DE Filter Data Shown)
0.0
2.3
4.6
6.9
9.2
11.5
0
50
100
25
75
125
Flow Rate, GPM
Feet
of
Hd,
Ft.
h
d.
0.0
1.0
2.0
3.0
4.0
5.0
Pressure
Loss,
PSI
5. Inspect the shaft and the o-rings for wear, cuts,
cracks, and debris. If the o-rings show any sign of
wear or damage, replace with Jandy O-ring and
Roll Pin Replacement Kit (P/N R0442100).
NOTE The o-ring inspection includes the Lid o-ring.
Please be aware that the roll pins are different
lengths; the handle roll pin is 1" long and the
shaft roll pin is
13
/
16
" long.
6. Wash the shaft and o-rings with clean water and
dry with a lint-free cloth. Ensure that all debris is
removed.
7. Wash the lid surface of the valve (where the lid
o-ring is seated) and dry with a lint-free cloth.
Ensure that all debris is removed.
8. Lubricate o-rings with 100% silicone grease
lubricant, like Magic Lube
®
. Do not use any
lubricant containing petroleum products.
9. Place the shaft back into the Slide Valve and
tighten the lid union nut.
10. Return the Slide Valve handle to the normal
operating position (see Section 3).
11. Turn on system pump(s) and check for normal
water fl ow.
Section 6. Winterizing
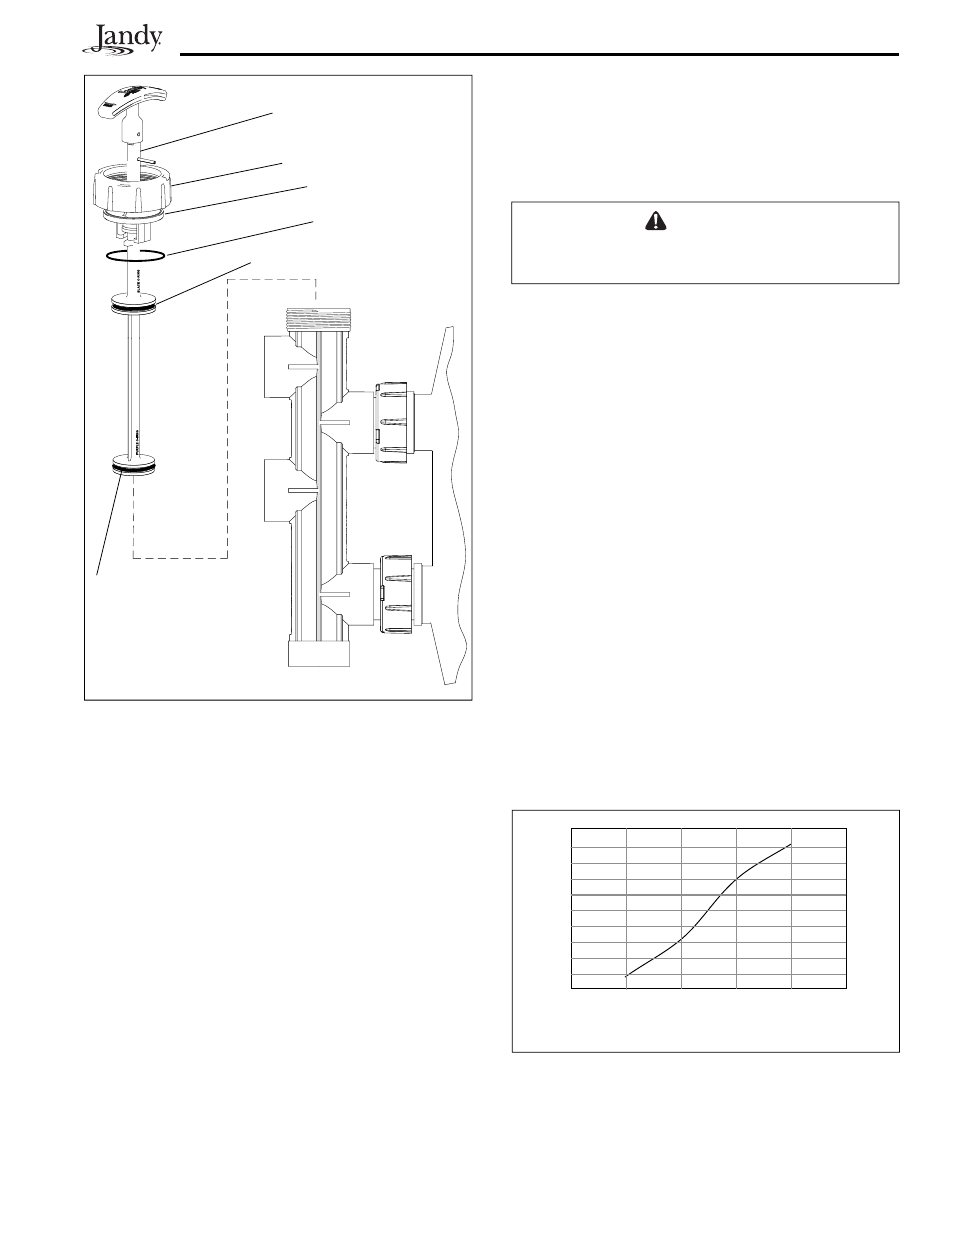
Lid O-ring
Shaft O-ring, Top (Black)
Shaft O-ring, Bottom
(Purple)
Shaft Assembly
Figure 9. Remove Slide Valve Shaft Assembly
Lid Union Nut
Index Plate/Lid
CAUTION
If not properly winterized, damage to the Slide Valve
will occur, which will increase the potential of injury.
1. Turn off the system pump(s).
2. Release all pressure from the system at the main
fi lter.
3. Loosen the lid union nut (see Figure 8).
4. Grab the Slide Valve handle and pull the shaft
assembly out of the valve (see Figure 9).
5. Allow all water to drain out the valve.
6. When it is confi rmed that there is no water left in
the valve, place the shaft back into the Slide Valve
and tighten the lid union nut.
7. Position the Slide Valve in Backwash mode (see
Section 4).
(DE Filters) Ensure that the Slide Valve handle is
fully extended (handle pulled all the way up). See
Figure 7.
(Sand Filters) Ensure that the Slide Valve handle
is fully depressed (handle and piston pushed all
the way down). Turn the handle until the stainless
steel pin on the piston locks into the position
bracket.