Motor to motor mounting plate, Motor and motor mounting plate to saw – Porter-Cable 36-678 User Manual
Page 14
14
MOTOR TO MOTOR
MOUNTING PLATE
DISCONNECT MACHINE FROM POWER
SOURCE.
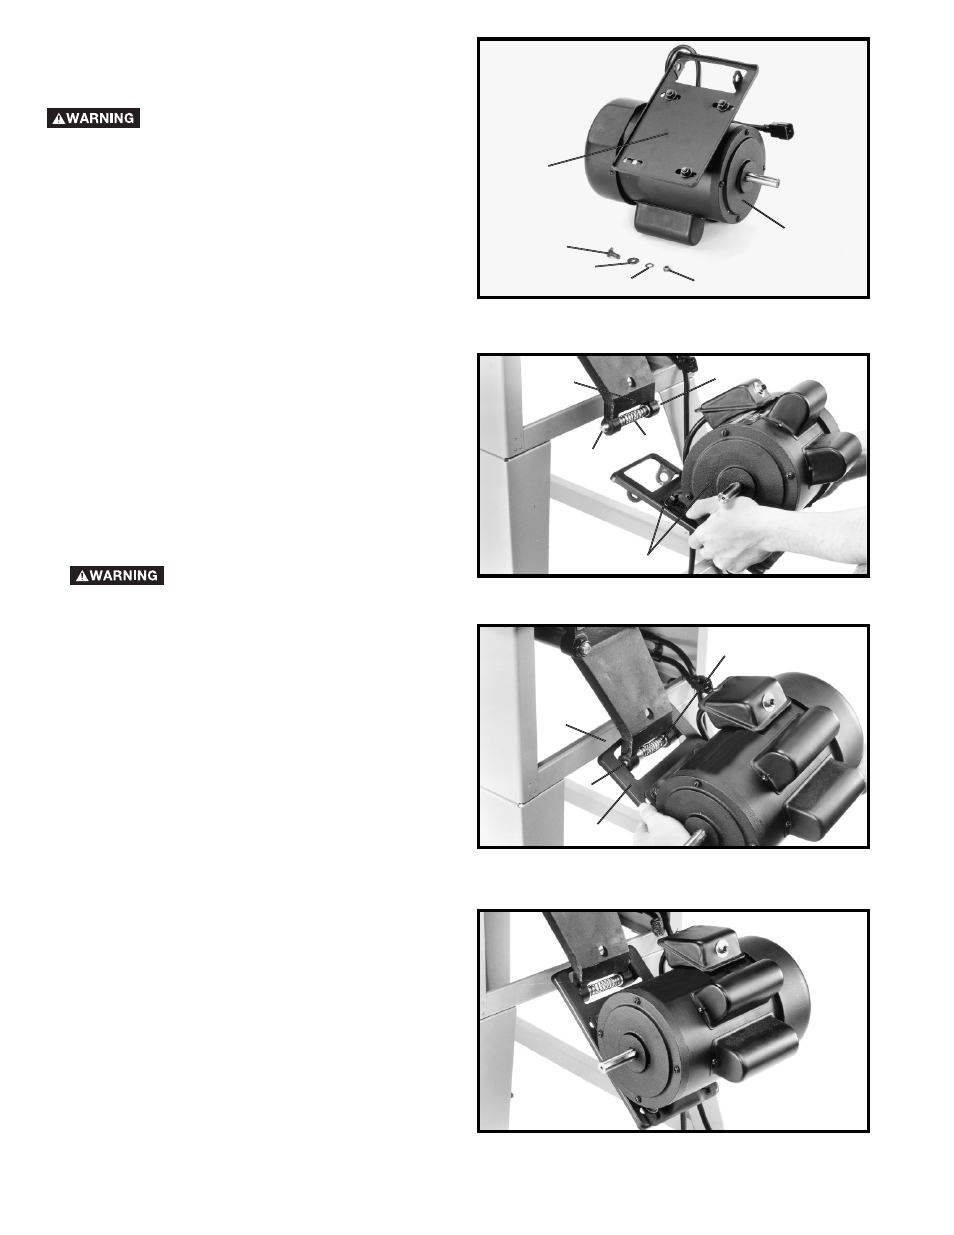
Assemble motor (A) to motor mounting plate (B) as shown
in Fig. 16. Align the four mounting holes in the motor
with the four holes in the mounting plate. Insert a 5/16-
18x3/4" carriage bolt (C), through the hole in motor and
then through the hole in the motor mounting plate, place
a 5/16" flat washer (D), then a 5/16" external tooth
washer (E) onto the carriage head bolt, and fasten with
a 5/16-18 hex nut (F). Repeat this process for the three
remaining holes in the motor and the motor mounting
plate.
NOTE: Do not completely tighten the hex nuts at this
time.
Fig. 16
A
B
C
D
E
F
MOTOR AND MOTOR MOUNTING
PLATE TO SAW
1.
DISCONNECT MACHINE FROM
POWER SOURCE.
2.
Insert a pin (X) Fig. 17, into the holes in each side of
bracket (B). NOTE: INSERT THE TAPERED END OF
PIN (X) FIG. 17, THROUGH THE INSIDE HOLE OF
BRACKET (B).
3.
Assemble spring (Y) Fig. 17, onto the non tapered
end of each pin (X) as shown.
4.
Position motor and motor mounting plate (A) Fig. 17,
below bracket (B) to allow bracket arm to slide through
large opening in motor mounting plate (A).
5.
Depress pins (X) Fig. 18, on both sides of bracket (B)
and rotate motor mounting plate (A) until pins (X) are
engaged in holes (D) Fig. 17, of motor mounting plate
(A).
6.
Fig. 19, illustrates the motor and motor mounting
plate assembled to the rear of the saw.
Fig. 17
A
B
Y
X
X
Fig. 18
B
A
X
X
Fig. 19