4 mounting and adjusting – Philips SQM5322/27 User Manual
Page 7
4
Make sure the screws are snug, but do not
over-tighten.
5
5
E
Tip
Use a longer bolt and spacer for
displays with curved or recessed
backs. Do not use the M6 Washer (O)
if you are using the M8 Bolts (J or K).
4 Mounting and adjusting
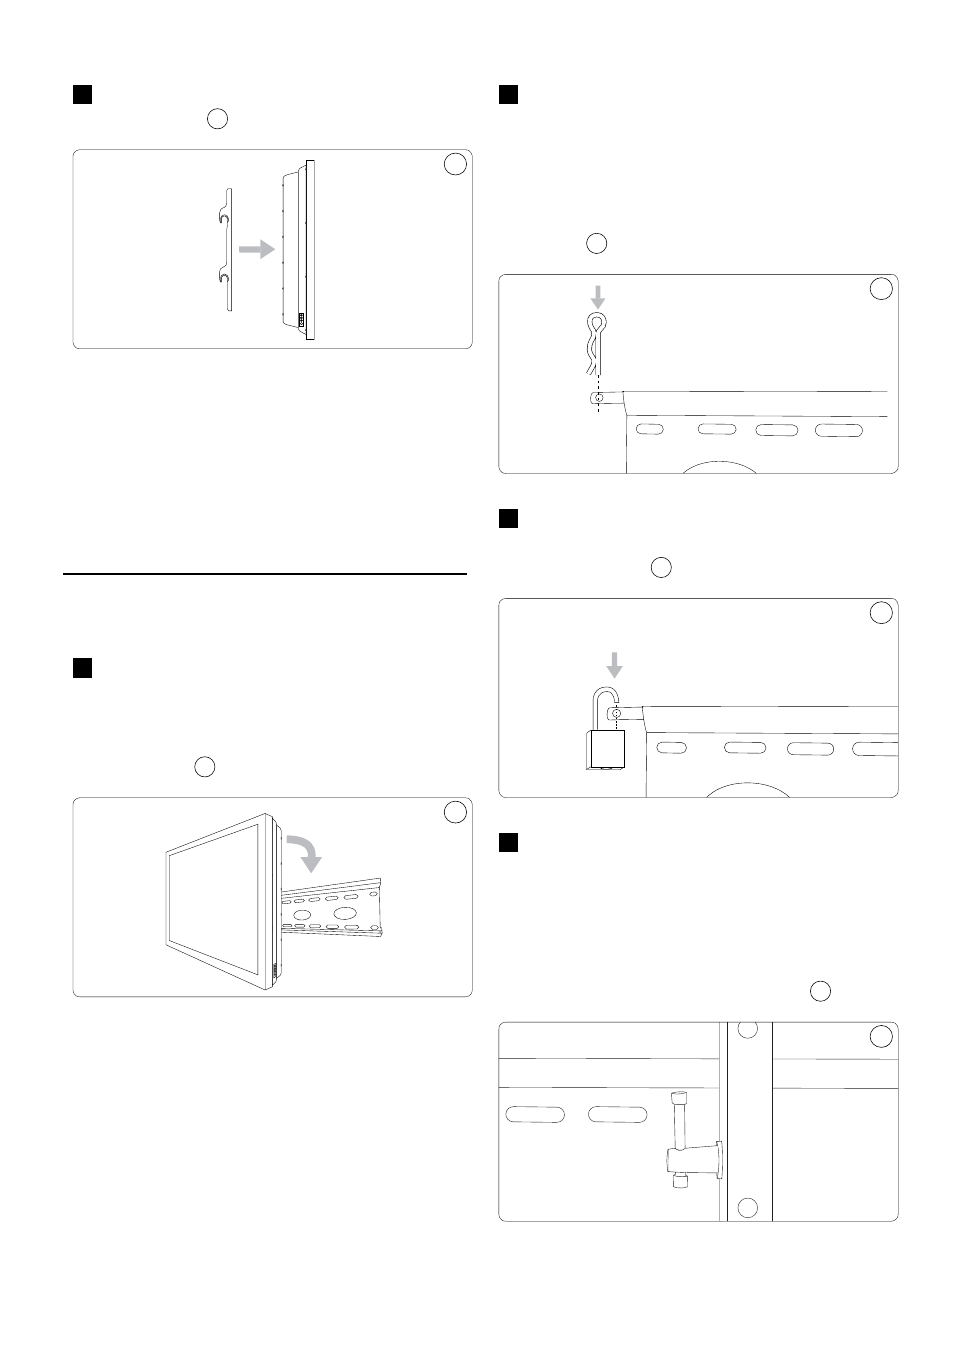
1
With the help of another person, carefully
lift your display and place it on the wall
plate. Do not release the display until the
mounting arms have securely hooked onto
the mount.
6
6
B
Warning
Insert the safety bar at the top of the
mount to avoid having the display
accidentally knocked off the mount.
2
This MUST be done in order to secure
the display to the mount. NOTE: A cotter
pin (included) Is used to secure the arms
to the mount OR a padlock (not included)
can be inserted into the hole at the end of
the saftey bar to help prevent theft of your
display.
7
7
3
A small padlock can be used to help
prevent theft of your display.
(not included)
8
8
4
To adjust the tilt position, have one person
hold the display in position while another
person loosens the two tilt adjustment
knobs located on either side of the wall
plate. Once the knobs are loose, move the
display to the desired angle. Re-tighten the
knobs before releasing the display.
9
9