Installing the voip sip phone, Connecting the sl4050/b12/e sip phone – Patton electronic SL4050/B2/E User Manual
Page 20
Installing the VoIP SIP phone
20
SmartLink 4050 Series Getting Started Guide
2 • Installing the SmartLink SIP Phone
Installing the VoIP SIP phone
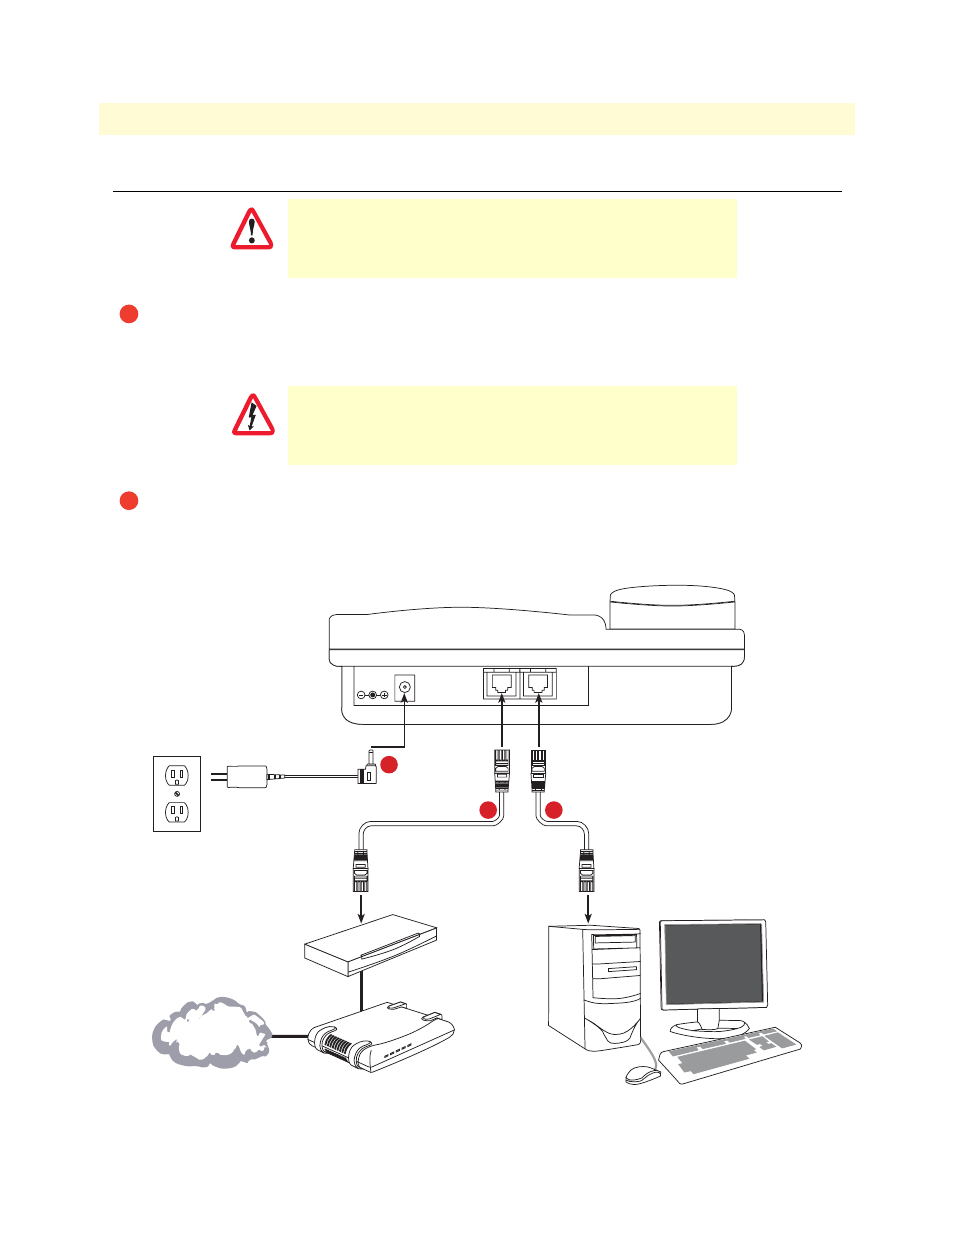
Figure 3. Connecting the SL4050/B12/E SIP Phone
The interconnecting cables shall be acceptable for external use
and shall be rated for the proper application with respect to volt-
age, current, anticipated temperature, flammability, and
mechanical serviceability.
Plug one end of the Ethernet cable included with the VoIP SIP phone into the LAN port on the SIP
phone (see
for SL4050/B12/E or
on page 21 for SL4050/B2/E). Plug the other end of
the cable into the xDSL modem or cable modem (or into an optional router or hub).
Do not work on the system or connect or disconnect cables during periods of
lightning activity.
If you will not be connecting a PC to the phone, go to step 3. Otherwise, connect an Ethernet cable into
the WAN port of the SIP phone (see
SL4050/B2/E). Plug the other end of the cable into the Ethernet port on the PC.
CAUTION
1
WARNING
2
DC IN 5V
WAN
LAN
Power adapter
Ethernet Cable (included with
SL 4050/10 phone)
Ethernet Cable (optional)
Router/Hub
(optional)
Cable/xDSL
modem
Power
Cable
LAN
RX
TX
PC (optional)
SmartLink 4050/10 VoIP SIP Phone
1
2
3
Internet or
optional WAN