Precor CONSOLE P80 User Manual
Page 81
Assembling the Treadmill
19
3.
Remove the seven screws holding the back cover in place.
Snap the back cover loose and set it aside, along with the
seven screws.
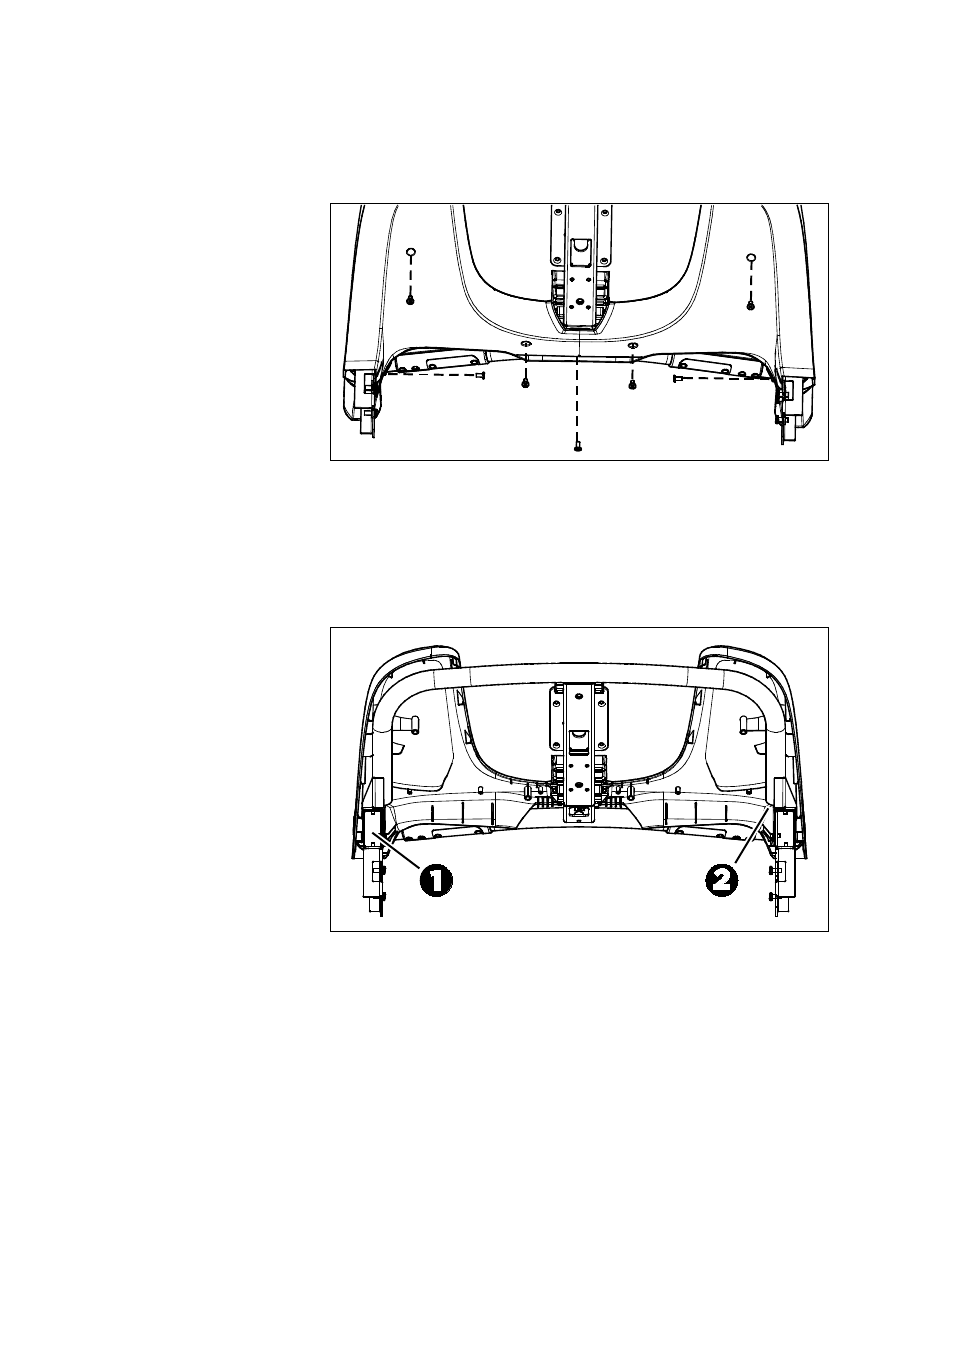
Figure 4: Removal and replacement of the rear fairing cover
4.
Remove the two ends of the base unit data cable from the
left arm of the fairing (position 1 in the following
illustration). Route the shorter of the two cable ends into
the fairing and extend the long end outward.
Figure 5: Cable storage locations in the treadmill fairing: base
unit data cable (1) and Auto Stop cable (2)
5.
Remove the Auto Stop cable from the tube on the
right-hand side of the fairing (position 2 in the preceding
illustration).
Important: In the following step, make sure that the end of
the data cable with the ferrite bead is the upper end. Likewise,
on the automatic stop sensor cable, the three-conductor
socket is the lower end and the four-conductor socket is the
upper end.