In-wall installation, Piega ap 3, as 3 – Piega AP 3 User Manual
Page 8
8
The AP 3, AS 3 loudspeakers can be flush mounted in a wall using a special mounting bracket so that only the loudspeaker front and
bracket frame are visible after mounting. This space saving mounting method allows you to enjoy the benefits of both quality sound
and a discrete design (refer to the alignment instructions on page 16).
PIEGA AP 3, AS 3
Positioning and mounting instructions...
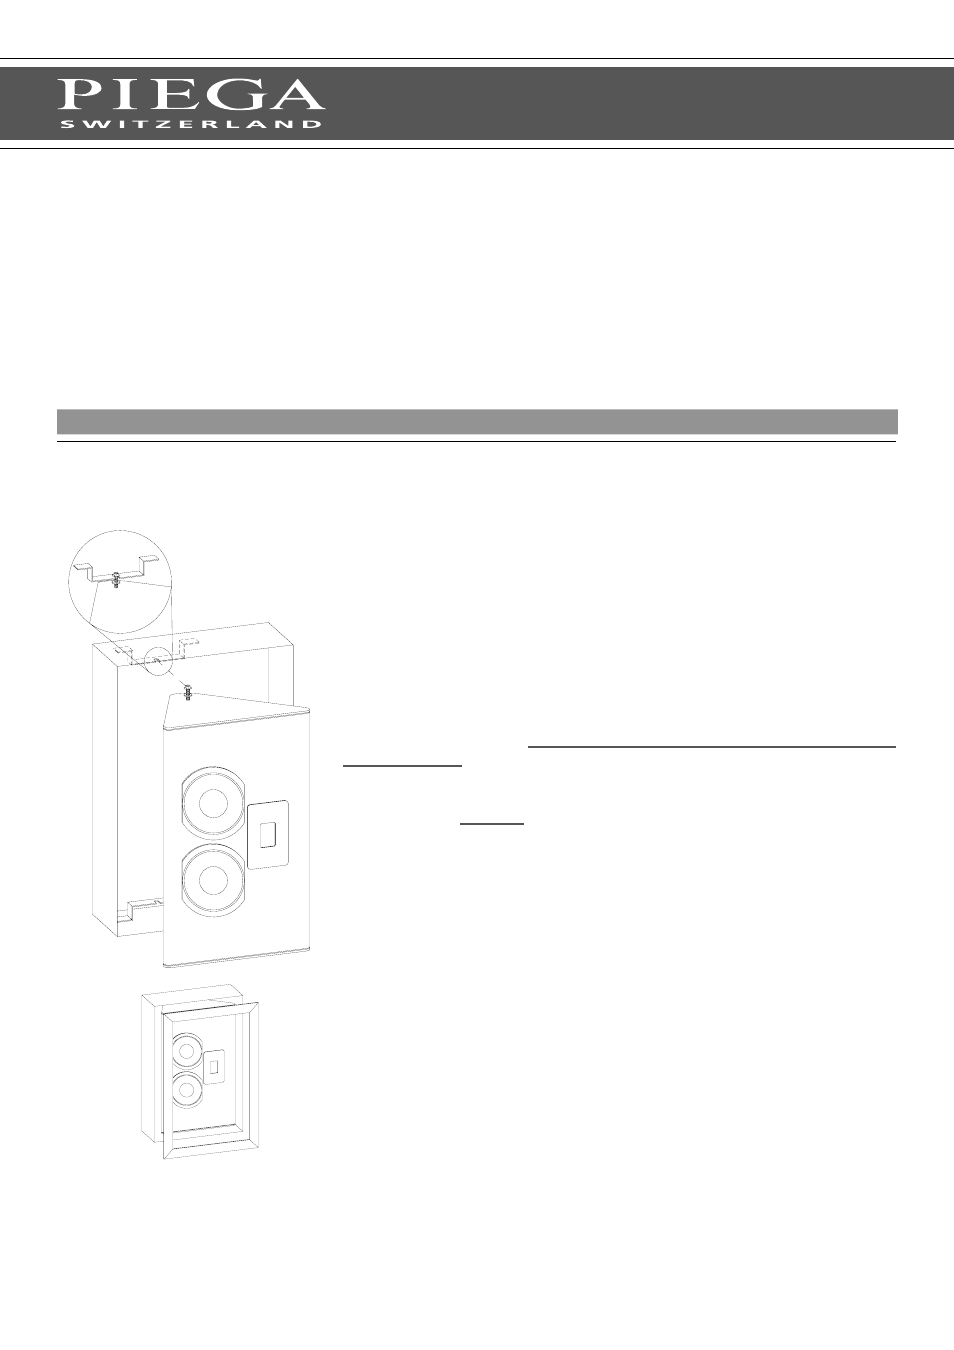
Mounting the flush-mounting frame:
>With concrete walls, the flush-mounting bracket must be mounted in
the recess at the required position without the loudspeaker (!) before
the wall is completed, i.e. when the wall is being built
>Bear in mind that empty conduits for the loudspeaker cables and
power supply cables (only for the active versions) must also be
provided in the recess - The holes required for this must be provided by
the customer...!
>The loudspeakers and the flush-mounting frame have an asymmetric
design, and so left/right alignment must be ensured
(Alignment instructions see page 16)
Fitting the loudspeakers in the flush-mounting frames:
>The loudspeaker should only be mounted and connected once the
building work is fully completed
>First of all, connect the loudspeaker cables to the terminals provided
(see the next page) and then mount the loudspeakers using the two
screws (see drawing)
> Do not mount the front panel until the end when the loudspeakers are
completely installed and connected
In-Wall Installation
Note:
Consult a specialist, i.e. the person responsible
from the building company with regard to the mounting without fail...!