Porter-Cable 4216 User Manual
Page 7
7
Fig. 6B
Fig. 6C
Fig. 6D
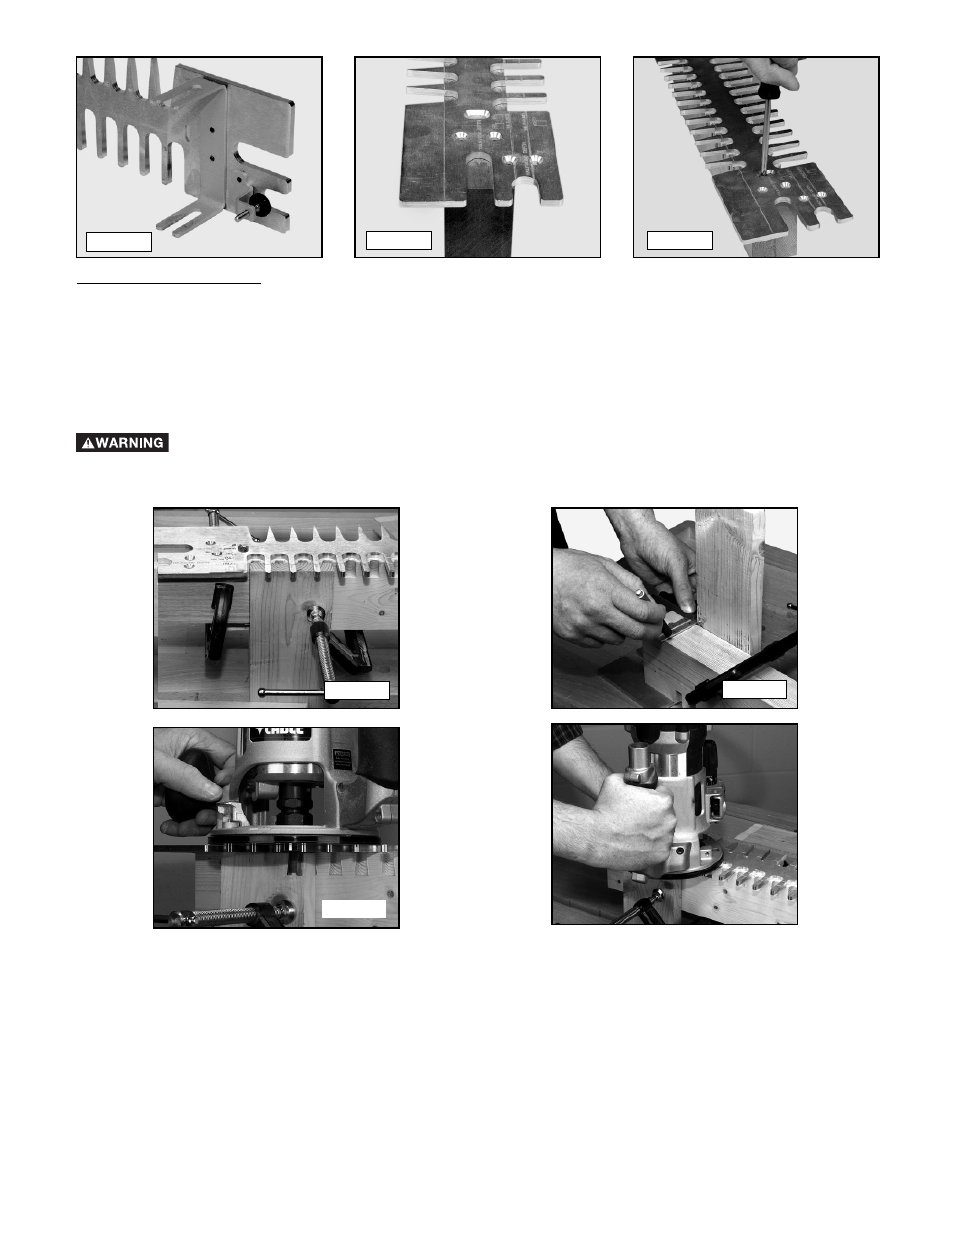
CUTTING THE TAILS
Step 3 -
Step 1 -
Step 2 -
Clamp the tail board with the outside surface facing away from the clamping board (Fig. 7A). Align
the tail board, using the instructions in your basic manual in the section “OPERATION”. Look under
“POSITIONING THE WOOD”, STEP 4.
This step is optional. Clamp stop blocks to the clamping board for rapid setups of repeated cuts.
Use a small square and a pencil to draw a line along the bottom of the clamping board (Fig. 7B). Align the
line with an edge of the tail board. (This line will be used to set up the pin board).
Use the width of the pinboard to mark the depth of the router bit on the tailboard (Fig. 7C).
DISCONNECT THE TOOL FROM THE POWER SOURCE.
Set the router bit depth, using the pencil mark from STEP 4.
Connect your router to the power source and cut the tails (Fig. 7D).
Step 4 -
Step 5 -
Step 6 -
Fig. 7A
Fig. 7B
- 36-729 (28 pages)
- 1500 (17 pages)
- PC600JS (32 pages)
- Dovetail Fixture/Jig 4113 (15 pages)
- 6605 (36 pages)
- 4210 (27 pages)
- METAL CUTTING SAW 440 (17 pages)
- PCB370SS (28 pages)
- 325MAG (15 pages)
- Double Insulated 10" Bench Top Table Saw 38129 (23 pages)
- 33-422 (28 pages)
- 90550124 (44 pages)
- 745 (52 pages)
- 447 (17 pages)
- 36-649 (32 pages)
- 347k (17 pages)
- 1400 (13 pages)
- FTS-150 (26 pages)
- XX55 (12 pages)
- 33-895X (32 pages)
- 3802L (23 pages)
- 345 (21 pages)
- 28-248 (28 pages)
- Miter Saw (4 pages)
- 36-225 (21 pages)
- 7549 (17 pages)
- Jig Saw (16 pages)
- 741 (16 pages)
- Model 543 (17 pages)
- Biesemeyer 1350734 (1 page)
- 725 (13 pages)
- PCB270TS (38 pages)
- 3802 (21 pages)
- (Model TS220LS) (29 pages)
- 743 (17 pages)
- 3700L (23 pages)
- PC1800AG (72 pages)
- 28-306 (20 pages)
- 440 (48 pages)
- 3807 (19 pages)
- 4212 (44 pages)
- PTX3 (8 pages)
- 314 (7 pages)
- RS830 (30 pages)