Securing the mount, Additional security – Premier Mounts PSM-442F User Manual
Page 10
10
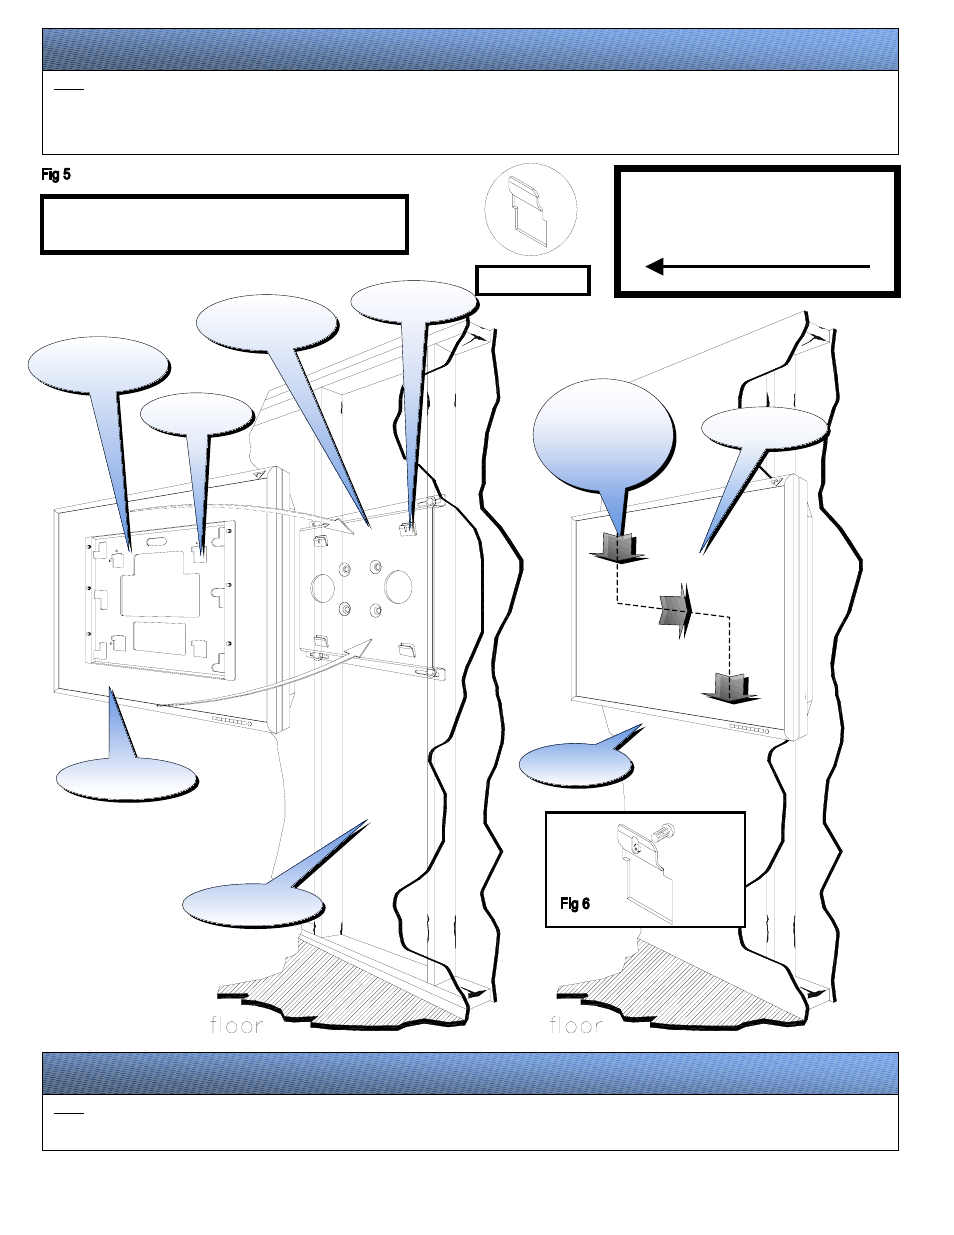
Securing the mount
Plasma display
PSM-series
mount
Universal flat
mount
Securing tabs
Tab openings
Wall structure
Plasma display
Wall structure
Align the tabs and
push the plasma
as shown on
arrows to lock in
place
Locked tab
Caution: All four (4) receiving tab openings from the
mounting bracket must be locked to the tabs found on
the flat back plate before letting go of the plasma
display. See the diagram on the left to see the
interlocked tab.
Caution: The plasma display is heavy and 2 people are needed to lift and
install it. Failure to do so could result in serious personal injury.
Additional security
(Does not apply to flat wall mounting)
Step 6
For additional security gradually tilt the bracket forward using a Phillips screwdriver. Secure the two (2) M6 x 12 (mm) Phillips screws (screws) see fig 6. Do not over tighten the screws.
Position the bracket to the desired angle.
Step 5
Warning: The plasma display is heavy and 2 people are needed to lift and install it. Failure to do so could result in serious personal injury.
Before placing the plasma on the wall recheck all hardware for proper tightness and security. Before installing, become familiar with the way the plasma mount attaches to the wall
mount. Align the four (4) tab openings to the four (4) receiving tabs on the flat back plate. When all four (4) the tabs are aligned slide the plasma down, right and down again to lock the
mounts together. Make sure all (4) tab openings are interlocked with the receiving tabs before letting go of the plasma. See fig 5.