07 video/audio adjust menu, Video adjust, Video/audio adjust menu – Pioneer Elite BDP-94HD User Manual
Page 39: Video/audio adjust menu 07, Chapter 7
Video/Audio Adjust menu
07
39
En
Chapter 7
Video/Audio Adjust menu
From the Video/Audio Adjust menu you can make various settings that affect how video is presented on your TV and how the sounds. Items
in the Video/Audio Adjust menu can only be changed during playback.
Video Adjust
• Default setting:
Standard
From the Video Adjust screen you can select the Standard or Cinema
video presentation or define presets of your own in Memory 1 to 3.
1
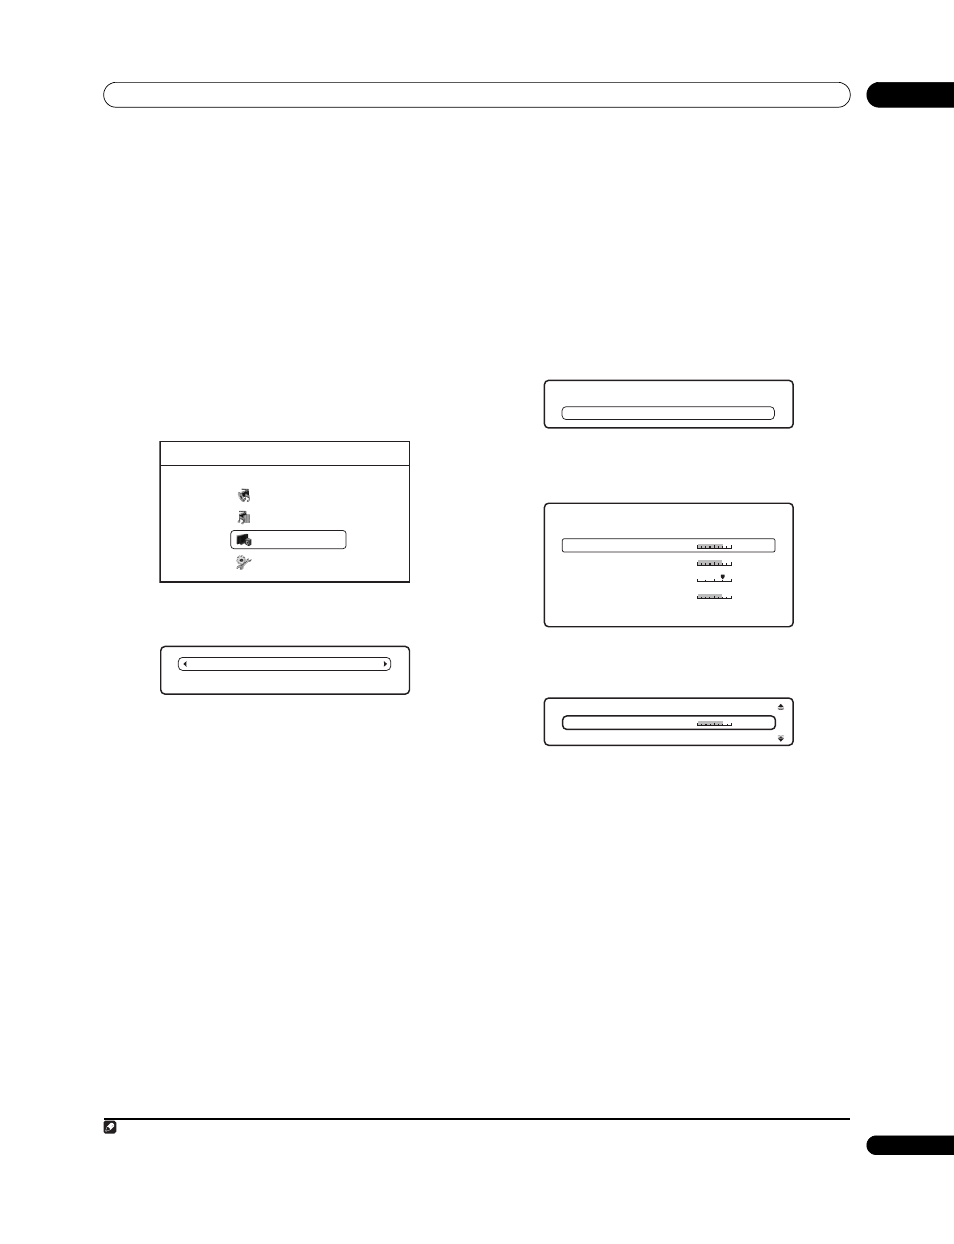
Press HOME MENU and select ‘Video/Audio Adjust’ from
the on-screen display.
You can press
VIDEO ADJUST on the remote to display the Video
Adjust screen.
2
Select ‘Video Adjust’.
3
Use the
/ buttons to select a preset.
•
Standard – Standard setting
•
Cinema
1
– Optimized for watching movies
•
Memory1/Memory2/Memory3 – Use for saving your own
presets (see Creating your own presets below)
4
Press ENTER or RETURN to make the setting and exit the
Video Adjust screen.
PureCinema
There are two types of video signals: Video material, with a frame
rate of 30 frames/second; and film material, that has a frame rate of
24 frames/second.
In PureCinema mode film material is converted to 60 frames/second
progressive for an exceptionally clear picture. Video output at 24
frames/second is converted to 60 frames/second.
For film material or sources otherwise recorded with a frame rate of
24 frames/second, video is output in PureCinema mode even if you
have Video Adjust set to
Standard, Cinema, or Memory 1, 2 or 3.
Additionally, film materials are output in PureCinema even if you
have the Video Adjust set to
Cinema. If you notice problems with the
images projected when set to
Cinema (images appear to move, or
zigzag), set the Video Adjust to
Standard or Memory 1, 2 or 3.
Creating your own presets
You can create up to three presets of your own.
1
Select one of the Memory presets.
2
Press
to select ‘Detailed Settings’ then press ENTER.
3
Adjust the picture quality settings.
• Use the
/ buttons to select a setting.
• Use the
/ buttons to adjust the current setting.
Select a setting then press
ENTER to display just that setting. This
gives you more screen area in which to see the effects of changes
you make.
• Press
ENTER or RETURN to go back to full-screen display.
You can adjust any or all of the following picture quality settings:
•
White Level
1
– Adjusts the intensity of white.
•
Black Level
1
– Adjusts the intensity of black.
•
Hue – Adjusts the overall color balance between red and green.
•
Chroma Level – Adjusts how saturated colors appear.
4
Press RETURN to save the preset and exit the Detailed
Settings screen.
Note
1 Effective only for video output from
HDMI OUT or COMPONENT VIDEO OUT connections (settings do no affect video output from VIDEO OUT or S-VIDEO OUT).
Home Menu
Disc Navigator
Home Media Gallery
Video/Audio Adjust
Initial Setup
Standard
Detailed Settings
Memory 1
Detailed Settings
Memory 1
Hue
M i n
Max
White Level
Max
Black Level
Max
Chroma Level
G re e n
Red
M i n
M i n
Memory 1
M i n
Max
White Level