Steps to self-configure linksys ata, Overview – Linksys Owtalk User Manual
Page 3
Steps to self-configure
Linksys ATA
1
Sign up for Owtalk at
http://www.owtalk.com
to get your self-
configuration information for Linksys ATA.
Plug the power cord and connect the WAN port on the back of the ATA
to your cable/ADSL modem, router, or broadband Internet connection.
The factory default network setting of most of the ATA is set as DHCP
mode, i.e. the device obtains the IP address automatically from the net-
work. Follow the steps below if your ATA is in DHCP mode. Otherwise
please refer to the device user manual on how to configure your device
to connect to a LAN or Internet under Static IP or PPPoE mode.
To obtain the IP address of the Analog Telephone Adaptor PAP2, press
110#
on your traditional landline phone after connected to the adaptor
to get your IP address.
2
3
4
Overview
This guide shows how to configure Linksys PAP2 Analog Telephone Adaptor
(ATA) so you can use the Owtalk service. But first you must be an Owtalk
subscriber.
Linksys ATA can be available in preconfigured mode, labeled as Owtalk
Preconfigured on the surface of the packaging box. Under the preconfigured
mode, all Owtalk SIP account information are pre-programmed, you don’t
need to go through the following procedures. Please refer to Appendix A on
how to activate an Owtalk preconfigured device.
Open Internet Explorer (or any other) web browser on your computer.
Enter the IP address of the ATA in the address field. For example, if it is
192.168.0.109, please type
http://192.168.0.109
in the address field.
A login screen will appear. Leave the User Name Field blank. Enter
admin
in the Password field. Then click
OK
button.
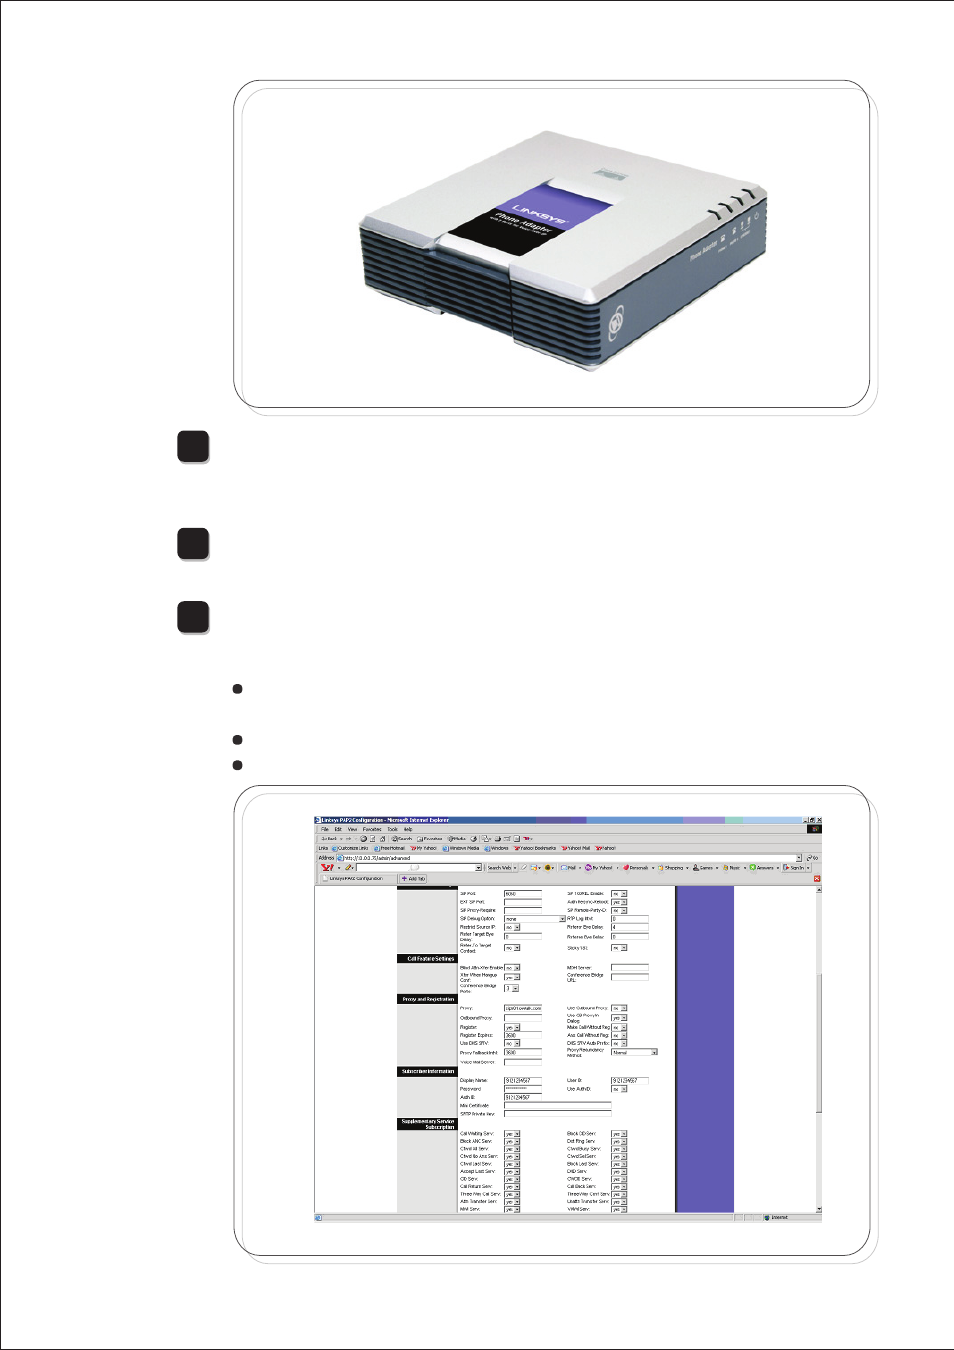
Click
Line 1
to enter the SIP Configuration. The configuration informa-
tion is available in the self-configuration tab in Owtalk after sign-up or
click
View SIP Account Configuration
in Owtalk
My Account
page.
Fill in the 10-digits Owtalk SIP User Name in the field of Display Name, User ID and
Auth ID.
Fill in the Owtalk SIP Password in the field of Password.
Fill in the Owtalk SIP Proxy/Server in the field of Proxy.
6
5
7