LeapFrog Nitro 4-Tec 3.3TM all-wheel-drive 4809 User Manual
Page 35
Nitro 4-Tec 3.3 • 35
Adjusting Your Nitro 4-Tec 3.3
Gear Ratios
Another Nitro 4-Tec 3.3 feature is the ability to change the gear ratios.
Currently, there are three optional gear ratios for the Nitro 4-Tec. The
stock gear ratio will provide very high (70+ MPH) top speeds. The
following gear ratio chart shows the available combinations with
optional spur gears and clutch bells.
Nitro 4-Tec gear ratios must be changed as 1st and 2nd gear sets in
order to maintain compatible gear center distances. The gear ratio
chart gives the only four compatible ratio choices.
Changing the Clutch Bell Gears
1. Remove the right, rear wheel. Remove the E-clip
from the two-speed shaft. Slide the pulley and belt off
of the shaft, being careful not to lose the pin that sits
under the pulley. Remove the pin. Slide the spur gears off
of the shaft (If you are using optional gears, you may
have to loosen the right chassis stiffener to remove the
spur gears).
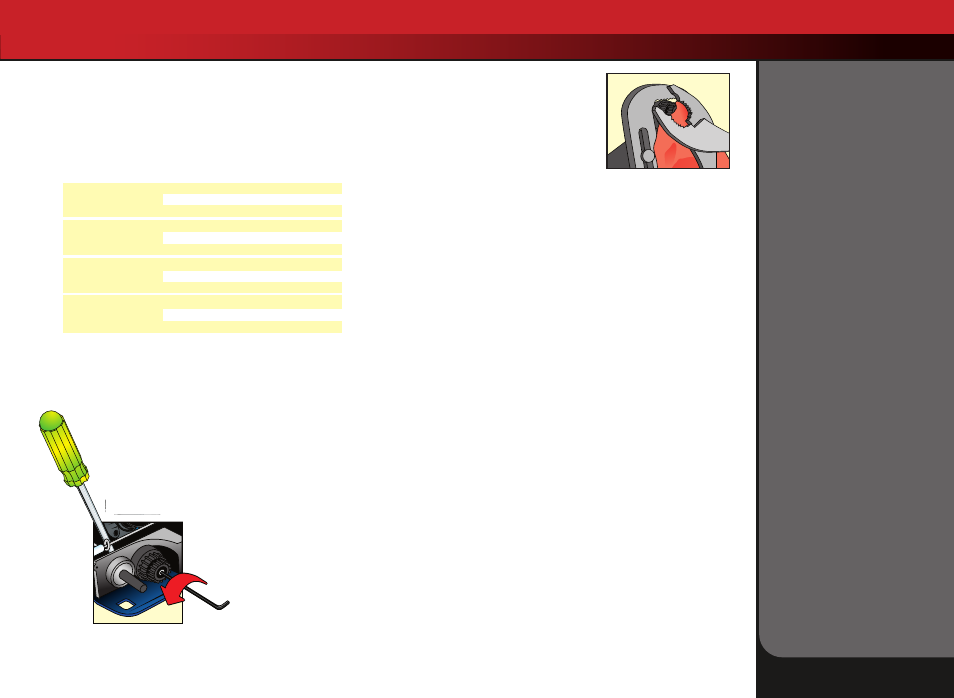
2. Lock the flywheel with a
flathead screwdriver to
immobilize it. Use a 2.5mm
hex wrench to unscrew
the caphead screw that
holds the clutch bell to the
pilot shaft. Remove the
clutch bell.
3. To separate the gears from the clutch
bell, gently grip the clutch bell with
channel-lock, adjustable pliers. Cover
the gears with a cloth to protect the
teeth. Using the pliers, unscrew the
gears counter-clockwise.
4. New clutch gears simply screw onto the clutch bell. Reinstall the
clutch bell and caphead screw onto the pilot shaft. Reinstall the spur
gears, pin, pulley and belt. Secure them on the two-speed shaft with
the E-clip.
5. To adjust the gear mesh, first loosen the four 3x10 countersunk
hex screws in the slotted holes in the bottom of the chassis.
Next, loosen the two countersunk hex head screws in the bottom
of the chassis which hold the slotted engine mount. The engine
should now slide back and forth. Slide a strip of thin note paper
between the spur gears and the clutch bell gears. Push the clutch
bell gears against the spur gears and tighten the screws on the
bottom of the chassis. Remove the paper and the gear mesh is now
correctly adjusted.
Centering the Servos
Whenever your radio system has been removed for service or cleaning,
the servos must be re-centered prior to installing the radio system in
the model. If the radio system is installed in the car, disconnect the
servo horns from the servos.
Connect the steering servo to channel 1 on your receiver and the
throttle servo to channel 2. The white wire on each servo cable is
positioned towards the crystal. Connect the red and black cable from
the battery holder to the “batt” terminal on the receiver. The red wire is
positive and the black wire is negative.
Place fresh “AA” batteries in the transmitter and turn the power switch
on. Slide the throttle and steering trim adjustments to to the center
position. Now install fresh “AA” batteries into the battery holder and
turn the power switch to the on position. The servos will automatically
jump to their center positions.
Turn off the battery holder switch followed by the transmitter. The
servos are now ready to be installed. Be careful not to move the servo
shaft when reinstalling the servo horns.
Gear
Clutch
Spur
Primary
Overall
Teeth
Teeth
Reduction
Reduction
Nitro 4-Tec Stock
1st 15
45
3.00
5.10
Equipment
2nd
19
41
2.16
3.67
Explosive acceleration
Optional Clutch Gears
1st 16
45
2.81
4.78
w/Stock Spur Gears
2nd
20
41
2.05
3.49
Very good acceleration
Stock Clutch Gears
1st
15
41
2.73
4.65
w/Optional Spur Gears
2nd
19
37
1.95
3.31
Good acceleration
Optional Clutch Gears
1st
16
41
2.56
4.36
w/Optional Spur Gears
2nd
20
37
1.85
3.15
Moderate acceleration