Lowrance electronic AirMap 500 User Manual
Page 65
59
1.
2.
3.
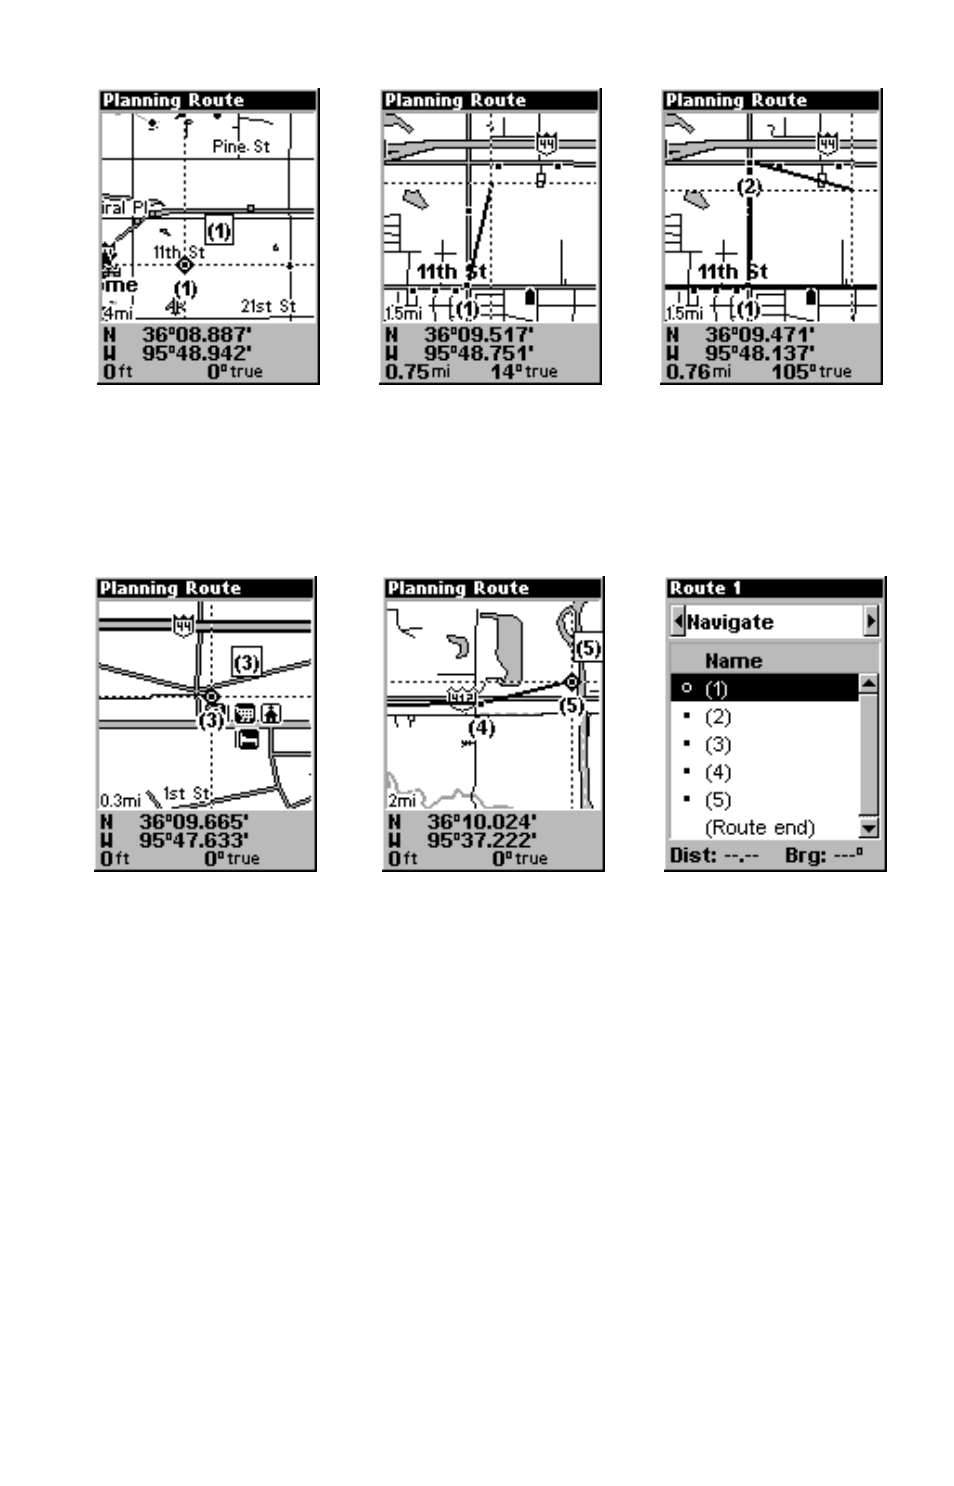
Route creation sequence, from left: Fig. 1. Set route waypoint (1) at 11th
St. & 145th Ave. Fig. 2. Zoom in; move cursor north to set point (2) at 145th
& Admiral. Fig. 3. With point (2) set, move cursor east to mark interstate
on-ramp with waypoint (3). In figures 2 and 3, notice the rubber band line
extending from the previously set waypoint to the cursor. This line will
become the course for the route.
4.
5.
6.
Route creation sequence, continued: Fig. 4. Point (3) set at on-ramp turn.
Fig. 5. Waypoint (4) set at highway exit to frontage road leading to river.
Waypoint (5) ends the route at a tree stand in the hunting area.
Fig. 6. Press
EXIT
to save the route and you return to this screen.
5. Move the cursor to the next point in the route, a spot where you need
to turn or change direction, and press
ENT
to set the next waypoint.
6. Repeat step five until the route reaches your destination.
7. To save your route, press
EXIT
. AirMap reverts to the Route screen,
with the route automatically named "Route 1" and stored in AirMap's
internal memory.
8. You can edit the name if you wish. Press
↑ to select the screen's
command box, then press
→ to
E
DIT
N
AME
|
ENT
. Press
↑ or ↓ to change
the first character, then press
→ to move the cursor to the next charac-
ter and repeat until the name is correct, then press
ENT
.