Getting connected, Connecting the little disk to your computer, Lacie little disk – LaCie LITTLE DISK USB 2.0 User Manual
Page 9: User manual page getting connected
LaCie Little Disk
•
Design by sam HeCHt
User manual
page
getting Connected
2. Getting Connected
2.1. Connecting the Little Disk to Your Computer
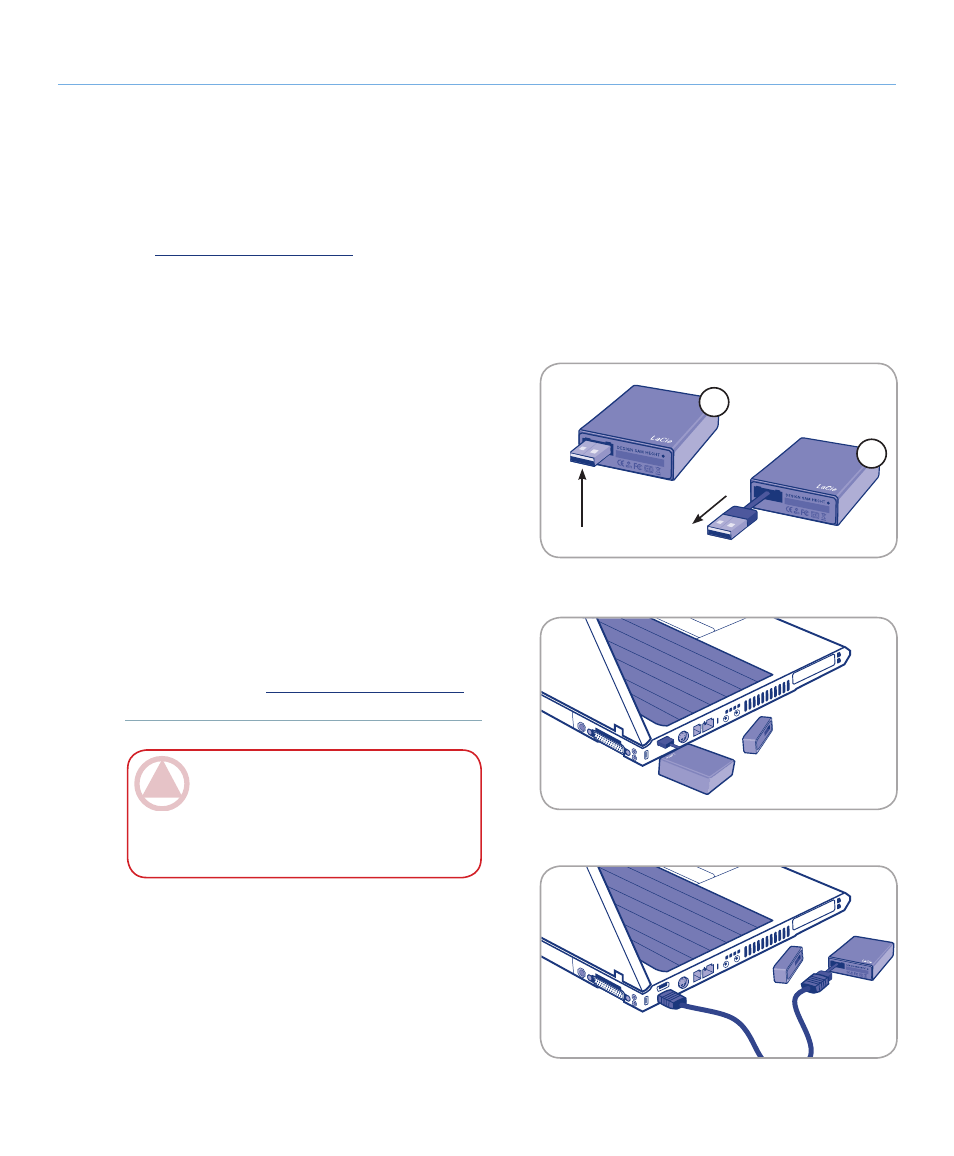
Fig. 2.1.b
ImpOrTANT INfO:
Your LaCie hard disk is
powered by your computer’s USB 2.0 bus. If the
Little Disk does not power on when connected,
check the physical connections and verify that
your system meets the minimum requirements.
Remove the cap.
If necessary, pull out the USB cable. Push the USB
connector toward the side of the Little Disk with
the LaCie logo (Fig. 2.1.A-1) and pull to extract the
cable (Fig. 2.1.A-2).
Insert the USB connector into an available USB 2.0
port on your computer (Fig. 2.1.B). If you need extra
cable length, connect the USB connector to the USB
extension cable and then connect the extension cable
to your computer (Fig. 2.1.C).
After a few seconds, the hard drive will mount on
your computer and appear on the desktop (Mac us-
ers) or in My Computer (Windows users).
Proceed to section
3, Formatting and Partitioning
.
1.
2.
3.
4.
5.
Fig. 2.1.C
Connecting your LaCie hard disk is simple. Just connect the USB connector to a USB port on your computer. See sec-
tion
3. Formatting and Partitioning
for information about optimizing the Little Disk for use with your operating system
when you have connected the Little Disk to your computer.
Fig. 2.1.a
1
2
push up
pull out