Create a raid-protected disk array – LaCie 12big Rack Storage Server User Manual
Page 9
LaCie Quick Install Guide
9
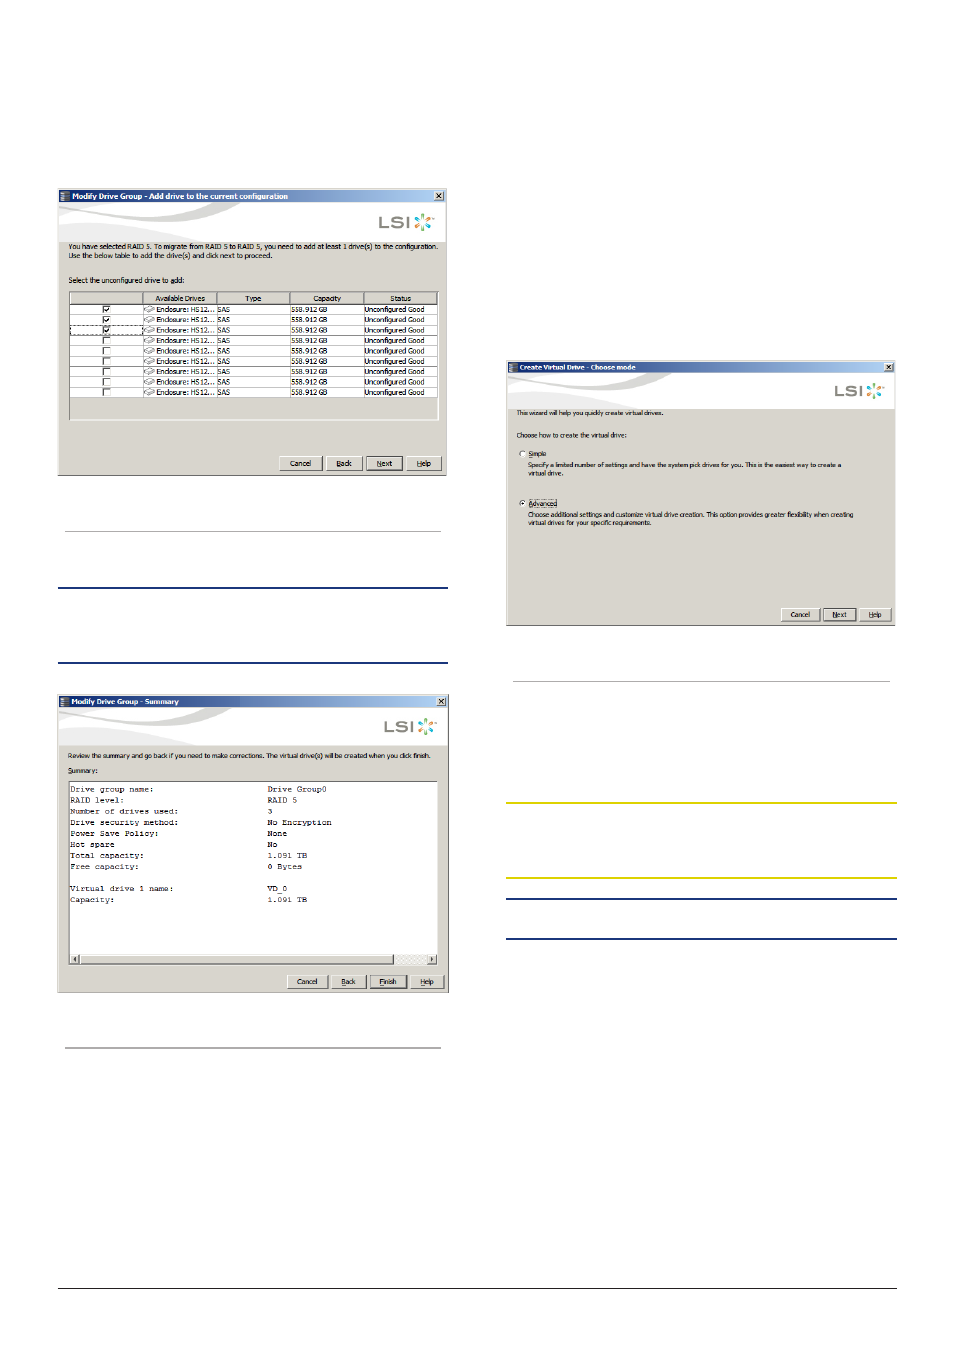
4. On the
Modify Drive Group Wizard
screen, select the RAID level
that you want to change (“migrate”) the drive group to and click
Next
. A screen states the number of drives that you have to add if
new RAID level that require more drives.
Figure 13 - Select Drives for RAID Configuration
5. Select the unconfigured drive or drives to add and click
Next
.
NOTE:
The drive(s) you add must have the same capacity as or greater
capacity than the drives already in the drive group, or you will not be able
to change the RAID level.
Figure 14 - RAID Configuration Summary Screen
6. Review the configuration information. Click
Back
to modify or
Finish
to accept the changes. A confirmation message appears since this
operation cannot be aborted.
7. Click
Yes
to accept and complete the migration to the new RAID
level.
You can monitor the progress of the RAID level change by selecting
Man-
age > Show Progress
in the menu bar.
4.3. Create a RAID-Protected Disk
Array
This section explains how to configure additional drives with custom set-
tings.
1. Select
Go To > Controller > Create Virtual Drive
to start configur-
ing your RAID array. Select
Advanced
and press
Next
.
Figure 15 - Create Virtual Drive wizard
2. Beneath the list of available drives, proceed as follows for each disk
array:
a. Select the drives you want to include in your array in
Unconfig-
ured Drives
view.
CAUTION:
Your operating system is pre installed on the first three data
drives. Removing the RAID configuration of those drives will delete the
pre-installed operating system.
NOTE:
You can select multiple drives by holding the Ctrl key.
b. Click the
Add
button to move the drives to the
Available Arrays
pane. If you make an error, select the drive and click
Remove
.