Lowrance electronic LRA-2400 User Manual
Page 15
9
2. Press
→|↓ to
A
DJUST
T
RIGGER
D
ELAY
and press
ENT
. That will launch
the Adjust Trigger Delay vertical scrollbar.
3. Press
↓ until Trigger Delay is set to zero percent. Press
EXIT
.
Adjust Trigger Delay
This feature eliminates the time lag between real radar returns and the
time it takes data to be processed by the radar software, a common is-
sue with all radars.
Caution:
If you have any doubt about your understanding of the Trigger
Delay feature, you should have it set up by a qualified radar
technician.
1. The radar should already be in STANDBY mode, so press
PWR
for 2
seconds to switch the radar into transmission mode. A confirmation
message will appear, press
← to select
Y
ES
.
2. Press
MENU
, select
G
AIN
and press
ENT
. Press
↑ to increase the Gain
level to around 15%. One or two red rings with blue borders should be
visible on the screen, depending on the wattage of your radar antenna.
3. Press
→|↓ to
A
DJUST
T
RIGGER
D
ELAY
, then press
ENT
.
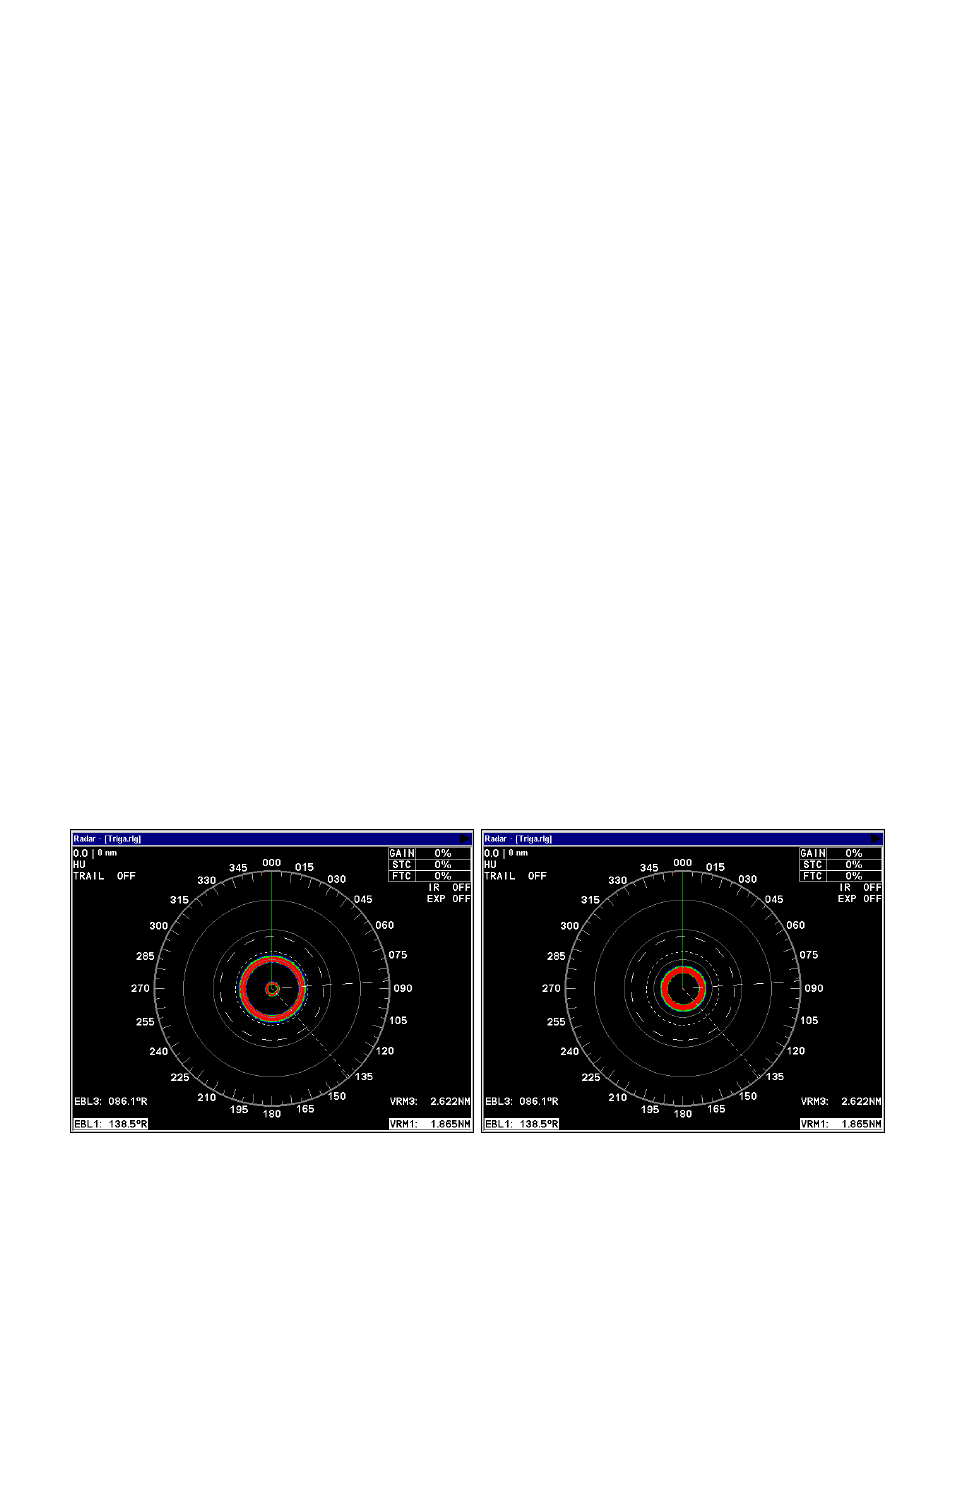
The 2 kW model, the LRA-1800, will have only one ring on the display.
The 4 kW model, the LRA-2400, will have two rings on the display. See
the following figures.
Before adjusting the Trigger Delay for 4 kW radars, two rings will be
shown on the screen (left). As Trigger Delay is increased, the larger
ring will start to get smaller. The small ring will disappear (right).
You may have to increase gain in the previous step if the rings are not
visible. Increase gain until you have solid red rings shown on the
screen, like in the preceding example. Increasing Gain too much can
cause the rings to be distorted.