Maintenance, Check the air filter often, How to check, clean and change the air filter – Little Wonder Tiller/Cultivator User Manual
Page 17
17
MAINTENANCE
Check the Air Filter Often
A wet or dirty air filter can
affect the way your engine starts,
performs, and wears. So, it’s a
good idea to check your air filter
once a month.
If you work in dusty soil, or if
you want to be on the safe side
— then check your filter more
often (for instance, before each
use). But be sure to replace it at
least once a year, in the spring or
fall. Clean or change it as
needed. It is recommended to
change the air filter yearly.
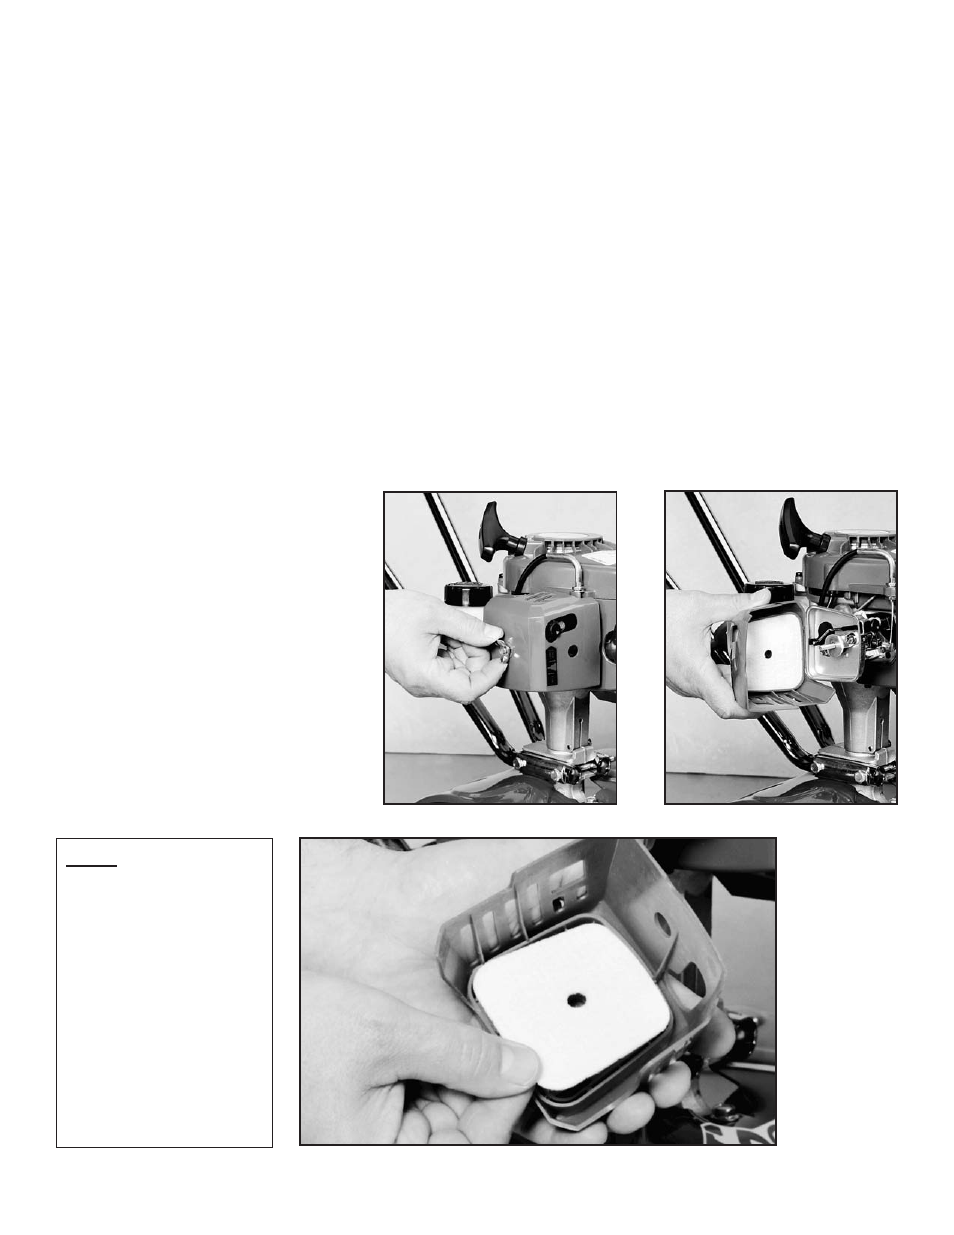
How to Check, Clean and
Change the Air Filter
1. Loosen the wing nut on the
side of the air-cleaner cover. (See
Picture 1, or look up Key #9 in
Air Cleaner Parts Assembly on
page 28.)
2. Take off the cover. Make
sure to clear the choke button.
(Picture 2)
3. The air filter is the white
pad on the inside of the air-
cleaner cover. Check whether it
is soiled or moist.
4. If the air filter needs
cleaning or no longer fits
properly, remove it. Just lift an
edge carefully and “peel” it out.
(Picture 3)
5. Use a brush to remove
debris from the pad.
6. If the air filter is so dirty
that it won’t come clean, you
must replace it or severe engine
damage will occur. Order a new
one directly from your local
Authorized MANTIS Dealer.
7. Insert your clean filter
inside the air-cleaner cover.
IMPORTANT! Make sure
filter is “seated” properly
in the cover. The filter
must fit snugly inside the
rim that holds the filter in
place.
Installing the filter incorrectly
will cause engine damage and
void the warranty. Fit the cover
back over the air cleaner. (Again,
make sure to clear the choke
button.)
8. Tighten the wing nut to
secure the cover.
Note:
Please check the lip
on the Air Cleaner
Cover. If the lip is
chipped or cracked,
it should be
replaced. This will
prevent dirt from
being ingested
through the
carburetor into the
inside of the engine.
Picture 1
Picture 2
Picture 3