Lenovo 1046 User Manual
Page 70
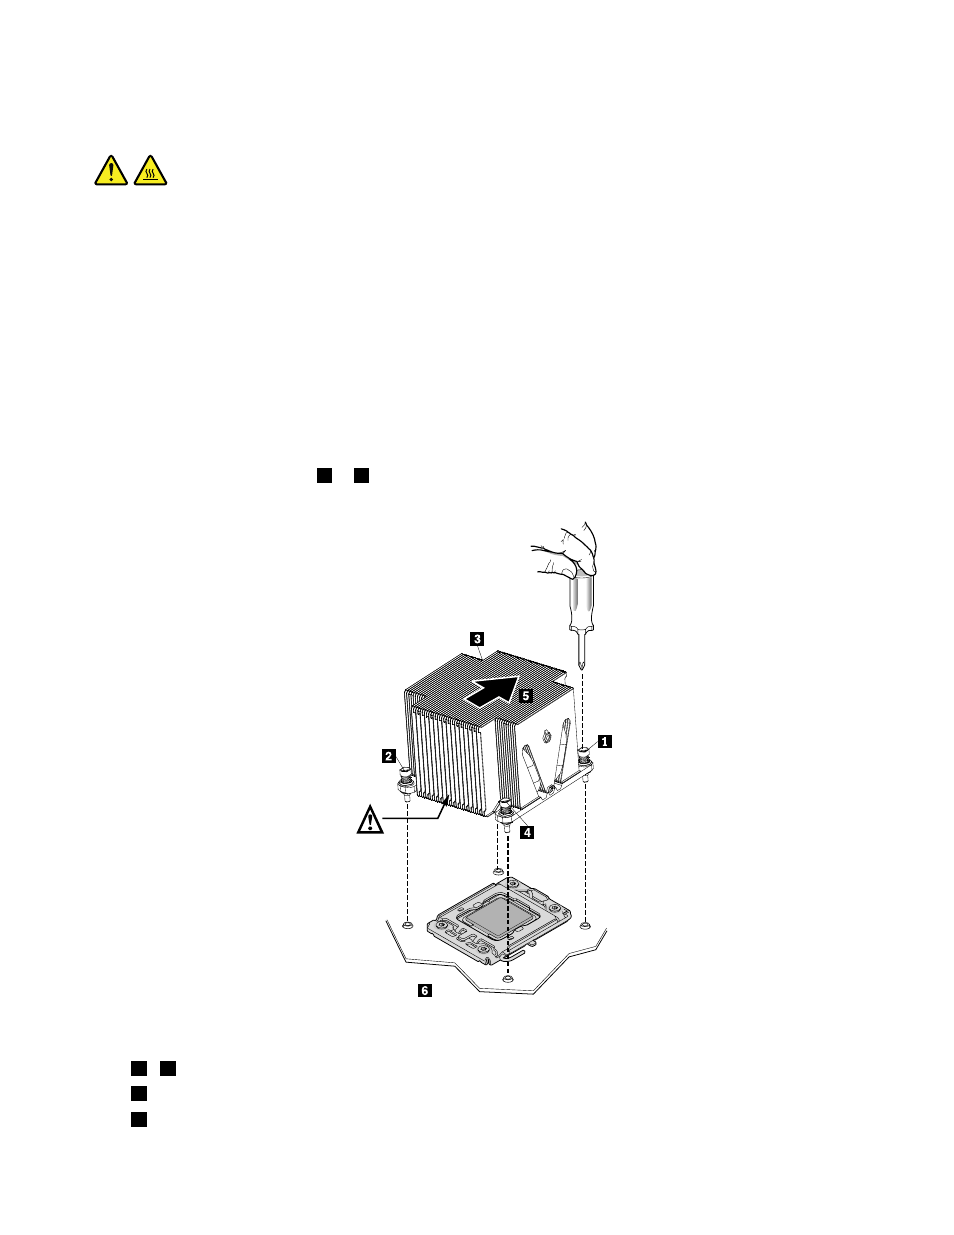
CAUTION:
The heat sink might be very hot. Turn off the server and wait three to five minutes to let the server
cool before removing the server cover.
To install the heat sink, do the following:
Note: Make sure that you have already connected the front fans to the system board before you install
the heat sink.
1. Remove all media from the drives and turn off all attached devices and the server. Then, disconnect all
power cords from electrical outlets and disconnect all cables that are connected to the server.
2. Remove the server cover. See “Removing the server cover” on page 19.
3. Notice the orientation of the heat sink air flow and the V-shaped cooling pipe. The V-shaped cooling
pipe should always face the power supply assembly. Then, align the retaining screws on the heat sink
with the corresponding holes in the system board. Install the four screws following the numerical
sequence as shown below (
1
to
4
) to secure the heat sink on the system board.
Figure 49. Installing the heat sink
1
-
4
Screws
5
Air flow
6
The front of the chassis
60
ThinkServer Installation and User Guide