Shank height adjustment, Caution, Table of contents shank height adjustment – Land Pride Grading Scrapers GS2584 User Manual
Page 12
10
Section 2: Adjustments
GS2584 & GS2596 Grading Scrapers 303-268M
3/15/13
Shank Height Adjustment
!
CAUTION
Make adjustments to the shank height after the Grading
Scraper has been properly hooked to a tractor to prevent
injury!
!
CAUTION
Always keep your feet and legs out from under the shanks
when adjusting shank height. The shanks can slip from your
grip and fall causing injury to your feet and/or legs.
!
CAUTION
Keep clear of the shank slots while adjusting shank height.
Shanks can pinch body parts in slots during adjustments!
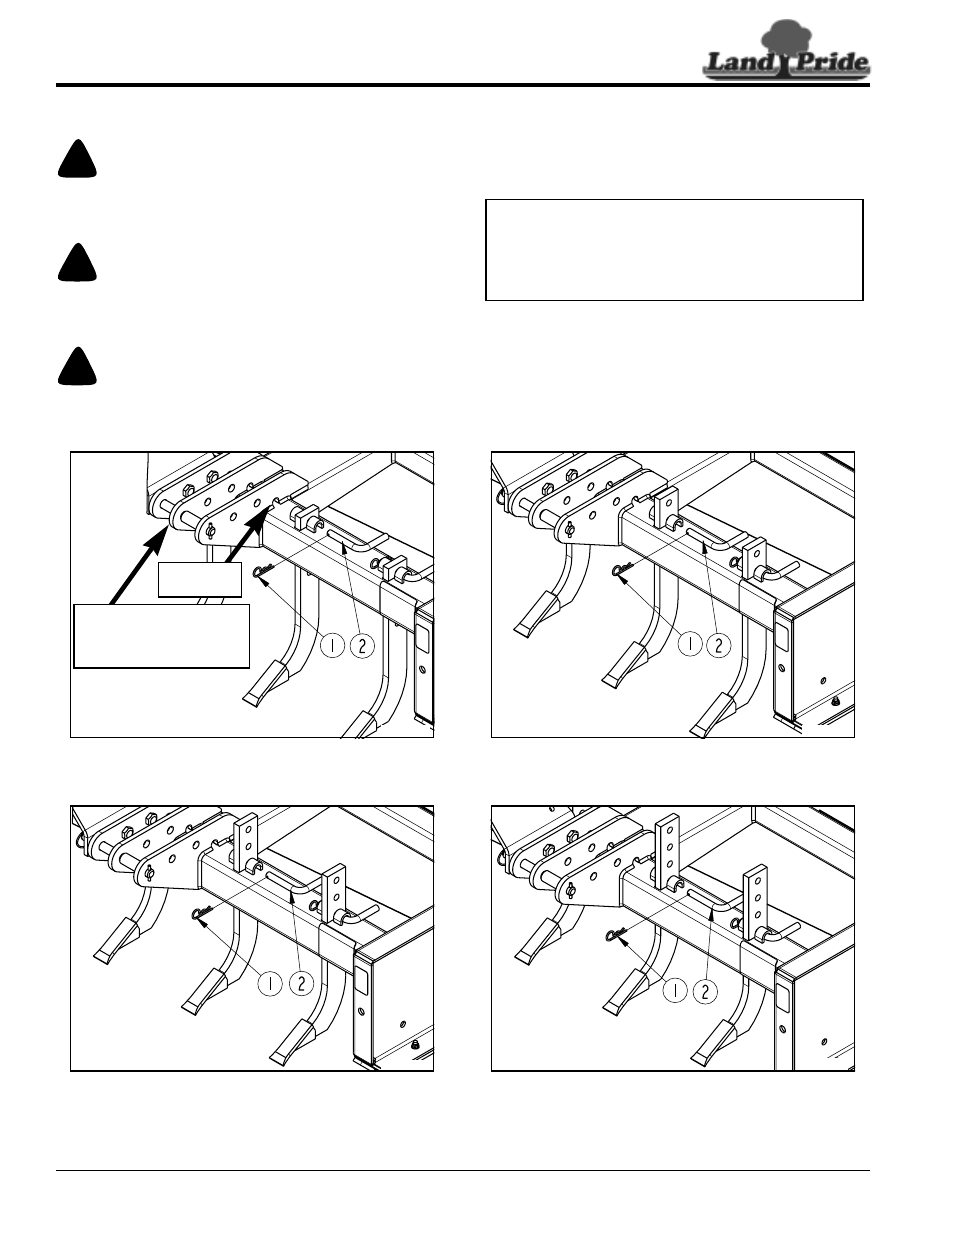
Top Hole
3 1/2" Below
Third Hole
1/2" Above
26656a
Model GS2596 Only
The two longer bent pins are
used when mounting shanks
between clevis plates.
See Note in
Instructions
26656c
Second Hole
1 1/2" Below
Fourth Hole
2 1/2" Above
26656b
26656d
Shank Settings
Figure 2-2
Refer to Figure 2-2:
Shank settings are based on the vertical distance
measured from bottom edge of skid shoes to bottom
edge of shank tips.
1.
Hook Grading Scraper to a tractor with a
category I or ll 3-Point hitch before adjusting shanks.
2.
Adjust shank height by removing hairpin cotter (#1)
and shank lock pin (#2).
3.
Adjust shank up or down to the desired depth and
then replace shank lock pins and hairpin cotter.
NOTE: (GS2596 Only) Refer to “Top Hole”
illustration below: Two of the bent pins (#2) supplied
with model GS2596 only are 1" longer than the
others. Use these two pins to mount shanks
between 3-Point clevis plates.