Optional equipment, For qualified installers only) – Lopi DVL Insert EF II User Manual
Page 38
38
Optional Equipment
(for qualified installers only)
© Travis Industries
4060111
100-01174
5
Install the logs
and embers.
6
Replace glass
and face.
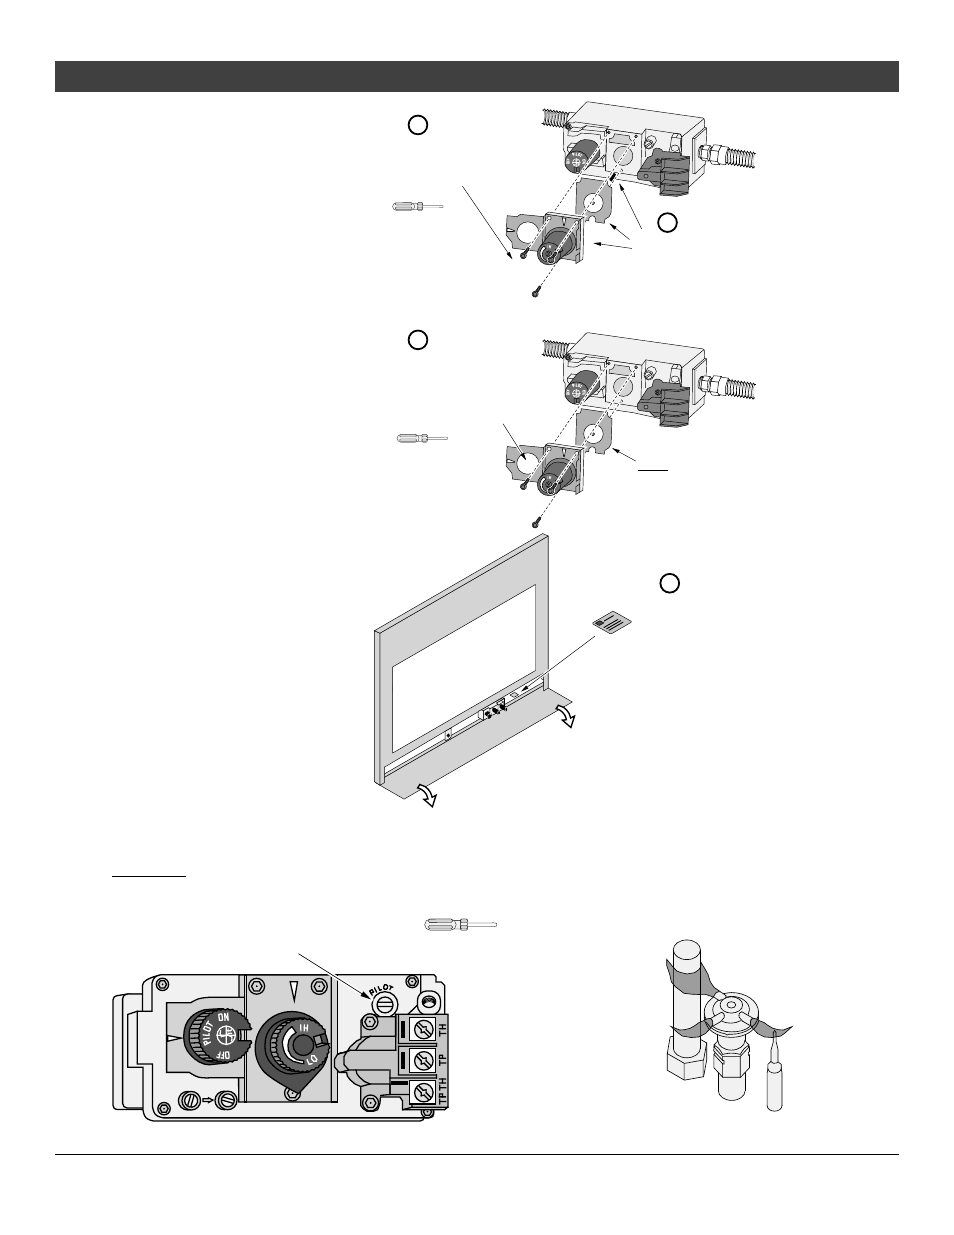
7
Remove the
regulator from the
front of the gas
control valve.
Replace with the
propane
regulator, using
the new gasket
and screws
included with the
regulator. NOTE:
Leak test this
area after the
heater is
installed, gas is
connected, and
the main burner
is lit.
Place the LP
label on the base
near the gas
control valve.
d
Remove and discard the three
screws using a slotted screwdriver
of Torx T-20.
NOTE: Make sure the
regulator gasket is correctly
aligned before installation.
Remove and discard the
regulator, diaphram, spring
and center post.
a
b
Slotted
Screwdriver
(or T-20 Torx)
Install the LP regulator. Use
the screws included with the
LP regulator. Tighten to
approximately 25 Lbs. torque.
c
Slotted
Screwdriver
(or T-20 Torx)
8
Make the gas line connection, bleed the gas line (if applicable), start the heater and thoroughly
leak-test all gas connections and the gas control valve. Check the pilot. Adjust if necessary.
WARNING:
When lighting or re-lighting the pilot, the glass must be removed (see page 20).
Standard
Screwdriver
The pilot flame must contact the thermocouple and
thermopile (see the illustration below). Adjust the pilot up or
down as necessary.
To adjust the pilot flame, turn this screw (NOTE: if totally
unscrewed gas will come out of this port). Clockwise
lowers the flame while counter-clockwise raises it.