Wall mounting (continued), Wall mounting without a modular wall phone plate, Installation on masonry – Lenoxx Electronics H-5560 User Manual
Page 14
IB-PH5560-WC-E-040505
Wall Mounting without a Modular Wall Phone Plate
MOUNTING AREA
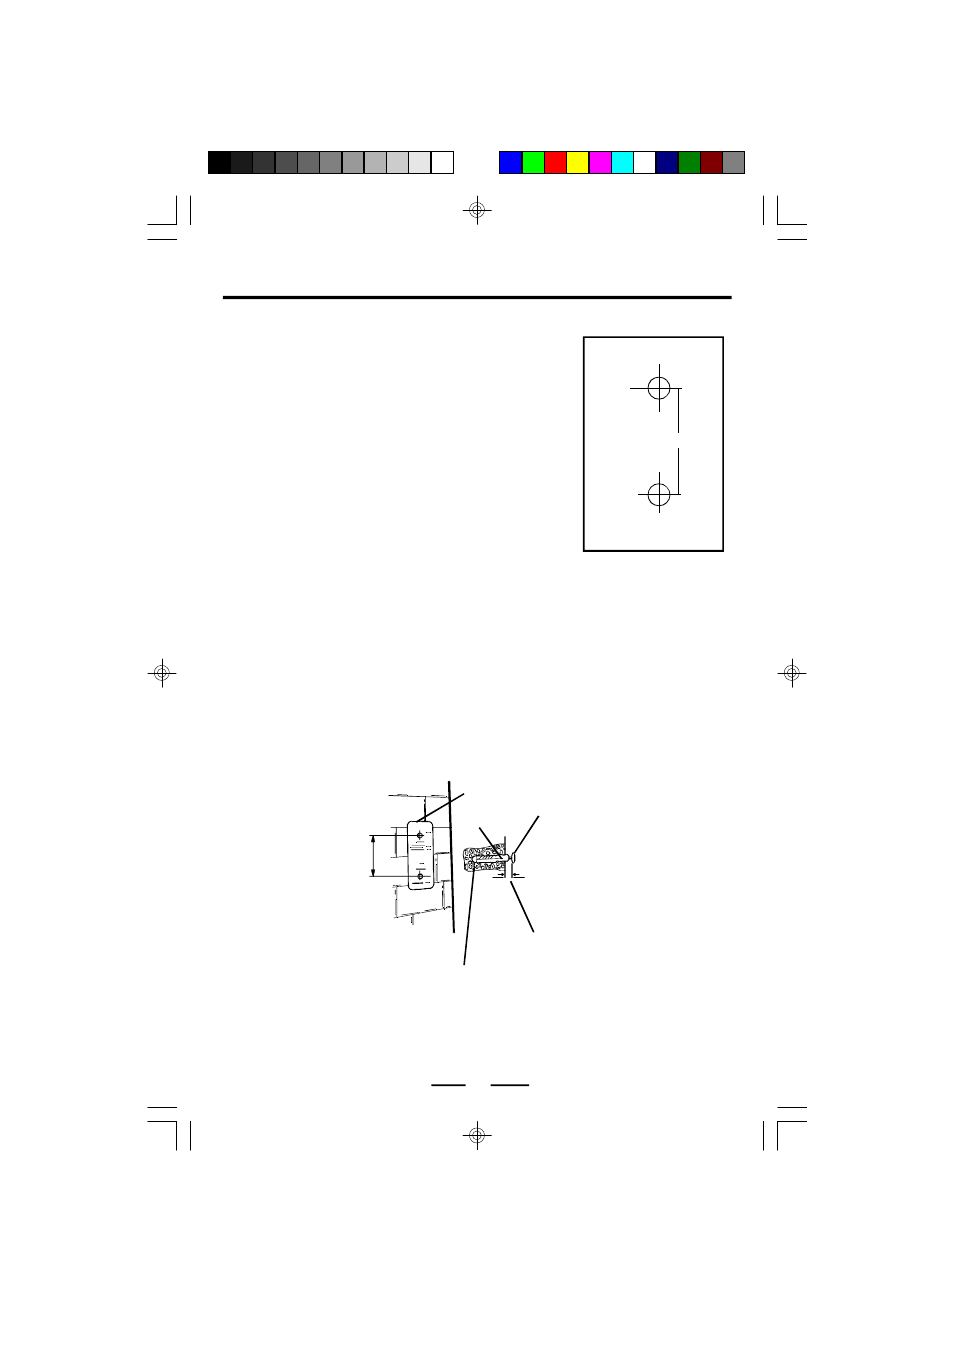
ANCHOR
MOUNTING SCREW
3/16" (5 MM)
LEAVE 3/16" (5 MM) SCREW EXPOSED
DRILL HOLE WITH 1/4" MASONRY BIT
3 15/16"
(100 MM)
1 2
WALL MOUNTING (continued)
Make sure space
between holes is
Follow these instructions to mount the phone on the
wall without a wall plate:
1. Locate a wall stud. If it is possible to utilize a wall
stud for mounting, dry wall expanders or a similar
type fastener is recommended. Consult your local
hardware stores for details.
2. Drill 2 holes 3
15
/
16
" (100 mm) apart.
3. Put a screw into each hole and leave
3
/
16
" (5mm)
of the head exposed to mount the phone (screws
are not included).
4. Connect the straight cord to the phone and jack.
5. Place the TELEPHONE BASE on the 2 mounting
screws and gently push down to lock into place.
Installation on Masonry
1. Use a 1/4" masonry drill bit and drill the 2 holes (spaced as above).
2. Insert plastic anchors and install the 2 screws.
3. Leave 3/16" (5 mm) of the screws exposed to mount the phone.
4. Place the TELEPHONE BASE on the 2 mounting screws and gently push down to
lock into place (anchors and screws are not included).
IMPORTANT
Before mounting the phone onto the wall, select a wall area with sufficient strength. If
mounting on the wallboard or in an area of questionable strength, locate a stud for
maximum support of your telephone.
Drill one hole
Drill other hole
100 mm
IB-PH5560-WC-E-040505.pmd
4/8/2005, 10:49 AM
14