Safety warning – Kobe Range Hoods CH0030SQB User Manual
Page 12
10
2.
Align hood-mounting bracket to the two
screws on the wall and hook hood into
place. Tighten screws to secure hood to
the wall.
3.
For safety purposes, extra knockout holes
on the back of the hood are provided.
Knockout the holes. Remove the baffle
filters and attach screws to the wall by
accessing
underneath
the
hood.
CAUTION: MAKE SURE HOOD IS
SUCURE BEFORE RELEASING
Wiring to Power Supply
SAFETY WARNING
RISK OF ELECTRICAL SHOCK. THIS
RANGE
HOOD
MUST
BE
PROPERLY
GROUNDED. MAKE SURE THIS IS DONE
BY
SPECIALIZED
ELECTRICIAN
IN
ACCORDANCE WITH ALL APPLICABLE
NATIONAL
AND
LOCAL
ELECTRICAL
CODES. BEFORE CONNECTING WIRES,
SWITCH POWER OFF AT SERVICE PANEL
AND LOCK SERVICE PANEL TO PREVENT
POWER FROM BEING SWITCHED ON
ACCIDENTALLY.
4.
Connect the electrical wires.
-
Connect three wires (black, white and
green) to house wires and cap with wire
connectors. Connect according to color:
black to black, white to white, and green
to green as shown on Figure 13.
-
If necessary to hide the electrical wire
connections, push wires back into the
wiring box. Access the wire connections
underneath the hood. Make sure wires
do not slip between motor or any
moving parts to prevent any damage.
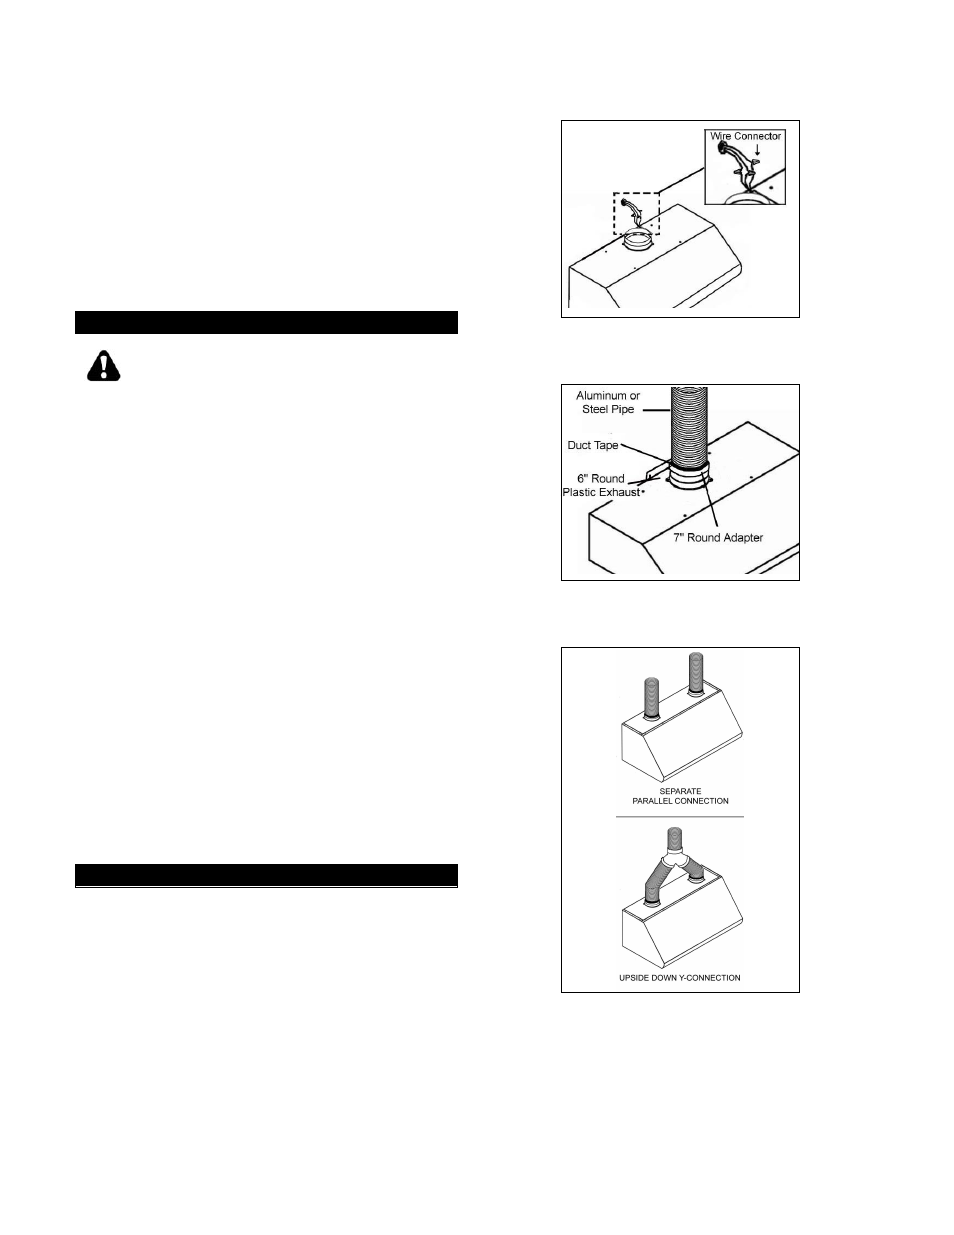
Duct Cover Installation
5.
Use aluminum or steel pipe to connect the
plastic exhaust on the hood to the
ductwork above. Use duct tape to make
all joints secure and air tight as shown on
Figure 14.
6.
To convert ductwork to 7” round, attached
7” round adapter (provided) to the 6”
round plastic exhaust.
7.
For 48” hood, prepare either separate
parallel connection or upside down Y-
Connection
for
proper
ductwork
installation. Refer to Figure 15.
Figure 13
Figure 14
Figure 15